Control
What gets the electrons flowing.
Electrical Diagram
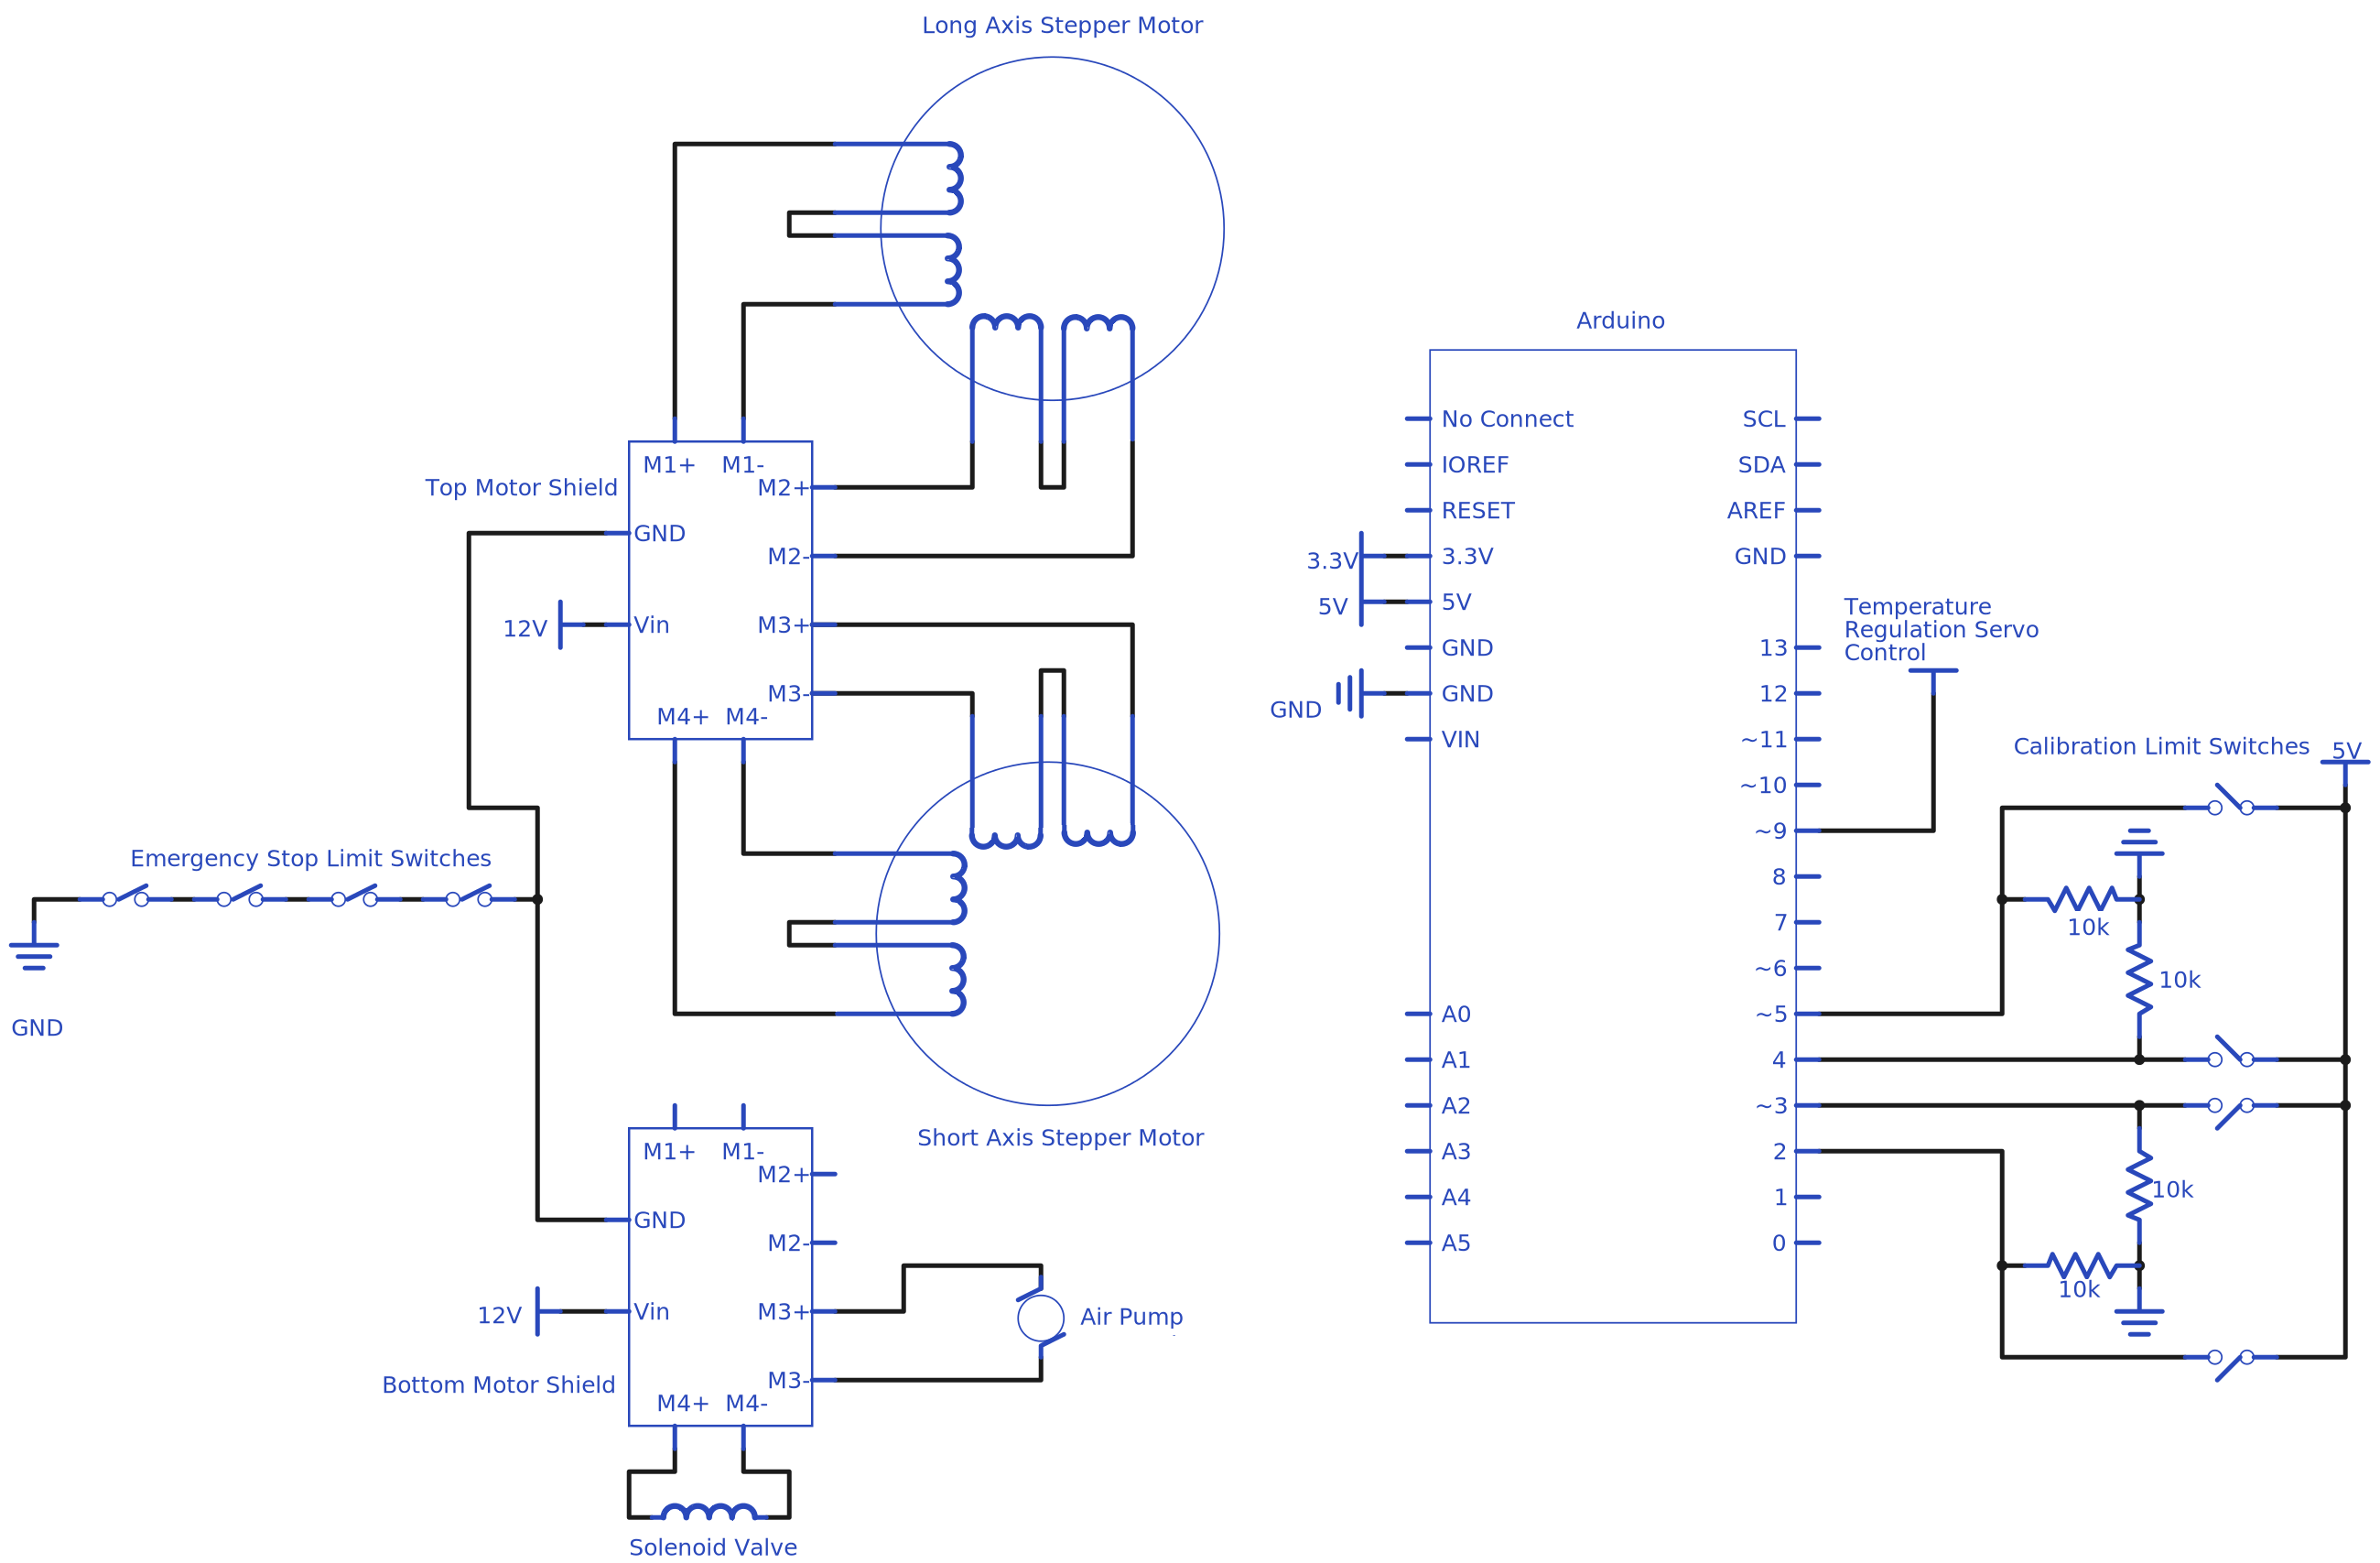
We used used pull down resistors connected to the limit switches to ensure that when the switch is open, the logic signal is held at 0 V. Our servo is connected directly to our Arduino, and the stepper motors are controlled via our motor drivers, stacked on top of the Arduino. The stepper motors are 8 wires, and connected in a two-phase series configuration. The solenoid was connected to the top motor driver, as it needed a supply of 12 V. The pump is also connected to a motor driver so that it can be provided with the correct voltage. The pump is supposed to be run at 6 V, higher than 5 V the Arduino can provide.
Firmware
The firmware for this project runs on the Arduino and controls all of the electrical components. Due to the significant number of parts that need to be controlled, we decided to create an Arduino library to manage the entire system. By doing this, we are able to organize code in a object oriented way with C++. The firmware also uses the Adafruit Motor Sheild V2 Library.
Functionality
The interface to our Arduino library is the PancakePrinter class. When instantiated, this object can be used to perform operations such as moving the gantry, extruding batter, and setting the grill’s temperature. A simple program to draw a square is written below.
// demo the PancakePrinter library by drawing a square with batter

#include <Servo.h>
#include <Adafruit_MotorShield.h>
#include <Wire.h>
#include <PancakePrinter.h>      // include our library

PancakePrinter pp;

void setup() {
    // initialize the printer’s components
    pp.init();

    // set the grill’s temperature to 350 degrees
    pp.setTemperature(350);

    // begin extruding
    pp.extrudeOn();

    // move to each corner of the square
    pp.moveTo(0, 0);
    pp.moveTo(50, 0);
    pp.moveTo(50, 50);
    pp.moveTo(0, 50);
    pp.moveTo(0, 0);

    // stop extruding
    pp.extrudeOff();
}

void loop() {
}
Program Flow
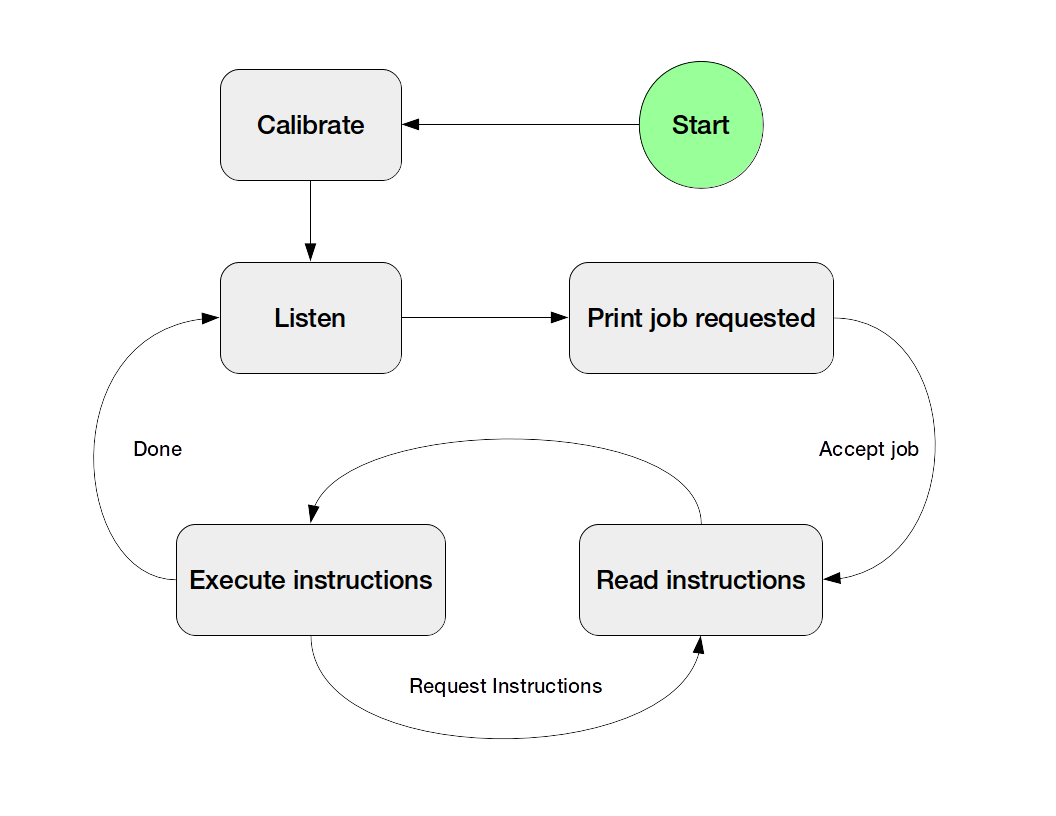
The program running on the Arduino can be best described by the finite state machine below. First we start with a calibration sequence. During this sequence the gantry moves towards the limits of its domain until it trips limit switches placed on each axis. The gantry then moves in the opposite direction until it trips another pair of limit switches on the opposite limits of its travel. By doing this, we can determine the maximum dimensions in which the gantry can operate.
After the calibration sequence has been completed, the Arduino establishes a serial connection with the user’s computer. The Arduino then waits for a message to start printing a new pancake. When the user has finished drawing her masterpiece and hits the “Print” button on her computer, the computer sends a request to the arduino, asking if it ok to send instructions for a print job. If the Arduino is available, it will respond to the computer with a message indicating that it is ready to start a new print.
At this point, the computer will send instructions to the Arduino as described in the Communication section above. Once the Arduino has finished executing the print job, it goes back to waiting for a print job request.