All of the source code and CAD files is on GitHub.
Current Software:
The current GUI, which displays a selection for width and height, was created using PyGTK, a python adaption of the GTK graphics library. It gathers the data via button Events, and then checks whether the specified width and length are supported by our machine. If they aren't, it requests a new answer. If they are, if sends that data to the Arduino through the serial port, using the string format "w=x", and "l=y", sending them as single characters (w is width, and l is length).
The original idea was to create an editor for pictures on the scarf, which would send that data to the machine to be turned into patterns via a color-switcher. Since that hardware was never implemented, the software doesn't communicate with the Arduino. However, if you wish to examine the drawing program, it is fully capable of allowing drawing on an arbitrarily sized grid, which taught us a little bit more about the full functionality of PyGTK.
Current Firmware:
The embedded side of the code is slightly more interesting. There are three main sections.
First:
There is the check_serial() function. This scans the serial port, waiting for data that looks like it came from our Python GUI. Once it finds that, it sets the width and length parameters of the program to the values that came through the serial port.
Second:
The second part is the sensor code. The sensor_pos() function checks the value from the IR sensor. If it detects that it is in a different color than it thinks, it waits for a debouncing period, and then increments the location of the carriage by one. So, each time it passes between mirrored and blank patches on our sensor bar, it knows that it has moved the carriage over by the width of a needle.
Third:
The rest of the code (that isn't initializing values or opening ports) is about the knitting. This is also fairly simple - after waiting for input from the GUI, it starts by knitting right. It moves the carriage until it hits the specified width, and then turns to knit all the way back. Every time it turns around, it adds one to the current length of the scarf. Then, it simply repeats these steps until the scarf is complete.
Current Mechanical:
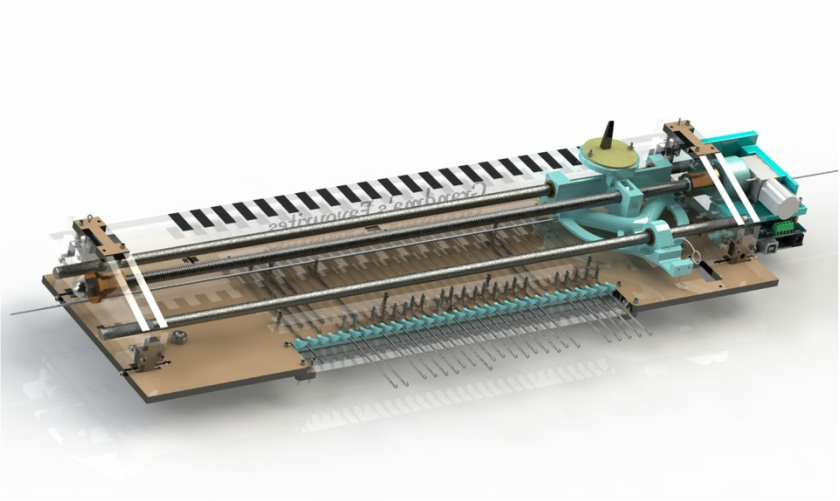
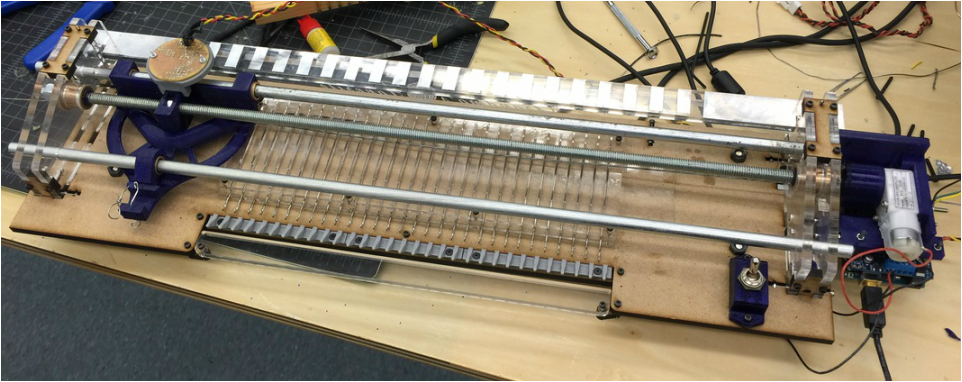
The carriage and needle bed are mounted in a chassis, which is wide enough to allow the carriage to pass completely over the last needle on each side of the bed. A slot on the front of the chassis base, known as the verge, constrains the knit piece such that it doesn’t follow the motion of the needles. The front of the verge is removable to make the needles accessible when casting on and off. A set of teeth just behind the verge holds all yarn forward except for the loop being pulled back by the needles, which ensures that the loops are pulled all the way through the previous stitches. These teeth are a modified version of those used in OpenKnit, since designing our own would consist only of trial and error. Bearings were added to decrease friction with the motion of the rods.
The chassis base is constructed of MDF due to its cost effectiveness, and the smaller sides are made of acrylic for aesthetic purposes and to allow the bearings pressed fit onto the thread rod to turn with less friction within the side pieces. The entire assembly is elevated on feet to make the knit piece more easily accessible.
All pieces of the chassis are laser cut due to its efficiency and accuracy. The sides are doubled for stability, since the sensor is very sensitive to vibration. The sensor bar itself is made from clear acrylic with reflective paint strips, allowing for increased contrast between the materials. Cotter pins were added to keep the sensor bar in place when the machine is in use but still allow for easy removal.
Due to the small tolerances in the needle bed and other parts of the machine, the mechanical aspect of this project ended up much more involved than we had anticipated. Though the machine works well, we didn’t have time to add features like automatically deactivating individual needles and color changing.
A limit switch, emergency stop, and Arudino attachment method were also added and need to integrated with the electrical and firmware systems
We're done.
We've come to the end of our project, and we made it. A knitting machine. It can knit as many 30-stitch rows as you can shake a stick at without fail (well, as far as we've seen).
Knitting faster than the speed of Grandma
This knitting machine can knit faster than Grandma could dream of knitting. It's fully automated, so all she has to do is cast on, take a pleasant walk with Grandpa, and come back to cast off.
Modifiable and Customizable
Every part on the machine can be easily detached and replaced, so if Grandma prefers taupe to wizard purple, she can switch out the cam. If she doesn't want to cast on by hand, she can add her own modifications! It's like the cookie recipe that's been passed down through the generations- we've built a base that's great on its own, but it's even better after everyone adds their own special touch.
Easy to Program
Whether she's making a dainty coaster or a scarf for all of the grandkids to wear at once, all Grandma has to do is enter the width and number of rows of her knit piece and it'll come out just the right size.

