How do you make the software subsytem of an autonomous Aeroponic Garden?
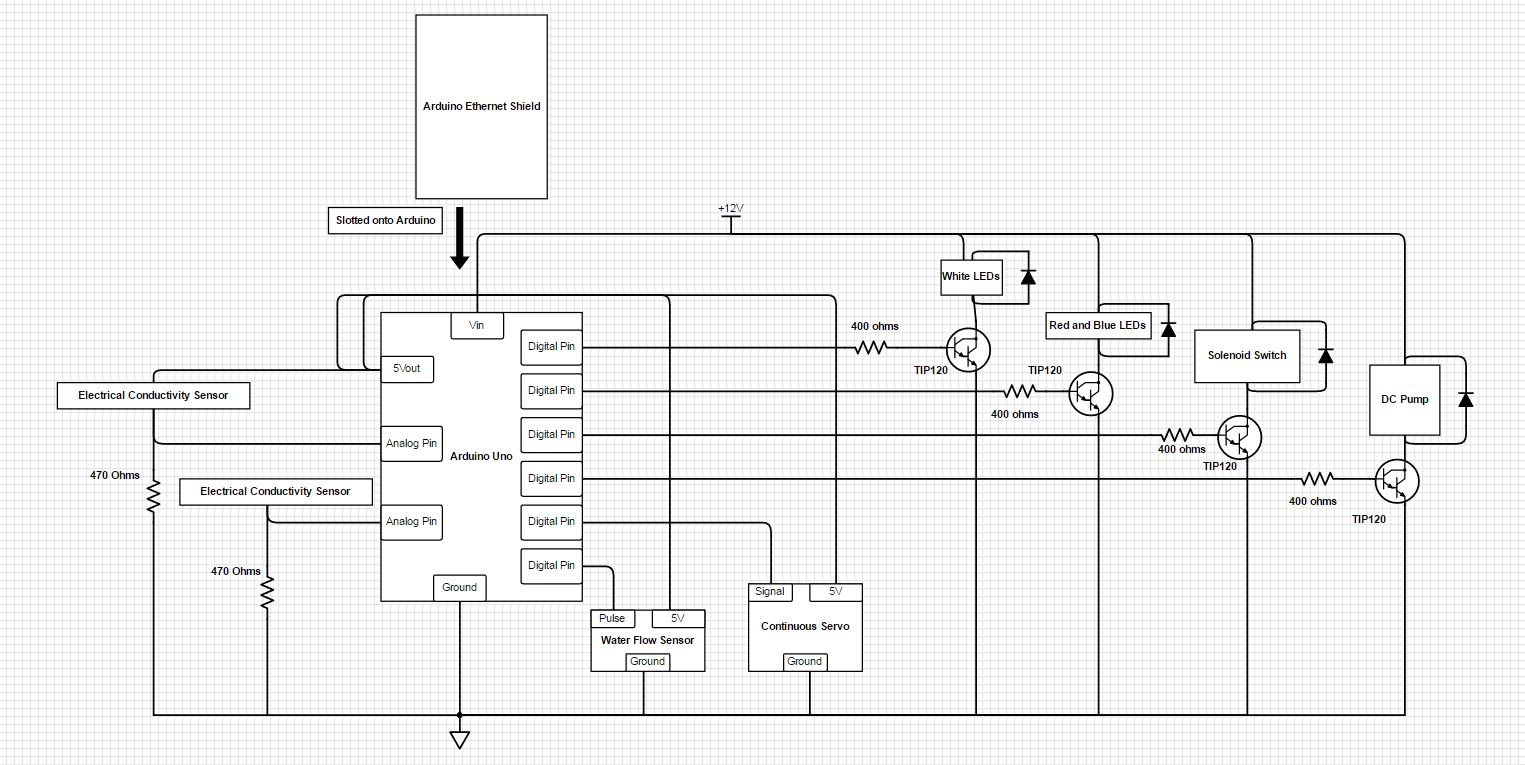
The software portion of our aeroponics system consisted of an Arduino microcontroller with an ethernet shield allowing both online datalogging and rudementary remote control.
Components
- PushingBox API
- Google Form and Sheet
- Website display/control page
- Nearbus API
- Arduino firmware
Software Control
To download our code, click here
Communications API's
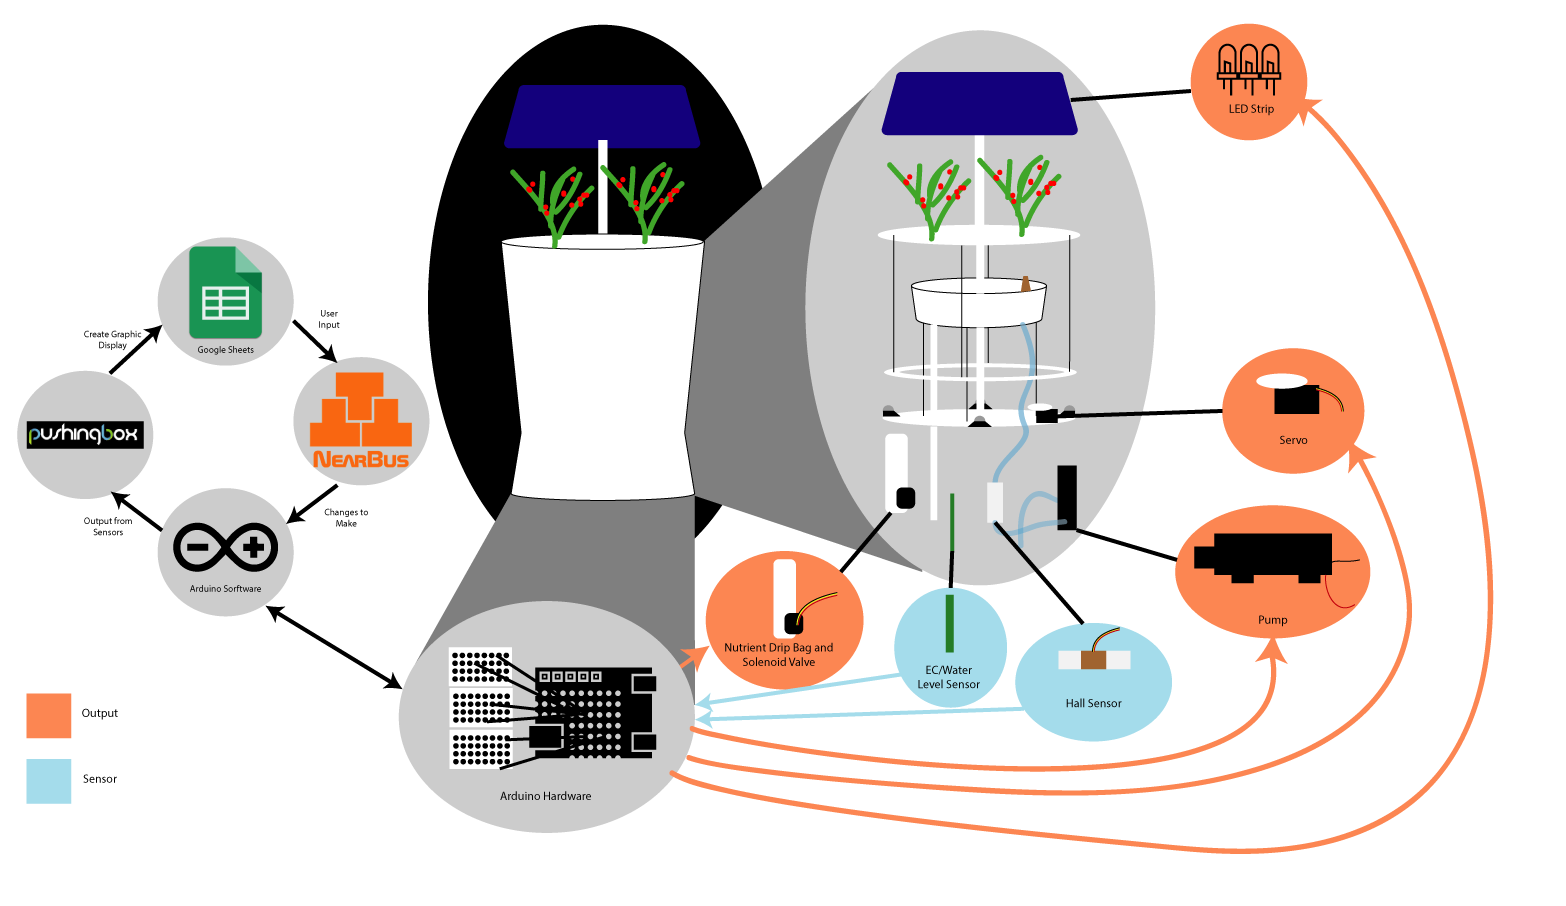
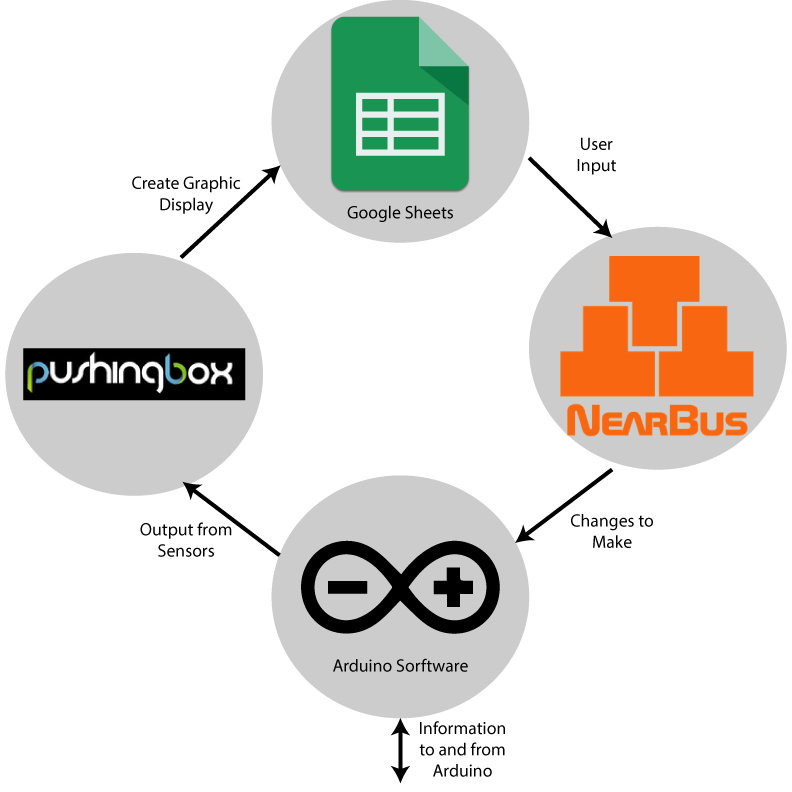
Our device is connected to the internet so that it can log data on its current state and activity. It does so using a service called PushingBox which acts as a middle-man allowing our Arduino to log data to the Google spreadsheet (via google's form entry API), which requires more secure https requests (while the an Arduino with the standard ethernet library is only permitted to send http requests). A graph created in this spreadsheet is embedded on our controls page as an html iframe. This controls page also has a form by which we can provide NearBus credentials and send encoded parameter changes to the system while it is running. When the Arduino detects a change in the virtual status of the device on NearBus servers, a dedicated function is called to edit corresponding global parameters on the microcontroller.
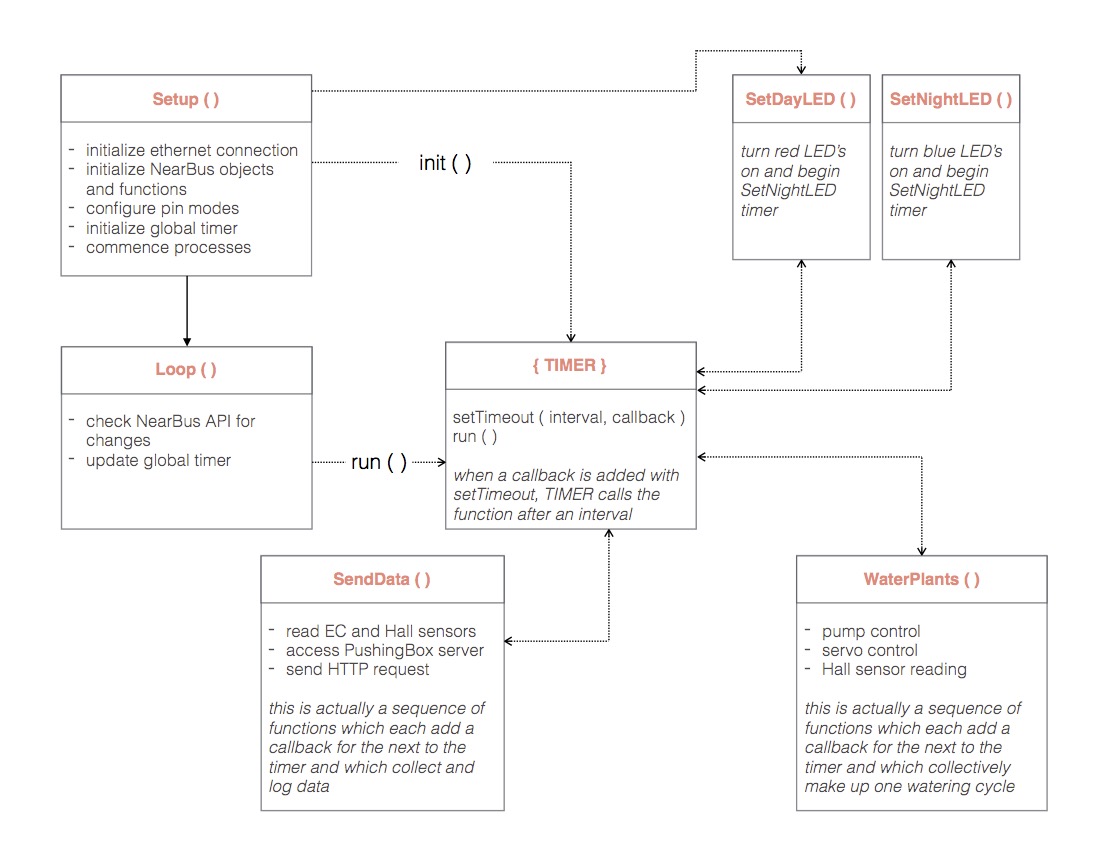
Arduino Firmware
The program running on the Arduino is fairly simple in control flow, though integration of the multiple connectivty API's as well as the timers on which the hardware depends makes for a bit more complication. Below is a diagram depicting the basic control flow on the Arduino. Once all objects have been created as globals, and in the Setup function, most of the control is handled by the global TIMER object (from Marcello Romani's SimpleTimer library) which is updated constantly in the main loop. The other function falled continuously in the main loop connects to NearBus looking for updates (this is what we use for website control). There are three sequences (aside from the nearbus connection) running concurrently as scheduled by the TIMER: we log data every 2 minutes on the system's current state, we water the plants every 15 minutes, and the lights are cycled over the course of 24 hours. Each of these loops is a series of functions which schedule a callback to the next via the TIMER.
Now, this is all how it should work. Currently we are running into memory issues with our Arduino, and need to do some more streamlining of the code before it runs perfectly. Our hope is that all this will be able to be sorted out by the end of the week.