Mechanical system
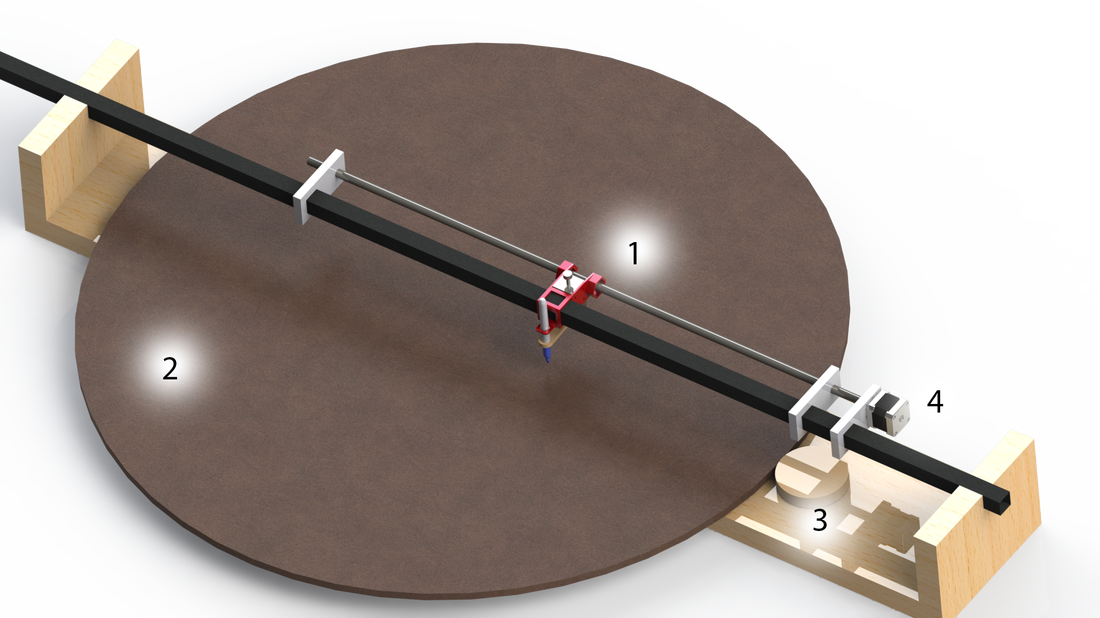

1) The Pen Car
The pen car assembly has 6 parts held together by the 3D printed bracket. Two lead screw nuts hold the pen car relative to the lead screw and propel it forward when the stepper motor rotates. On the other side, the pen car is braced against a square tube (this prevents the pen car from rotating when the pen is pressing against the paper). In between the two nuts, the solenoid is held by four screws and actuates the pen up and down via a shirt connecting bar that is kept approximately in place by another slot in the main pen-car bracket.
2) The Platter
The main platter is 42" across and is made out of a single piece of MDF. It is held in place beneath the gantry by a large lazy-susan bearing that lets it spin with relatively low friction while keeping the it remarkably level. Underneath the platter is an encoding wheel pictured to the right. There is an accompanying LED/sensor unit that can detect the difference between the tick marks and thereby deduce the orientation of the platter.
3) The Motor
We powered the platter from the edge by using a small geared dc motor. Powering the platter from the side like this allowed us to convert the high-rpm low-torque of our small electric motor to low-rpm higher-torque for the platter. It was important to keep driving wheel small in order to have the platter spin slowly enough for the pen to be able to draw the finer detail. Because the platter was inevitably off center (by around a sixteenth of an inch), we had this side wheel pressed against the platter by pulling the wheel inward with a small spring. This way we could be sure the motor was always making constant contact with the platter.
4) The Stepper
The stepper motor rotates the lead screw at a fixed rate so that the Arduino always knows exactly where the pen car is. The stepper and the lead screw are held parallel to the square tube gantry with two aluminum spacers. At the beginning, the stepper sends the pen car all the way to the center of the platter until it hits a limit switch that is mounted on the square tube gantry. Next, the arduino commands the stepper to slowly move the pen car out from the center while occasionally actuating the solenoid as the platter rotates beneath.