Software Structure
All of our code is on a GitHub Repository. Go check it out!
Our firmware has 4 sub-structures:
1. Python scripts to gather information:
weathertherForecastInfo.py -- gets forecast information using the python library "Forecastio"
thermometer.py -- gets the temperature information from a temperature sensor.
2. GUI scripts:
MainScreen.py -- the main GUI that displays the forecast and communicates with the Arduino through other Python scripts.
returnItemGUI.py -- the GUI for when the user wants to return an item back to the desk.
goodWeatherGUI.py -- the GUI for when the weather is just cloudy and there are no items the user needs to take.
3. Python scripts that communicate with Arduino through pyserial library:
turnTable.py -- uses pySerial to communicate with Arduino to turn the round table according to the forecast.
returnItem.py -- uses pySerial to send commands to Arduino once the user wants to return an item.
4. Arduino script:
motor.ino -- Arduino code to control the stepper motor attached to the turning disk.

On the UML diagram above, you can see the interaction between the codes. The blue boxes depict GUI scripts and the green box depicts the Arduino script which controls the stepper motor. The dotted arrows show imports and usages (e.g. thermometer.py is imported by MainScreen.py) and the continues arrow shows inheritance.
weatherForecastInfo.py calls the Forecastio API in order to collect weather forecast information. (Forecastio is an open-source project and their source code can be found here. For further documentation, you can check this link.) weatherForeastInfo,py sends this information to the MainScreen.py gui, which displays this information on the screen.
The thermometer.py script provides the temperature inside to the same GUI. The thermometer.py script has been adjusted from this Adafruit tutorial.
With the user's input, MainScreen.py hands the appropriate item by communicating with the Arduino code through turnTable.py. turnTable.py sends commands to the Arduino depending on the weather displayed on MainScreen.py. Similarly, MainScreen.py switches to the returnGUI.py script upon user's input. This script helps user choose the object they wish to return to the disk. returnGUI.py communicates user's selection to returnItem.py, which talks to the serial port of Arduino. This way, we are able to control the stepper motor on python. Python-Arduino communication is run by pyserial library.
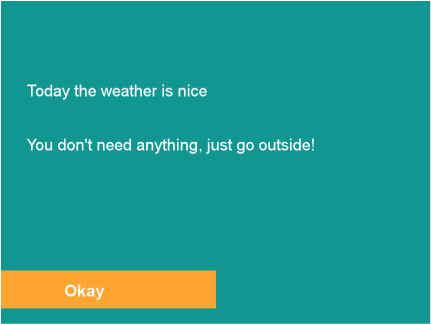
Lastly, in one of our test runs, we realized that we don't have a state for a not-cold, not-raint, not-sunny, warm weather. This is when the goodWeatherGUI.py comes in. It lets the user know that they do not need to take any item with them to go outside. It inherits from returnGUI.py and goes back to MainScreen.py
For more information, you can check our codes in GitHub. We have added comments and docstrings to facilitate understanding the flow of the software.
weatherForecastInfo.py calls the Forecastio API in order to collect weather forecast information. (Forecastio is an open-source project and their source code can be found here. For further documentation, you can check this link.) weatherForeastInfo,py sends this information to the MainScreen.py gui, which displays this information on the screen.
The thermometer.py script provides the temperature inside to the same GUI. The thermometer.py script has been adjusted from this Adafruit tutorial.
With the user's input, MainScreen.py hands the appropriate item by communicating with the Arduino code through turnTable.py. turnTable.py sends commands to the Arduino depending on the weather displayed on MainScreen.py. Similarly, MainScreen.py switches to the returnGUI.py script upon user's input. This script helps user choose the object they wish to return to the disk. returnGUI.py communicates user's selection to returnItem.py, which talks to the serial port of Arduino. This way, we are able to control the stepper motor on python. Python-Arduino communication is run by pyserial library.
Lastly, in one of our test runs, we realized that we don't have a state for a not-cold, not-raint, not-sunny, warm weather. This is when the goodWeatherGUI.py comes in. It lets the user know that they do not need to take any item with them to go outside. It inherits from returnGUI.py and goes back to MainScreen.py
For more information, you can check our codes in GitHub. We have added comments and docstrings to facilitate understanding the flow of the software.
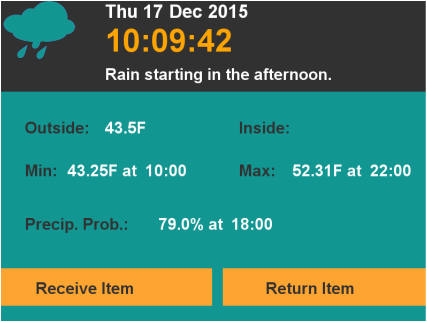
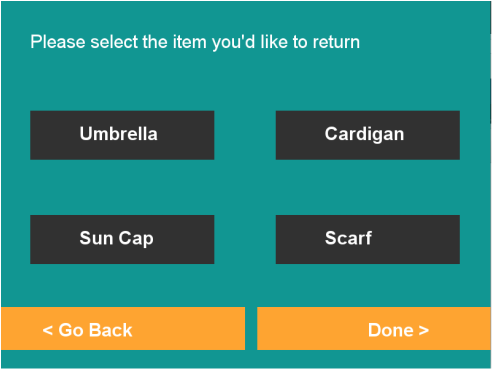
Here are the images from the GUIs:
|
|
|
|
On the upper left corner, you can see the GUI that MainScreen.py generates. Rignt next to it, you can see the GUI that is generated by returnItemGUI.py once the user clicks "Return Item".
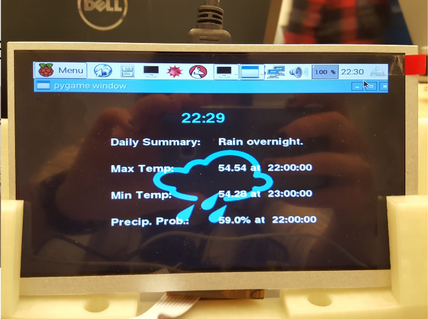
On the lower left corner, you can see the GUI generated by "goodWeatherGUI.py" for when the user hits "Receive Item" in the main GUI and no items are appropriate for the weather as it is not specifically sunny or rainy or cold. On the lower right corner, you can see the previous version of the GUI.
We had 4 sprints over the course of this project. The integration between Python and Arduino has been set in sprint 2 and they were deployes on Raspberry Pi in sprint 3. However, the GUI was finalized in sprint 4.
Learn more about the other systems!