Electrical Design
|
|
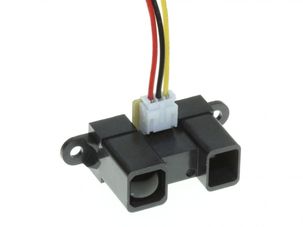
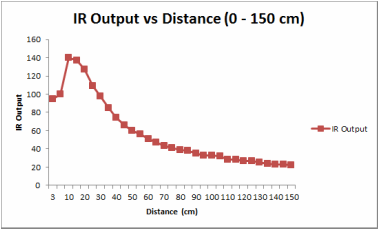
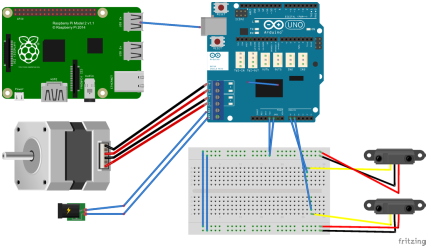
IR sensor4 IR sensors are used in this project. The IR sensors are attached under each of the hangers on the turning disc. Each IR sensor checks whether an item is hanging or not.
|
|
|
|
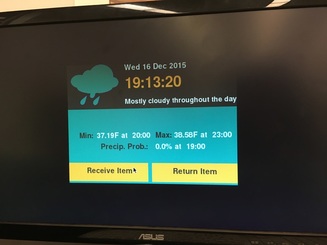
DisplayWe showed the weather forecast and other useful information using a display. We made the GUI of our weather forecast using the PyGame package of python. The display was connected with the raspberry pi using an HDMI cable.
|
|
|
|
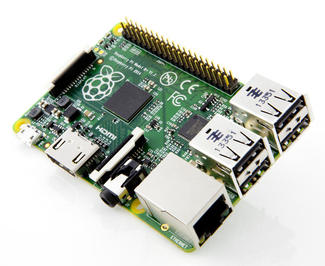
Raspberry-PiThe raspberry-pi retrieves the weather forecast and shows it on the display. It works as a master of the entire system that controls the arduino according to the weather forecast and user inputs.
|
|
|
|
Temperature Sensor Circuit
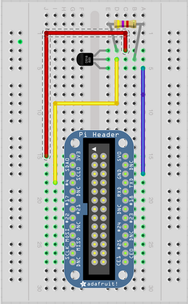
The temperature sensor we used is the DS18B20 "1-wire" sensor.
Through Raspberry Pi cobbler, we were able to read temperature data directly on Raspberry Pi. To do this, we have followed the documentation set by Adafruit. The circuit is illustrated on right. |
|
Learn more about the other systems!