Arduino Code
The arduino is an important part of our project because it relays the commands which we speech into the phone to the robot and it controls the movements of the robot.
Sprint 1
That's why we had integrated Arduino code since Sprint 1. We started by looking at and tinkering with Arduino code which we found from IoT boys. This Arduino code described how to turn on LEDs with voice control and an HC-05 bluetooth module, which we had as well.
We looked at the code and tested it out. We learned that the Arduino can read messages from the Bluetooth module using the serial port, the same way we've used it in the past to look at print statements on our monitors. We changed the code from controlling LEDs to controlling motors with an Adafruit V2 motorshield. We also changed it from taking the words character by character to taking in a whole string at a time. Last, we changed the strings of commands which it responded to from being led-related to motor related. This is how we were able to get the robot to turn to commands in Sprint 1.
Sprint 2
In Sprint 2, we used the Arduino code for more than just sending commands to the robot. We used Arduino code heavily to test our IR LEDs and IR sensors. We had sensor characterization code, in which we power the IR sensors and connect the output leg into the analog pin of the arduino. We graphed the output of this leg continuously and so we could see in real-time if the sensor was "shot". We tested the accuracy and predictability of this setup with a TV-remote, which sends out IR light pulses.
In Sprint 2, we also worked with IR LEDs and Arduino. We needed to modulate the IR light, so we needed to use an Arduino to do so. To figure out how to do this, we looked at Zovirl Industries website. We used this code to gain a better understanding of IR transmitting works and as a tool, so that we could get our robot integrated faster. We went through the sample code and identified what all the functions were doing, and how that contributed to the whole. We then created our own Arduino script, went through the code again and picked out the components we needed, commented them and put them in our script. This code begins with defining what we want the number of oscillations to be, the length of the oscillation and the changing voltage intensities. It then includes helper functions which define what the period of one of the oscillations will be (there is two, to read more about how the IR LED works, read our blog about it), actually oscillating the LED on and off, turning the LED off for the second oscillation and creating the second oscillation. These commands are all put together in yet another command, which will turn the LEDs on and off at a certain frequency for a given amount of time, then turn the lights completely off for four times that amount of time. It will repeat this process with different intensities of light four times, using the intensities which we designated at the beginning of the script. This code worked well, but it was a little more than we needed for our purposes.
We integrated the LED code with our previous command code from Sprint 1 to create code which controls the robots' movements and allows it to shoot sensable IR LED light.
We also integrated the IR sensor code into the motor control code. We did this by creating a set of logic which stated : at every iteration of the void loop, check if the sensor reading is less than 100. If it is, then the robot spins.
Sprint 3
In Sprint 3, we implemented the SoftwareSerial library, which allowed us to use digital pins 10 and 11 as the serial communication pins, the TX and RX pins, which are located in pins 0 and 1 in the Arduino. To implement this change, we also need to define BTSerial, a variable, as our SoftwareSerial object and read BTSerial instead of the normal Serial.read.
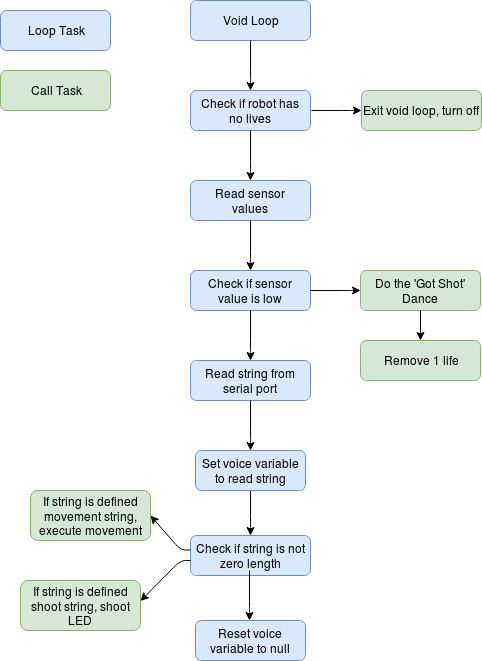
We integrated more of the game design into our Arduino code in Sprint 3. Now, the robot had an integer variable counting it's life total. We created a function named 'gotShot', which commands the robot to turn right, left and right again when it gets shot. For the 'if sensor value is less than 100' logic, we command the robot to show that it got shot (using the function 'gotShot'), and subtract one from its life counter. We had also added a set of functionality which would enable the robot from not being hit twice directly. We did this by keeping track of the time since it was last hit with millis. Then, 'if(sensorValue1 < 100)' was changed to 'if(sensorValue1 < 100) && currtim > prevtime + 3000' . What this does is that when the sensor senses being shot, it also checks if a reasonable amount of time has passed since the last time it was shot. If it is, it can get hit again, if it's not, then the robot is "immune" . Part of this was also resetting prevtime every time that a robot got hit. Unfortunately, we took this functionality out when we were debugging, to simplify our code, and we never put it back in. Considering how our game plays now, however, it is not useful.
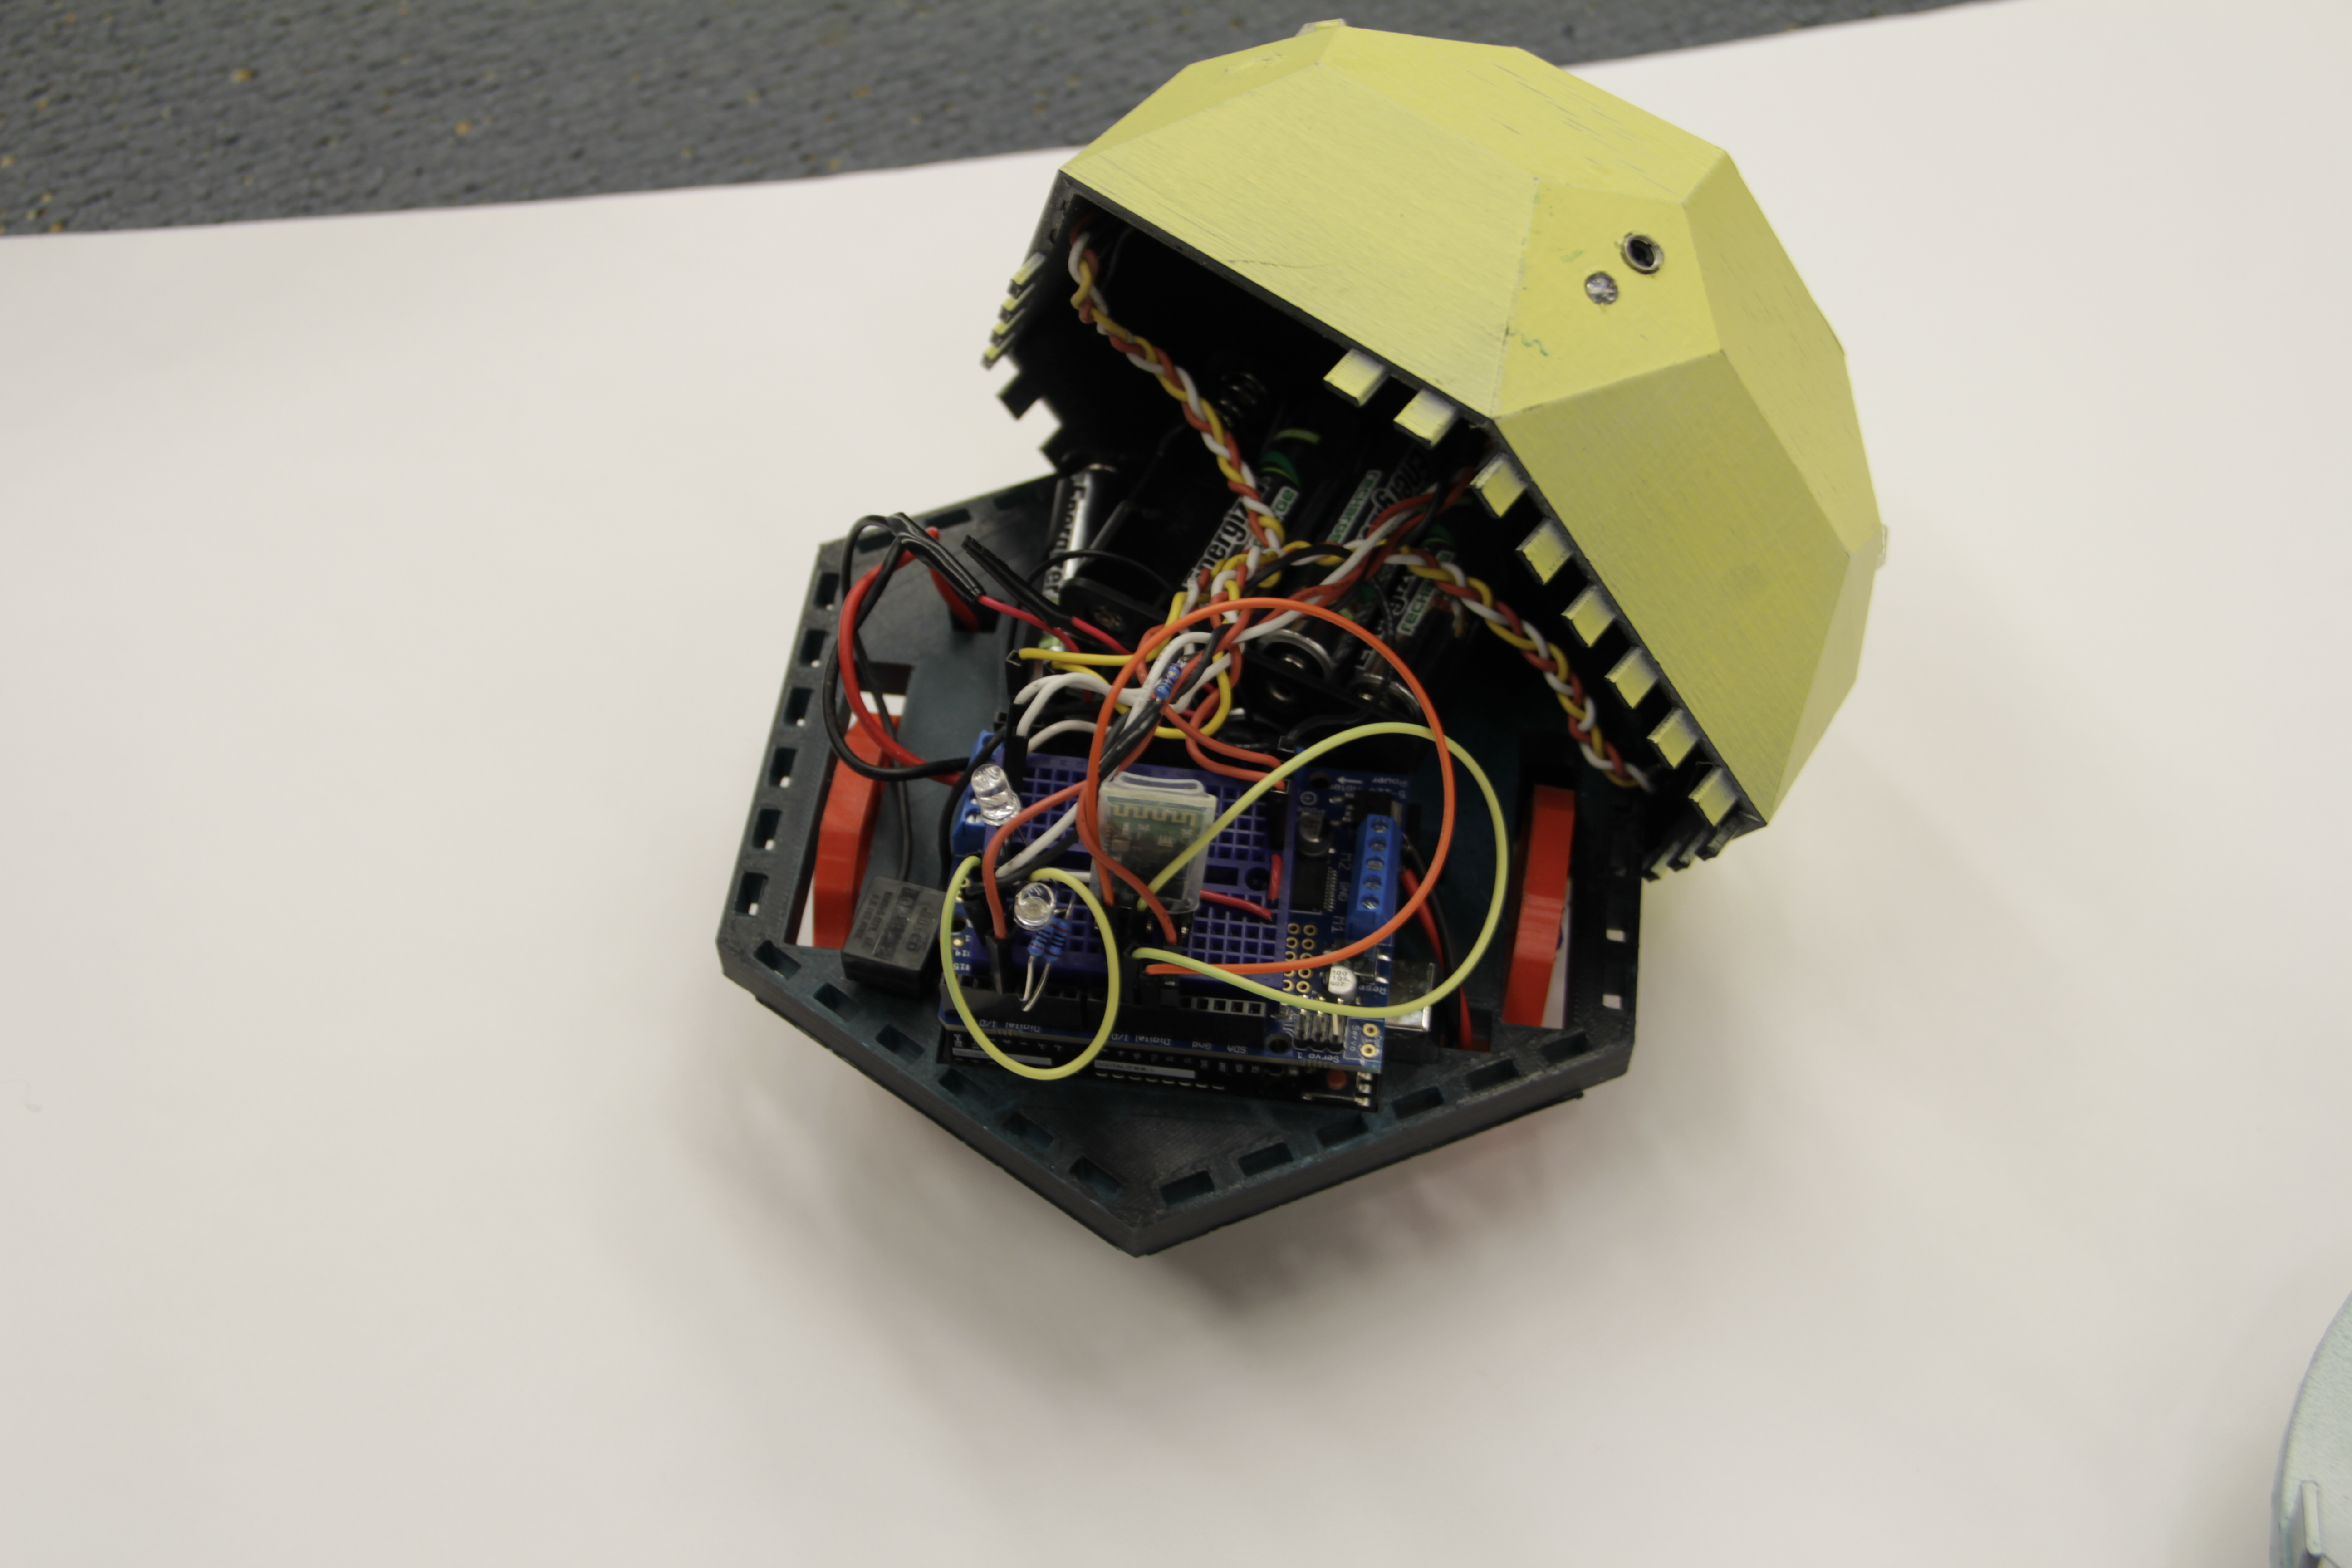
We added a visible laser to our robot and also included commands to turn the visible laser on and off with a digital pin. The purpose of the visible laser was to make shooting easier, by allowing the user to see where she was shooting. Thus, we put the IR LED code in a function which starts with turning the laser on, shoots the IR LED and turns the laser off.
To improve playability, we added more turning functions. We measured how long it takes the wheels to turn ninety, one-hundred eighty and fourty-five degrees. We created new functions which make the robot turn left or right those degrees and the functions consist of turning the motors on and using a delay for that time interval which it takes the motors to turn the robots those degrees. These times vary from robot to robot so we calculated them for both and created two separate ino files for the robot and dragon.
We added a dance function in Sprint 3 which would make the robot move in a certain amount of steps, which resembled the macarena. We did this to increase the cuteness factor of our robot and make it more fun to use. The command was implemented by adding another if statement checking what the sent in bluetooth string is , ' if (voice == "dance") ', and adding a dance_step counter. For each iteration of the time step, the robot does a different movement. We used counters instead of having it do all the movements at once, because we wanted it to still be listening.
We also added a sing function and speakers to the robot, so when asked the robots could sing a popular song. We found speakers and added them to the robots. We then searched online and found an already-made song for Arduino: Imperial March. We modified it to only use the first section, and made so that when the player asks a robot to sing, it will play the Imperial March.
One problem we ran into here was that we would stop if the voice command was not equal to dance, but there was no stop to the dancing. This was causing some issues, but momentarily we fixed it by changing ' if (voice != "dance") { voice = "";' back to 'voice=""';' at the end of the commands list. The purpose of this is to be able to "clear the cache" at the end of each function, so that it can be continuously listening and react to a new command coming from the Bluetooth.
During these two weeks a lot of what we did was also making small changes in the code during our debugging process. We modified logic, took out delays and put in delays. We added the IR LED command mulitple times to the function which shoots, so that it shot for more time and was more reliable.
In the End
Our robots do not work consistently, they are sort of finicy. To debug, we had added visible LEDs which light up when the robot recieves a non-zero string from Bluetooth and when it is finished executing the function. As you can see in integration, we found a lot of weird bugs this way. For example, the Arduino was picking up non-zero commands when none were given. We suspect that this problem was caused by Bluetooth - Arduino communication and we will continue debugging until our next presentation of our battle robots, at Olin's Winter Exposition!