Electrical System Without Power Supply
Sensors
The Bird Hub houses the following sensor modules:
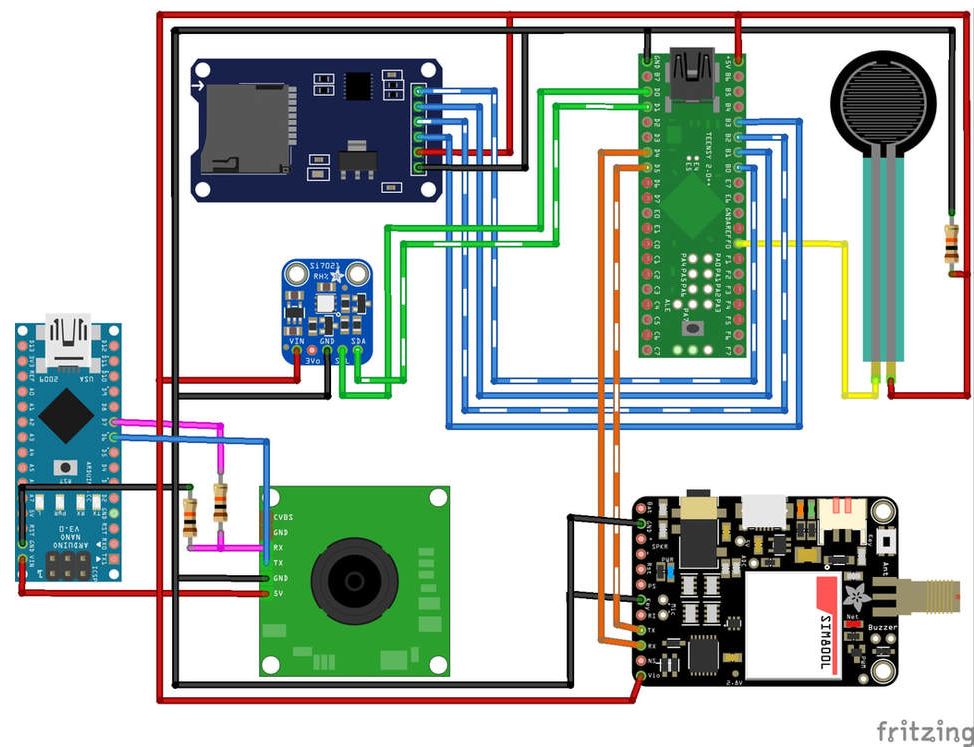
Adafruit HTU21D-F Temperature & Humidity Sensor Breakout Board
Temperature & Humidity
To create our minimum viable product, we had to integrate at least one sensor into our system. The first sensor that we purchased was the Temperature & Humidity Breakout Board from Adafruit. We chose this module as our first sensor due to it being heavily documented, inexpensive, and capable of our desired range of accuracy (± 1°C). Another advantage of this board was the 3.3V regulator, since we were not certain of the microprocessor we would be using at the time. We communicated with this sensor through the Teensy++ 2.0 (wiring shown below) which was also the microprocessor we used for our GSM module.
To create our minimum viable product, we had to integrate at least one sensor into our system. The first sensor that we purchased was the Temperature & Humidity Breakout Board from Adafruit. We chose this module as our first sensor due to it being heavily documented, inexpensive, and capable of our desired range of accuracy (± 1°C). Another advantage of this board was the 3.3V regulator, since we were not certain of the microprocessor we would be using at the time. We communicated with this sensor through the Teensy++ 2.0 (wiring shown below) which was also the microprocessor we used for our GSM module.
Sparkfun
Force Sensitive Resistor - Square
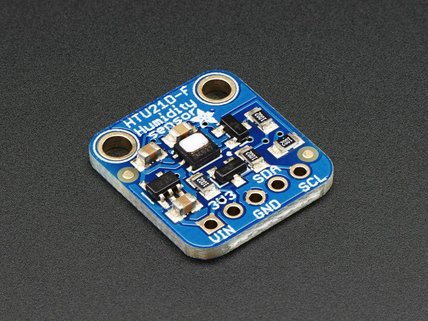
Force-Sensitive Resistor
After our first sprint, our team took the time to talk to a local ornithologist about the kind of data that would be useful for professionals like him. Given that we had already implemented a weather sensing module, he was interested in the weight of the birds. He noted that there is a lack of data available that correlates weather, availability of food, and bird weight. We chose this sensor because it was able to register weight similar to those of birds in New England (around 100 g). We also hooked this sensor up to our Teensy++ 2.0 so we could have our data collection and wireless transmission take place on the same microprocessor.
After our first sprint, our team took the time to talk to a local ornithologist about the kind of data that would be useful for professionals like him. Given that we had already implemented a weather sensing module, he was interested in the weight of the birds. He noted that there is a lack of data available that correlates weather, availability of food, and bird weight. We chose this sensor because it was able to register weight similar to those of birds in New England (around 100 g). We also hooked this sensor up to our Teensy++ 2.0 so we could have our data collection and wireless transmission take place on the same microprocessor.
Camera

Adafruit suggested wiring for TTL JPEG Camera
For our camera, we used a TTL Serial JPEG Camera with built-in motion detection. Originally, we thought we could use our GSM Module to transmit the pictures taken by our camera to our web server. However, we soon discovered that our ~50KB pictures were too large for either a Teensy++ 2.0 or an Arduino Nano to handle at once. Another option we explored was sending the JPEG data is smaller packets to our server, but we found that reassembly of JPEG data was a more complex task than we could handle. In the end, we settled on simply saving our images to SenMod MicroSD Card Adapters. Above, you can see the set up and wiring offered by Adafruit, which is the setup that we ultimately used in our final system. While we were hoping to use the Teensy++ 2.0 for faster writing of images to the SD card, we had issues communicating with the camera with a non-Arduino microprocessor. Eventually, we decided to integrate both our camera and servo for the food dispenser using our Arduino Nano. The motion detection feature of this camera allowed us to dispense food only when a bird was detected at the feeder, allowing The Bird Hub to save both food and energy.
Wireless Transmission
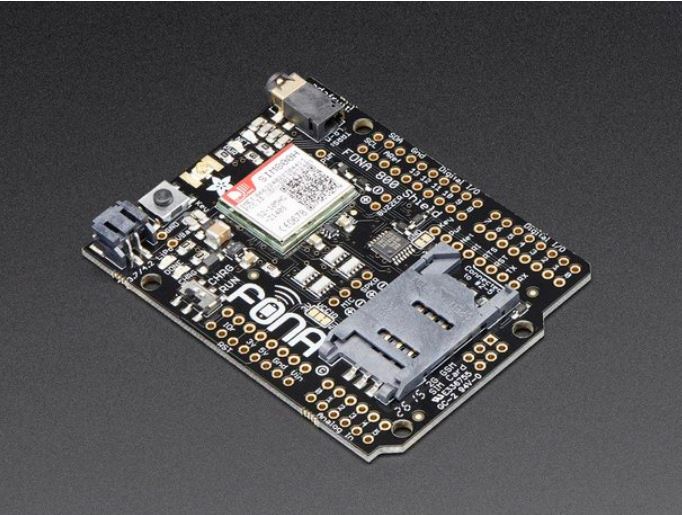
Fona 800 module
One of our stretch goals was wireless transmission of our sensor data, which was accomplished by using a GSM Module, Fona 800. Interfacing with this device was definitely one of the more challenging tasks of our project, given our lack of experience with wireless transmission. Originally, we hoped to use the HTTP POST feature of the Fona to upload to our own web server. However, we ran into issues with timeouts and reliable transmitting the POST requests. That's why we switched over to the HTTP GET method which allowed us to post our data to a site named dweet.io. We then grabbed the data posted to Dweet and visualized it using a free dashboard, Freeboard.io. Although we planned on returning to our web server eventually, we received positive feedback on our Freeboard at our Sprint 3 review and decided that this method of data visualization met our goal of having user updates.
Solar Panel
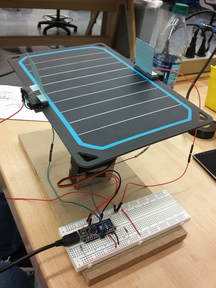 Sprint 1 Solar Panel Sprint 1 Solar Panel
For our off-grid power source, we went beyond our MVP of a battery and decided to use a solar panel instead. In this sprint, our mechanical moving part was from the solar panel. We built a sun-tracking solar panel that follows the sun in order to reduce the angle of incidence against the panel, which increases power efficiency. To make the solar panel track the sun, we used two light dependent resistors, a DC servo motor, and an Arduino nano.
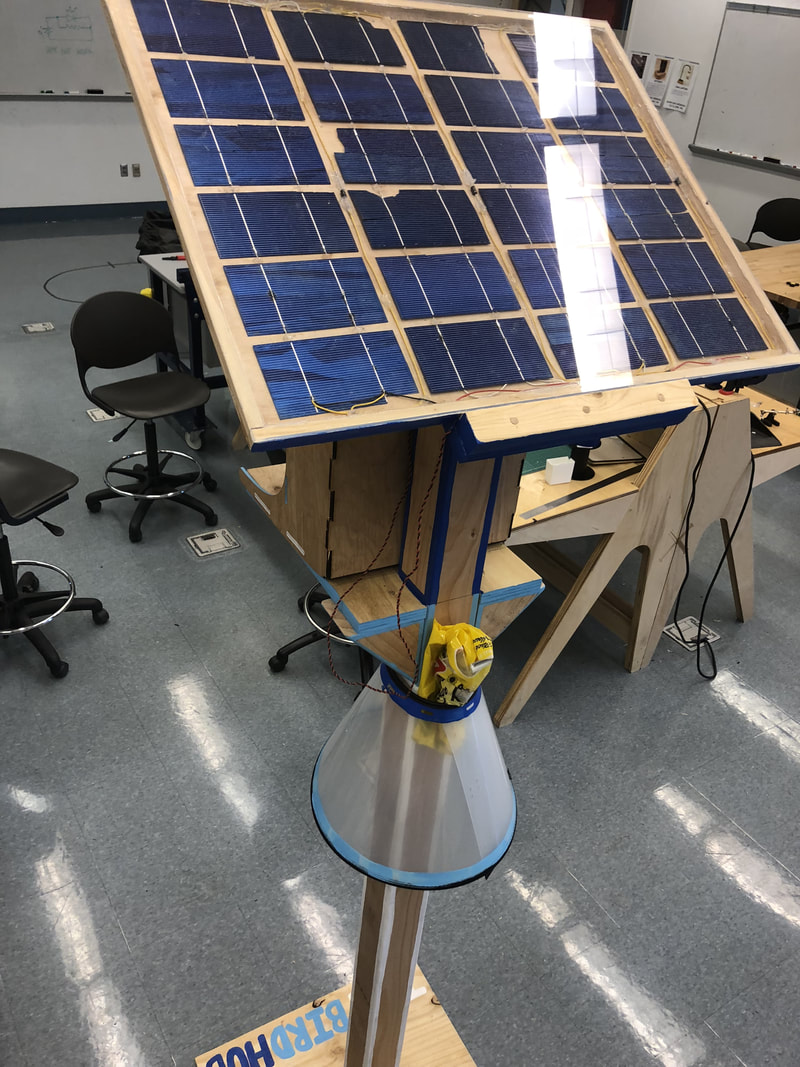
For our first sprint, we designed and 3D printed a worm gear to rotate the panel but it turned out to require to much force to rotate probably due to the worm resolution, so we decided to go with a simpler attachment to the servo motor instead. We designed another 3D printed attachment for the motor and LDR sensors and taped the rest of the parts together. We then calibrated the LDR’s in a pitch black room with a phone flashlight positioned center, left, and right on the two sensors. After Sprint 1 was complete, our team decided to make the solar panel fixed rather than tracking due to time limits and goals to integrate all of our sensors. As for our final solar panel design, we decided to make a fixed solar panel of at least 6V by creating an array of polycrystalline solar cells in series that are within a wooden and glass frame. Our final design was an array of 24 cells in series in a 4x6 cell pattern. For every row of 6 cells, bypass diodes were soldered in parallel. Bypass diodes are used in parallel with solar cells in series to prevent the current from sunlit cells to burn out shaded solar cells by providing a current path around the bad cell. |
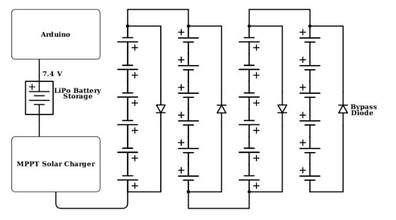
Solar Panel Schematic
|
Battery charging circuitry
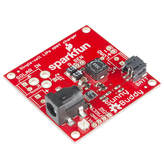 Sunny Buddy from SparkFun
To merge our two power supplies (battery and solar panel) into one, we used the sunny buddy from SparkFun. It's an easy to use solar charger protoboard, were we just had to plug in the Barrel Jack coming from our solar panel and the two wires coming from our 3.7V 5000mAh LiPo Battery and could use the load connector to power our Arduino. Sunny Buddy then makes sure that the battery stays charged and switches between the solar panel and the battery as power supply depending on the amperage value coming from the solar panel.