Sprint 1
For our first sprint, we focused on quickly constructing a cardboard solenoid engine as a proof of concept for our overall goal. This rapid prototype consisted of a piece of delrin tube wrapped with insulated magnet wire and conductive solenoid circuit. Spinning the makeshift shaft would manually complete the circuit to the solenoid, causing the solenoid to pull on our engine's piston at given intervals to rotate the engine shaft. 

Sprint 2
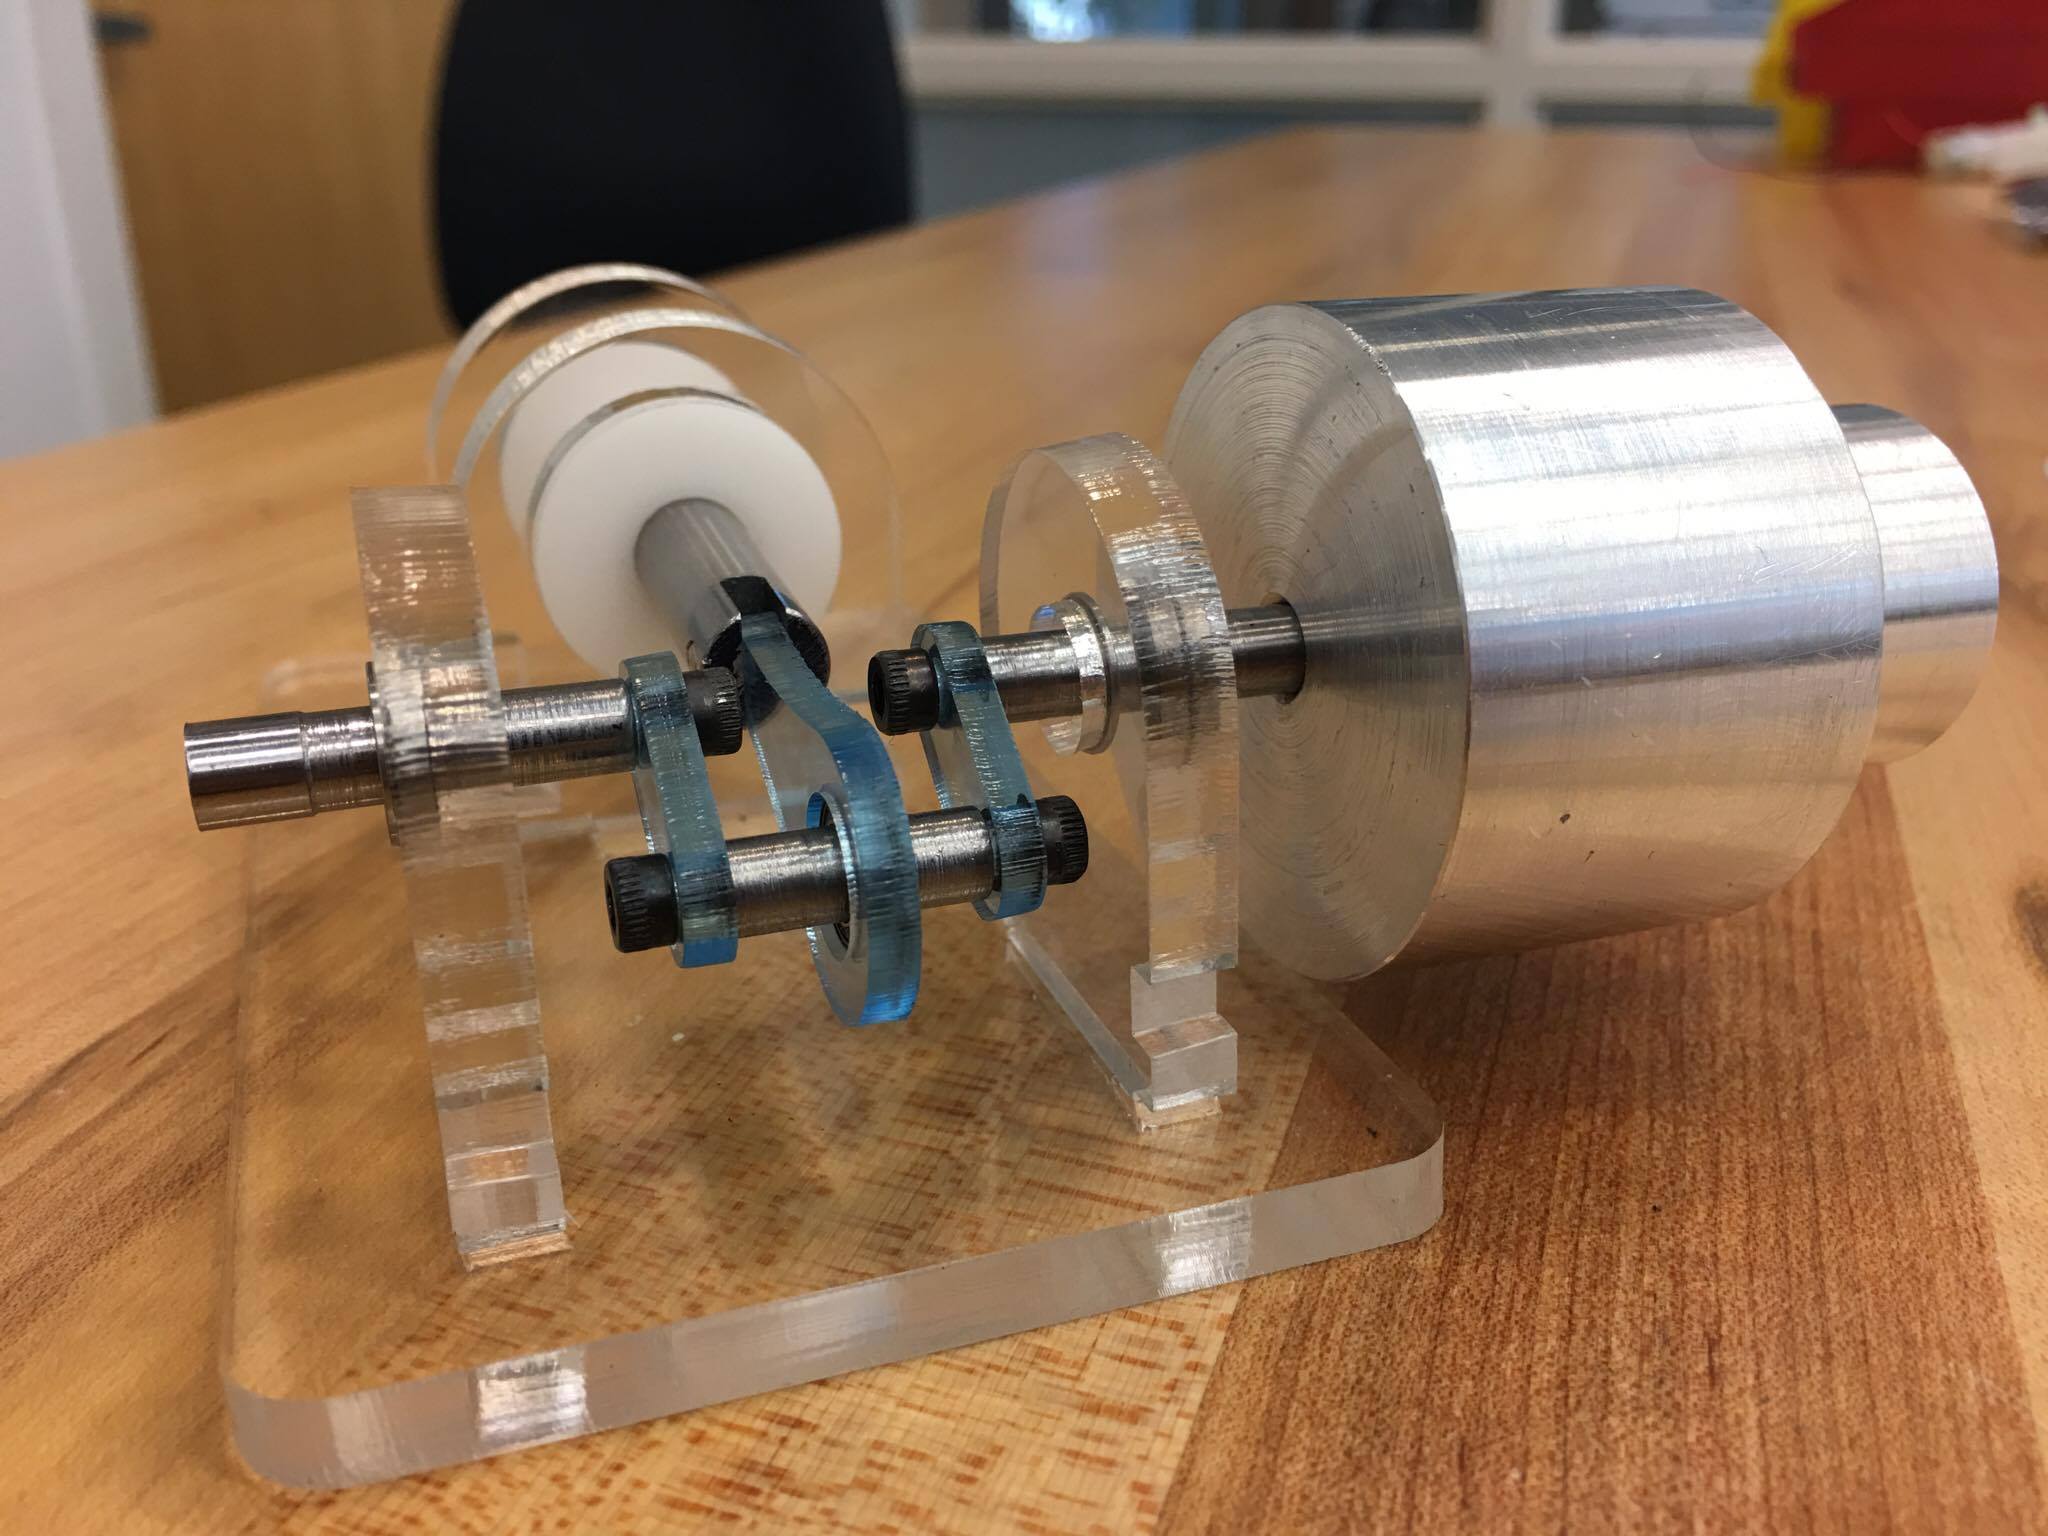
We immediately began design and construction of a more refined engine, lasercutting several parts out of acrylic and experimenting with wrapping different gauges of wire for solenoids.
Sprint 3
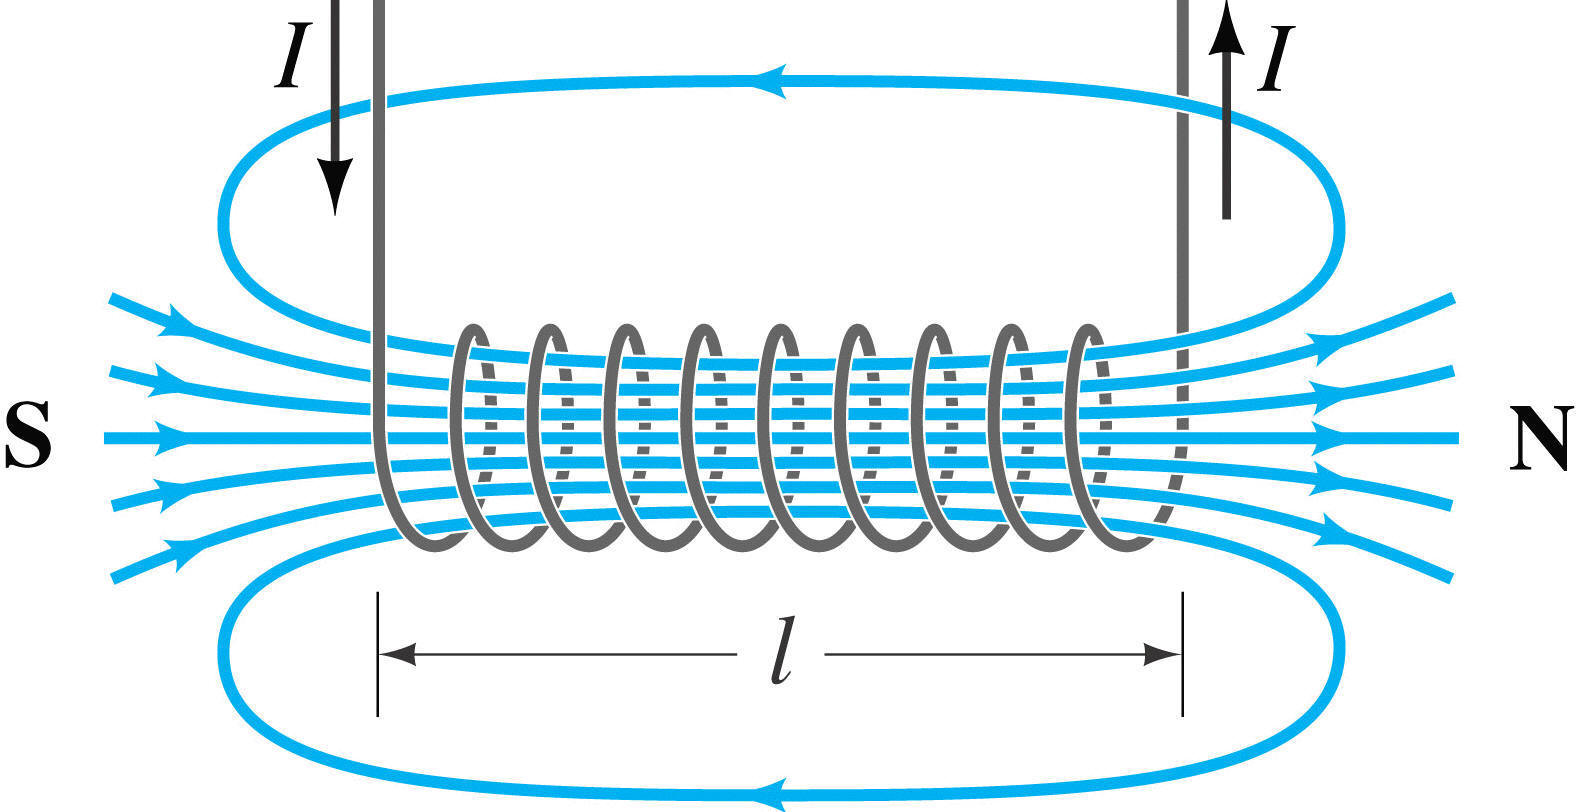
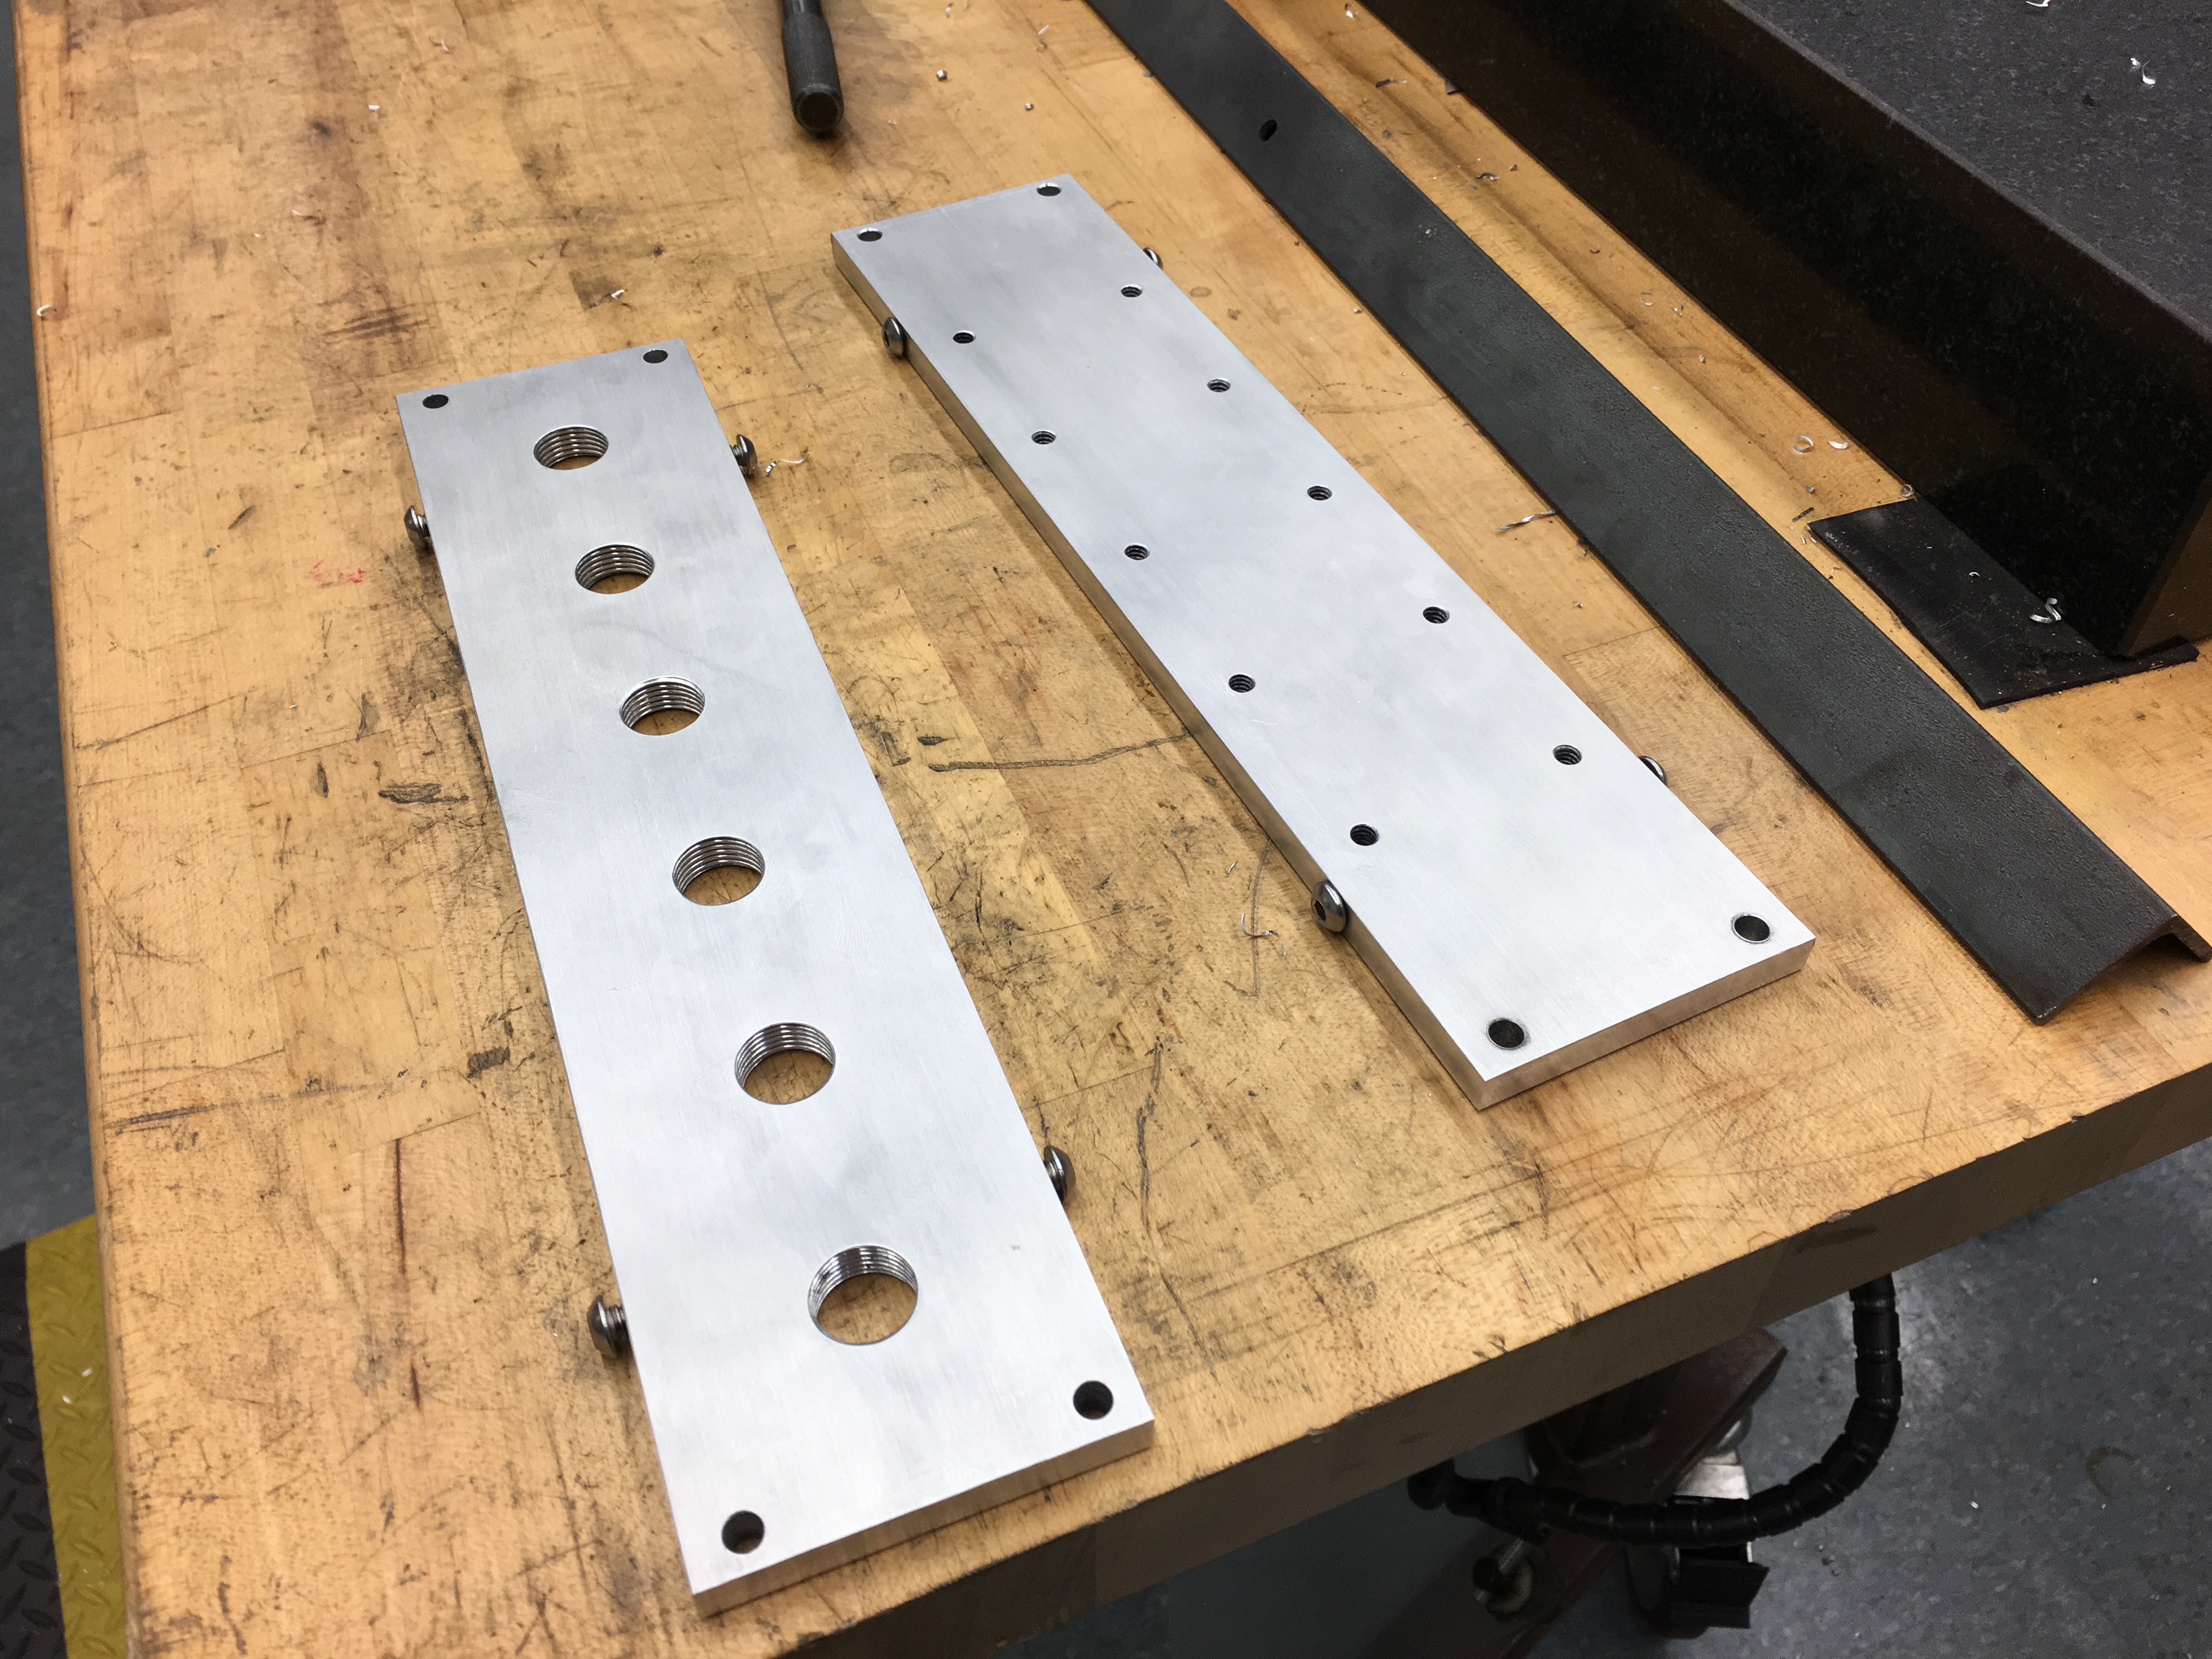
In our third sprint we focused on preparing materials for the final iteration of our engine, since designing and machining our engine parts and having time to connect it to our circuitry would take more time than alloted within a single sprint. Delrin for the solenoids was prepared and we fully wrapped one solenoid to ensure our calculations for solenoid force were correct. Additionally, the software control for our six-solenoid engine was written, and thermocouples calibrated to prepare for controlling the fans to cool our solenoids.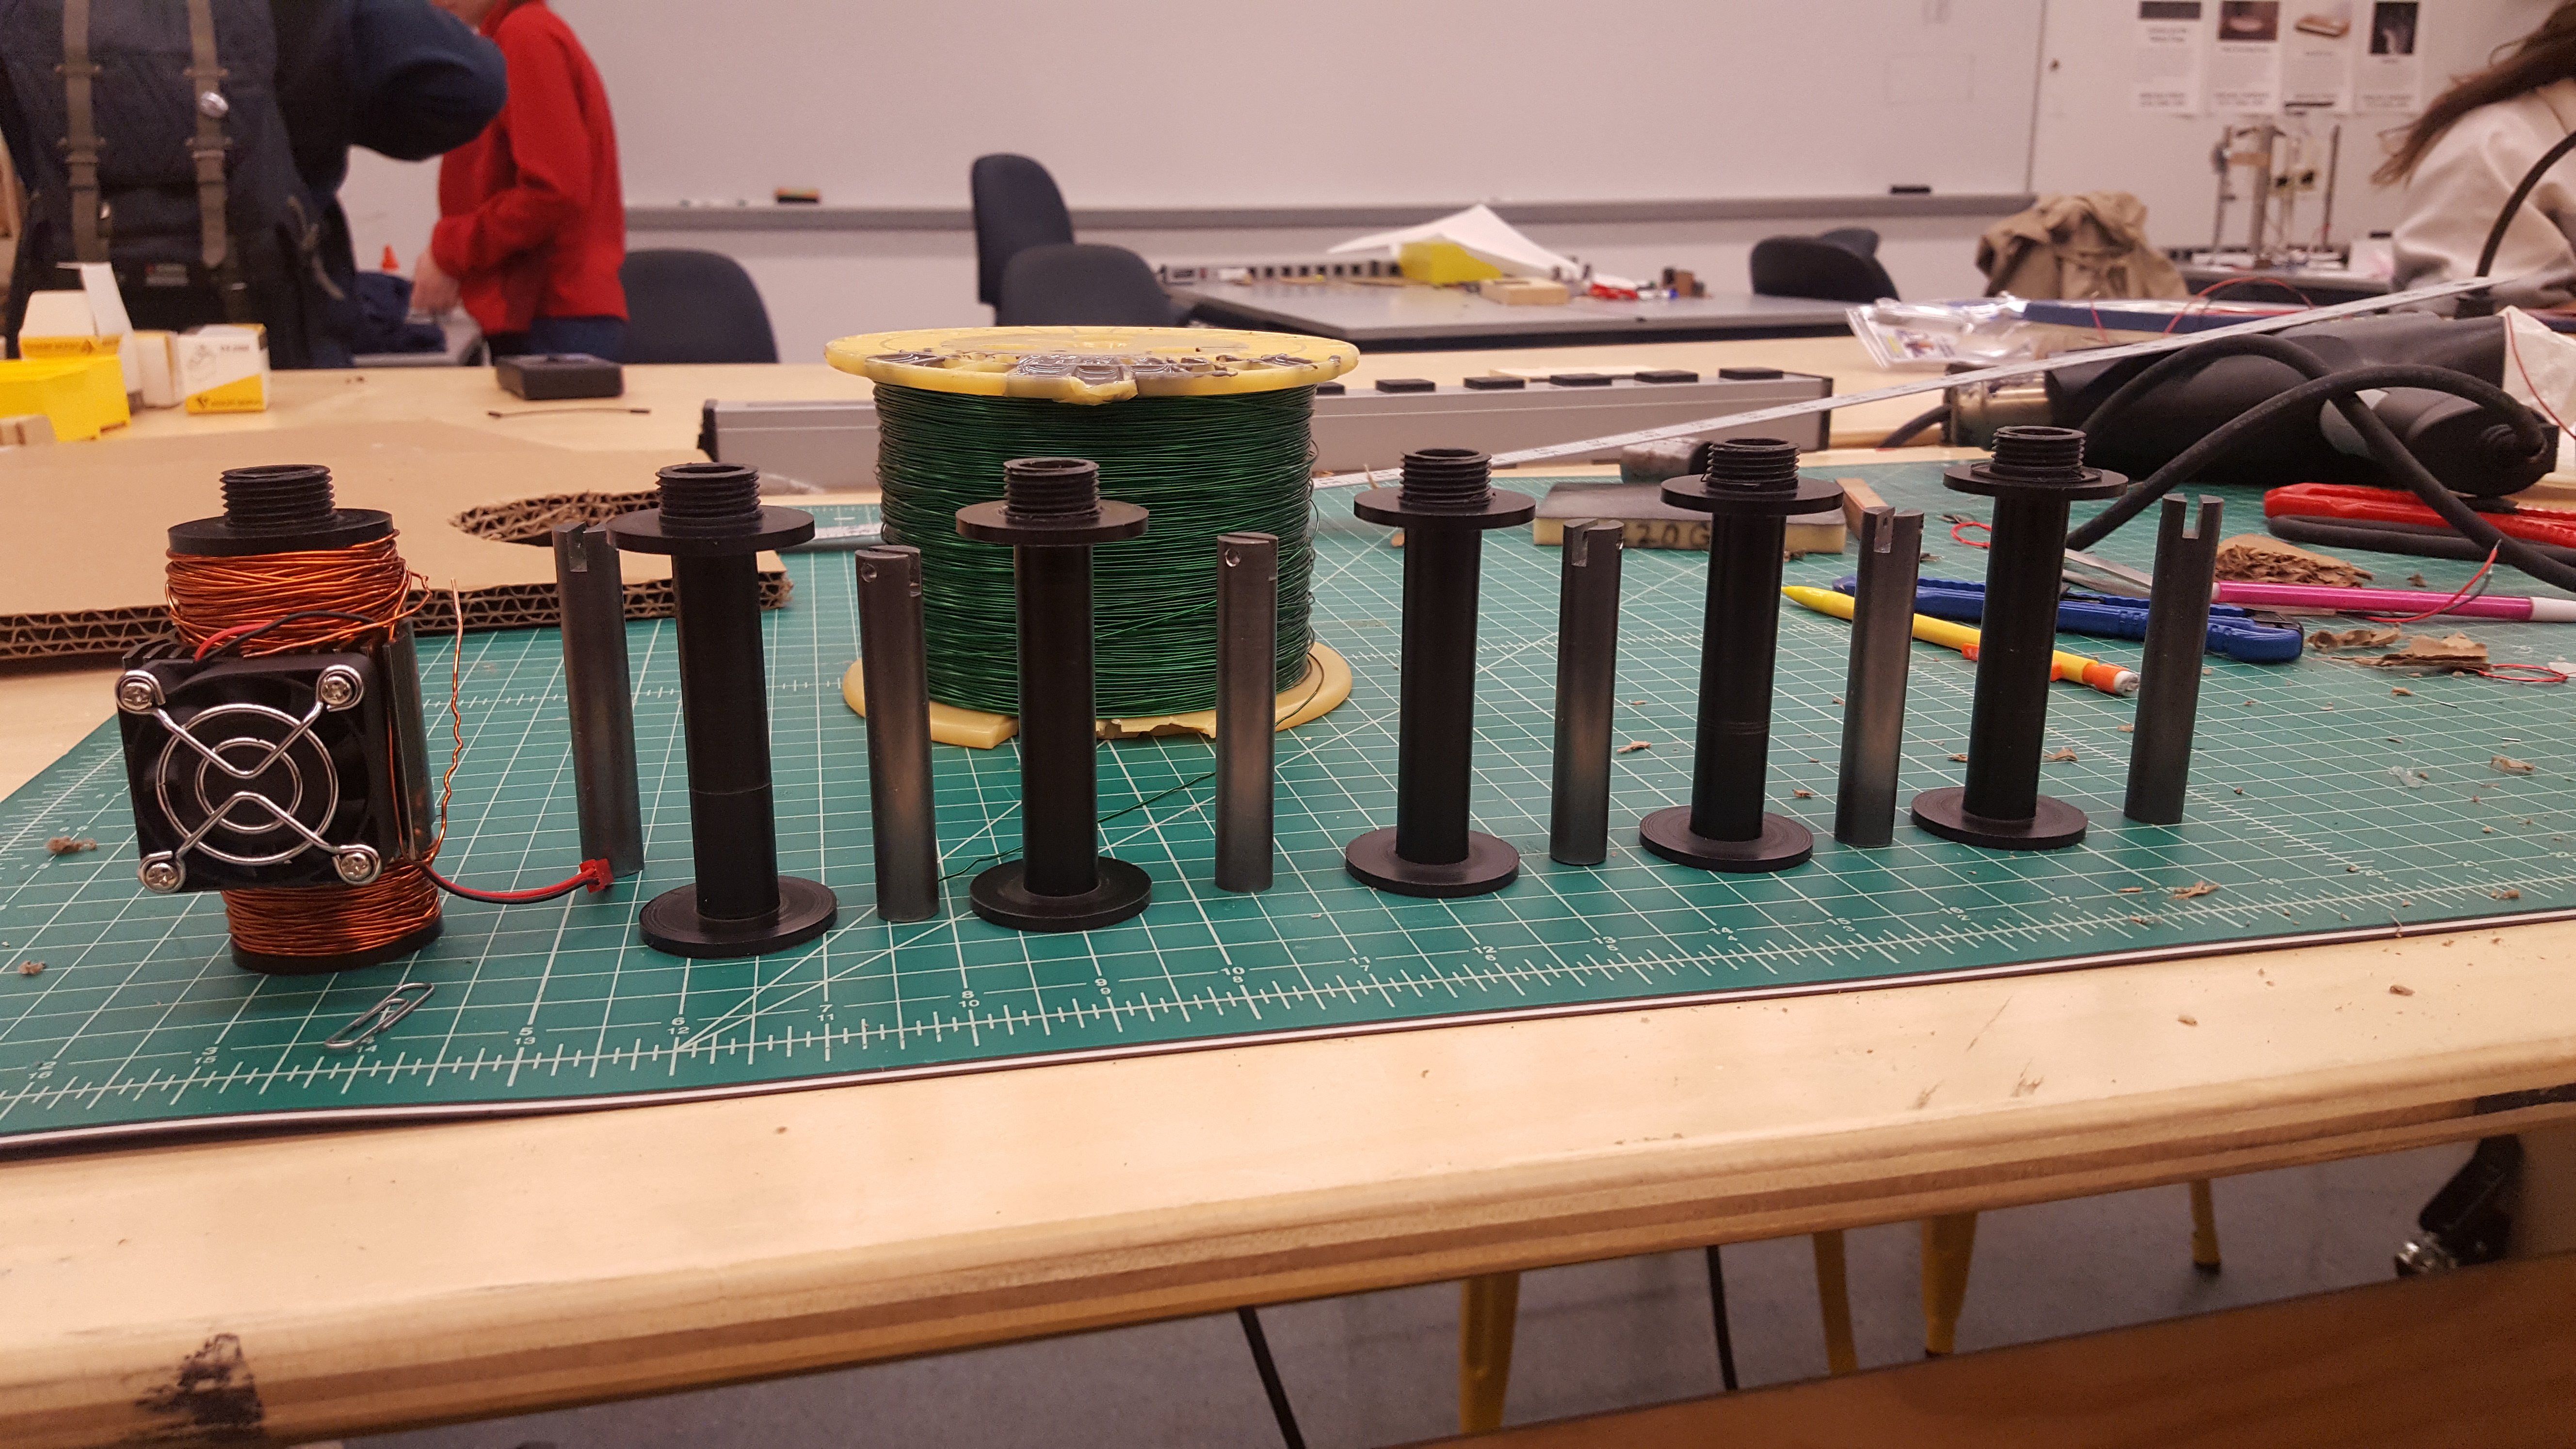
Sprint 4
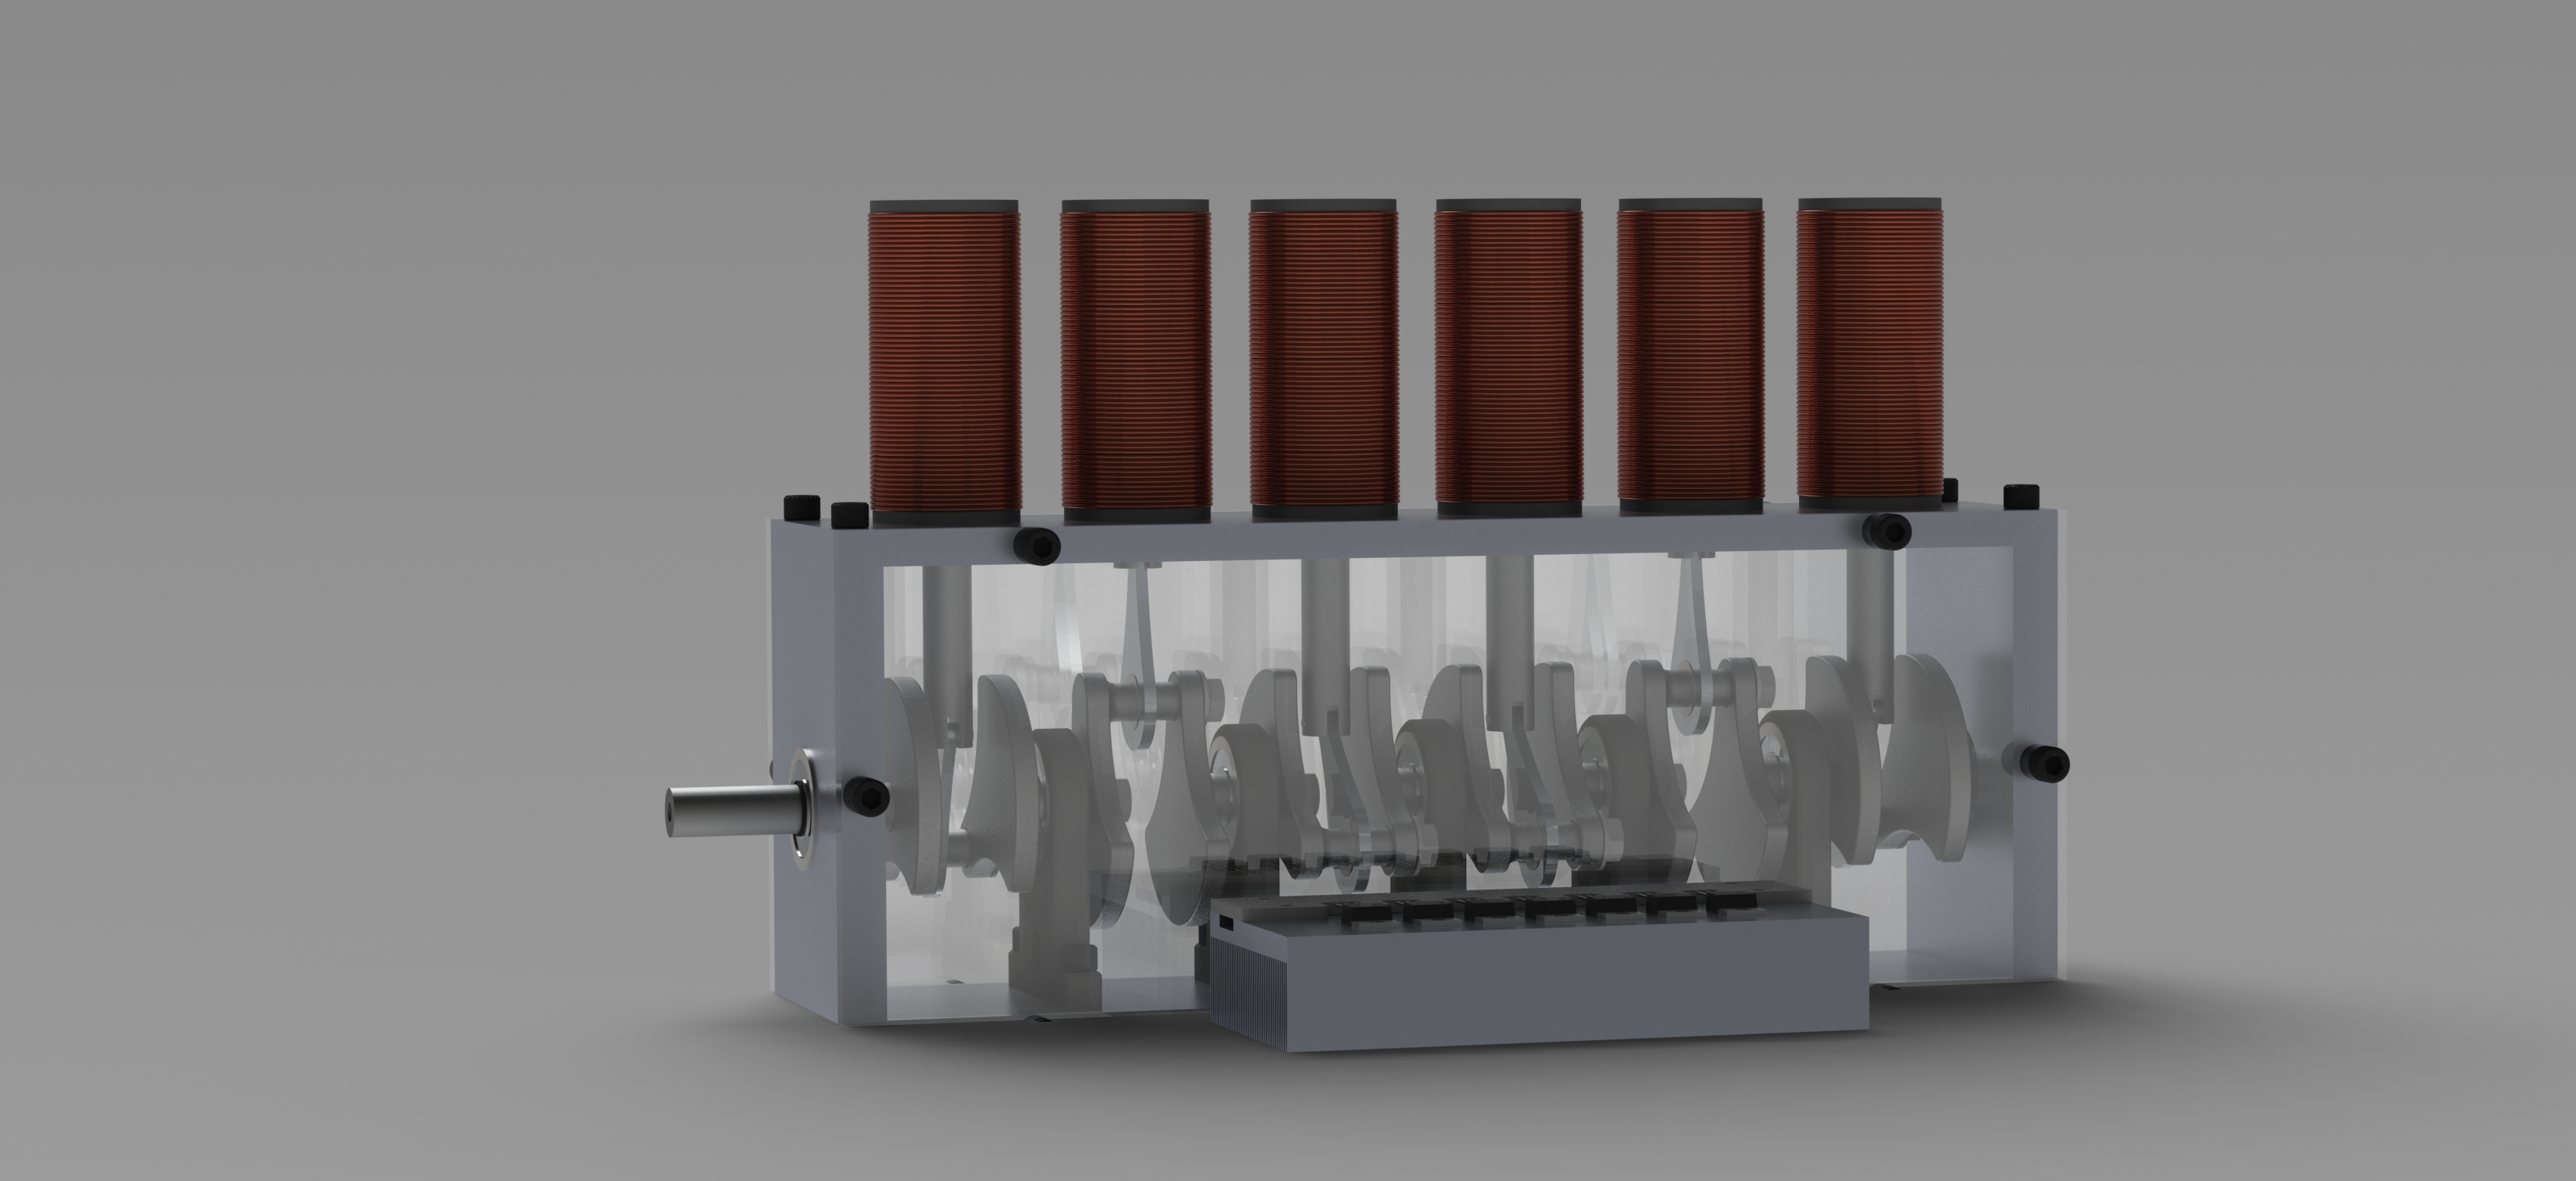
Our fourth and final sprint was mainly comprised with finishing the last few pieces of our engine and integrating all of our individual systems together. We 3D printed an engine shaft with onyx on a MarkForged printer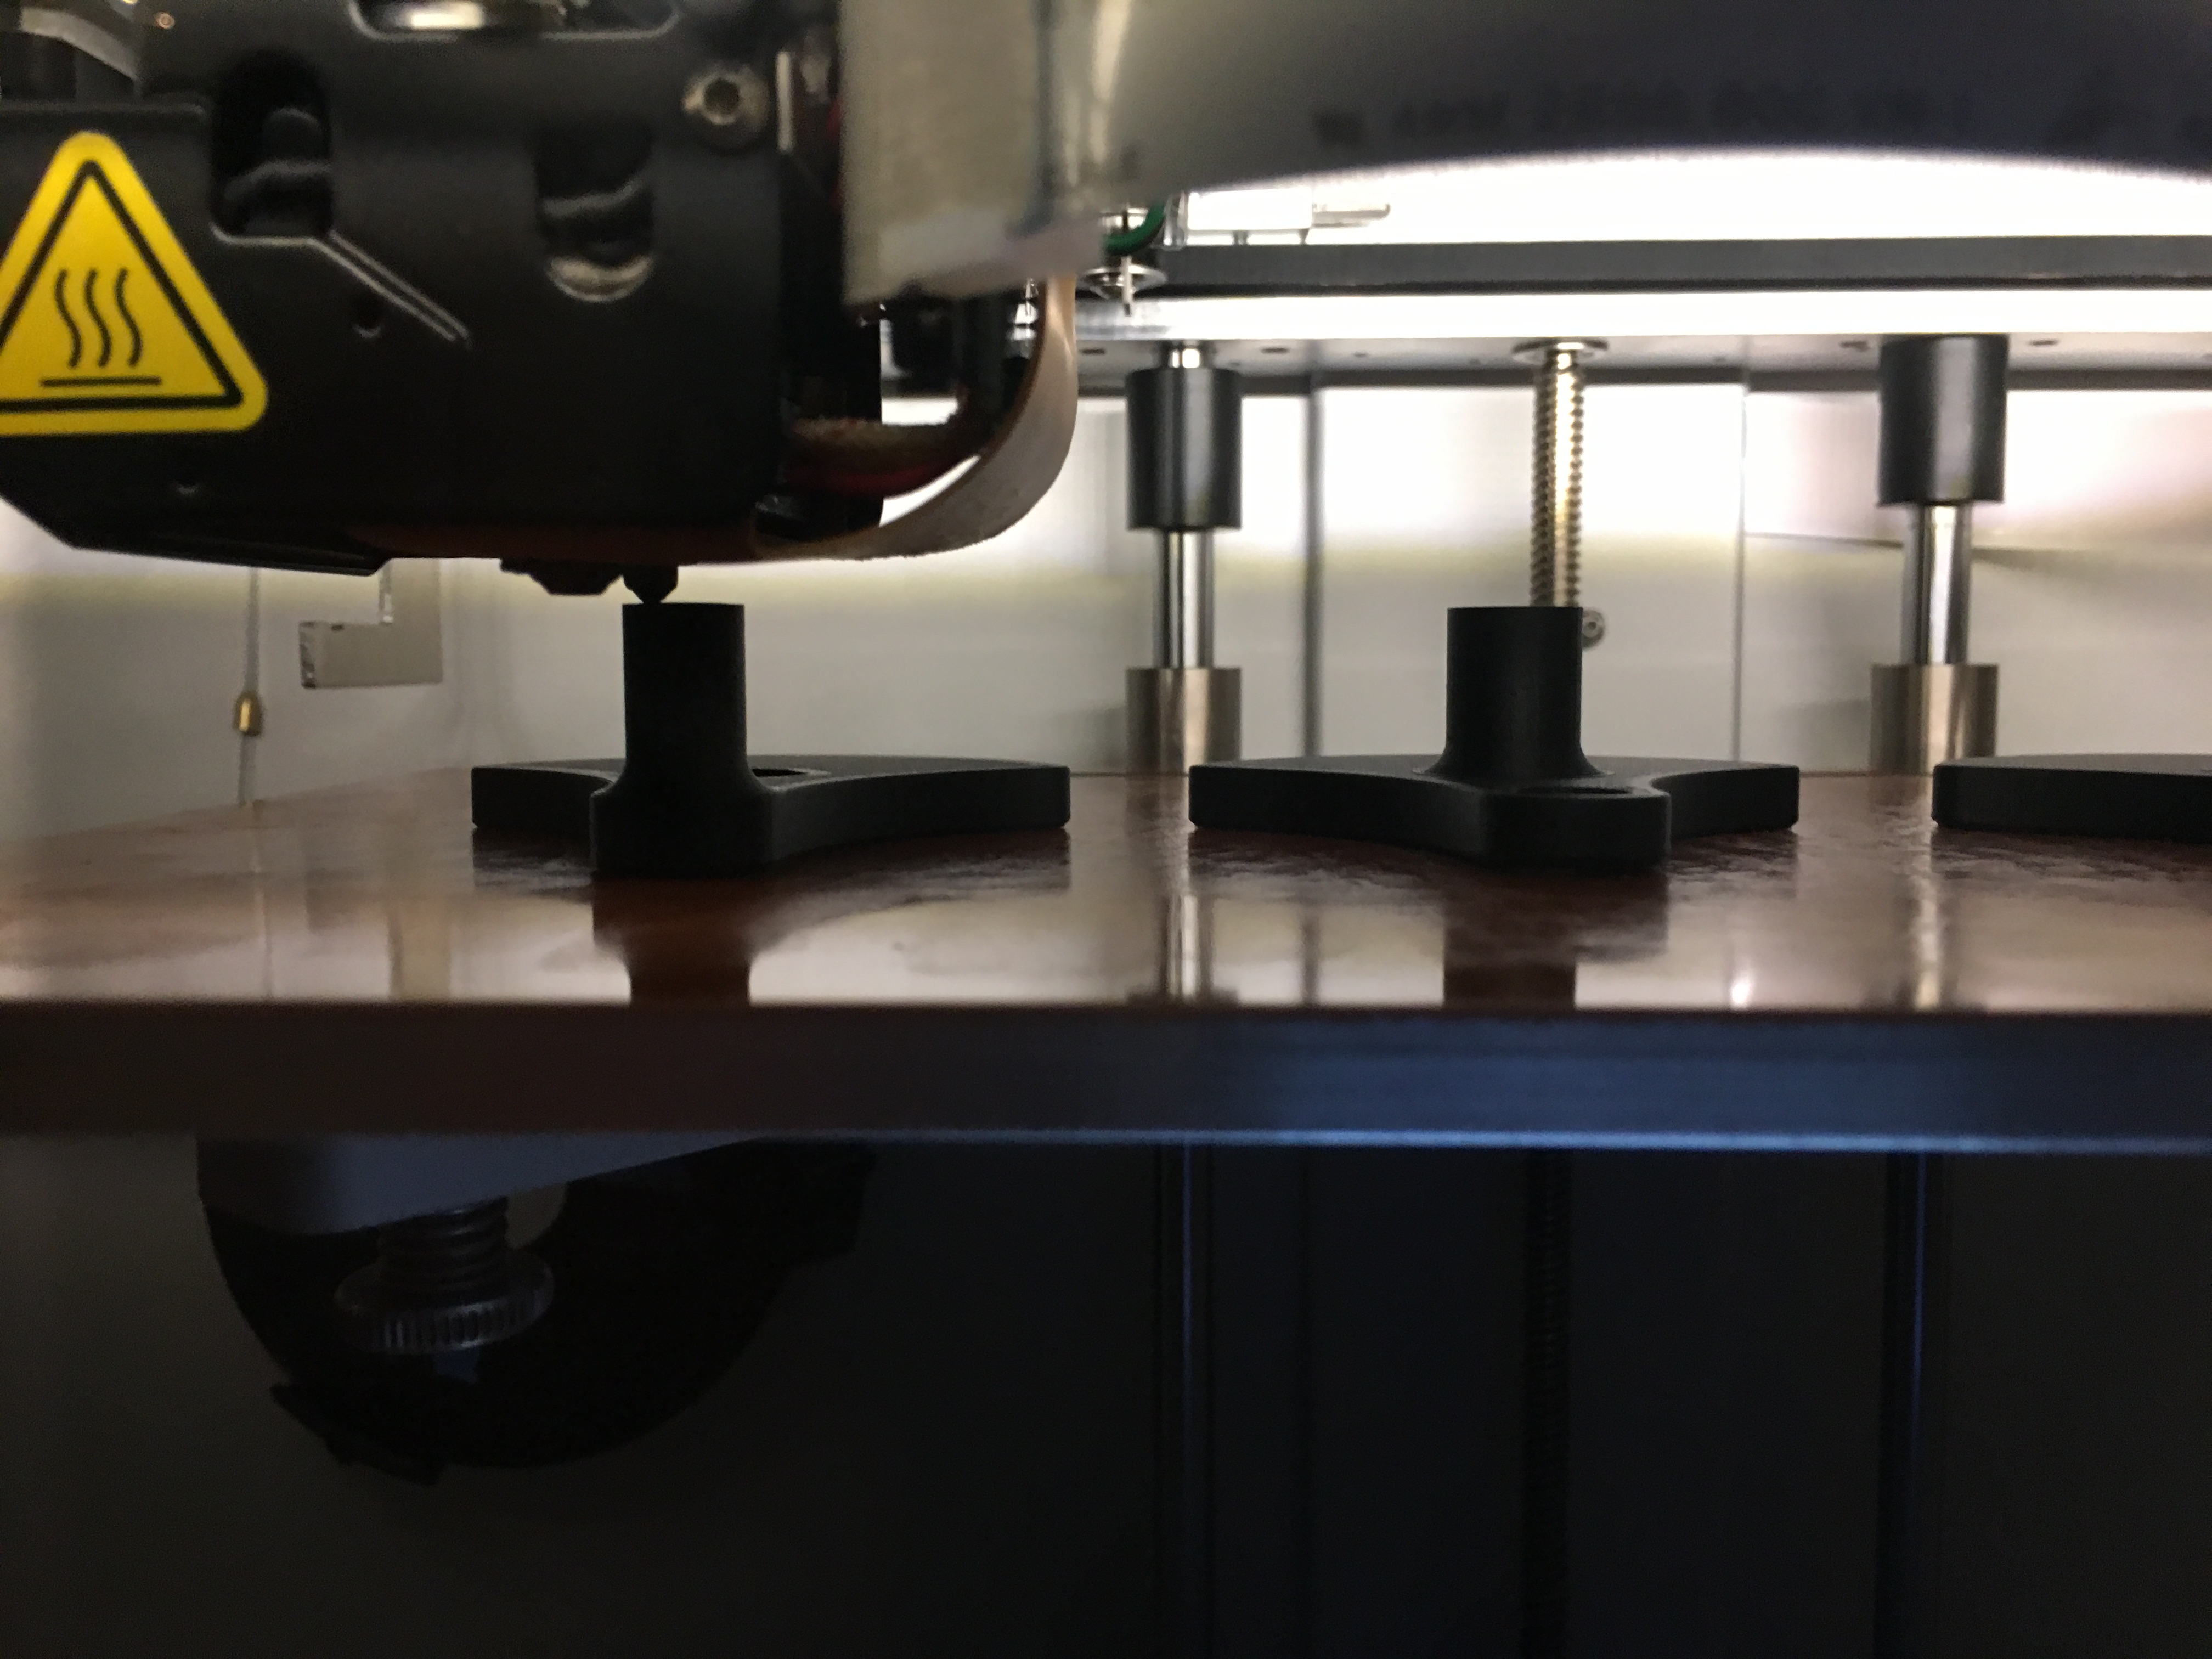
 then screwed everything together and began connecting the solenoids to our electrical circuit.
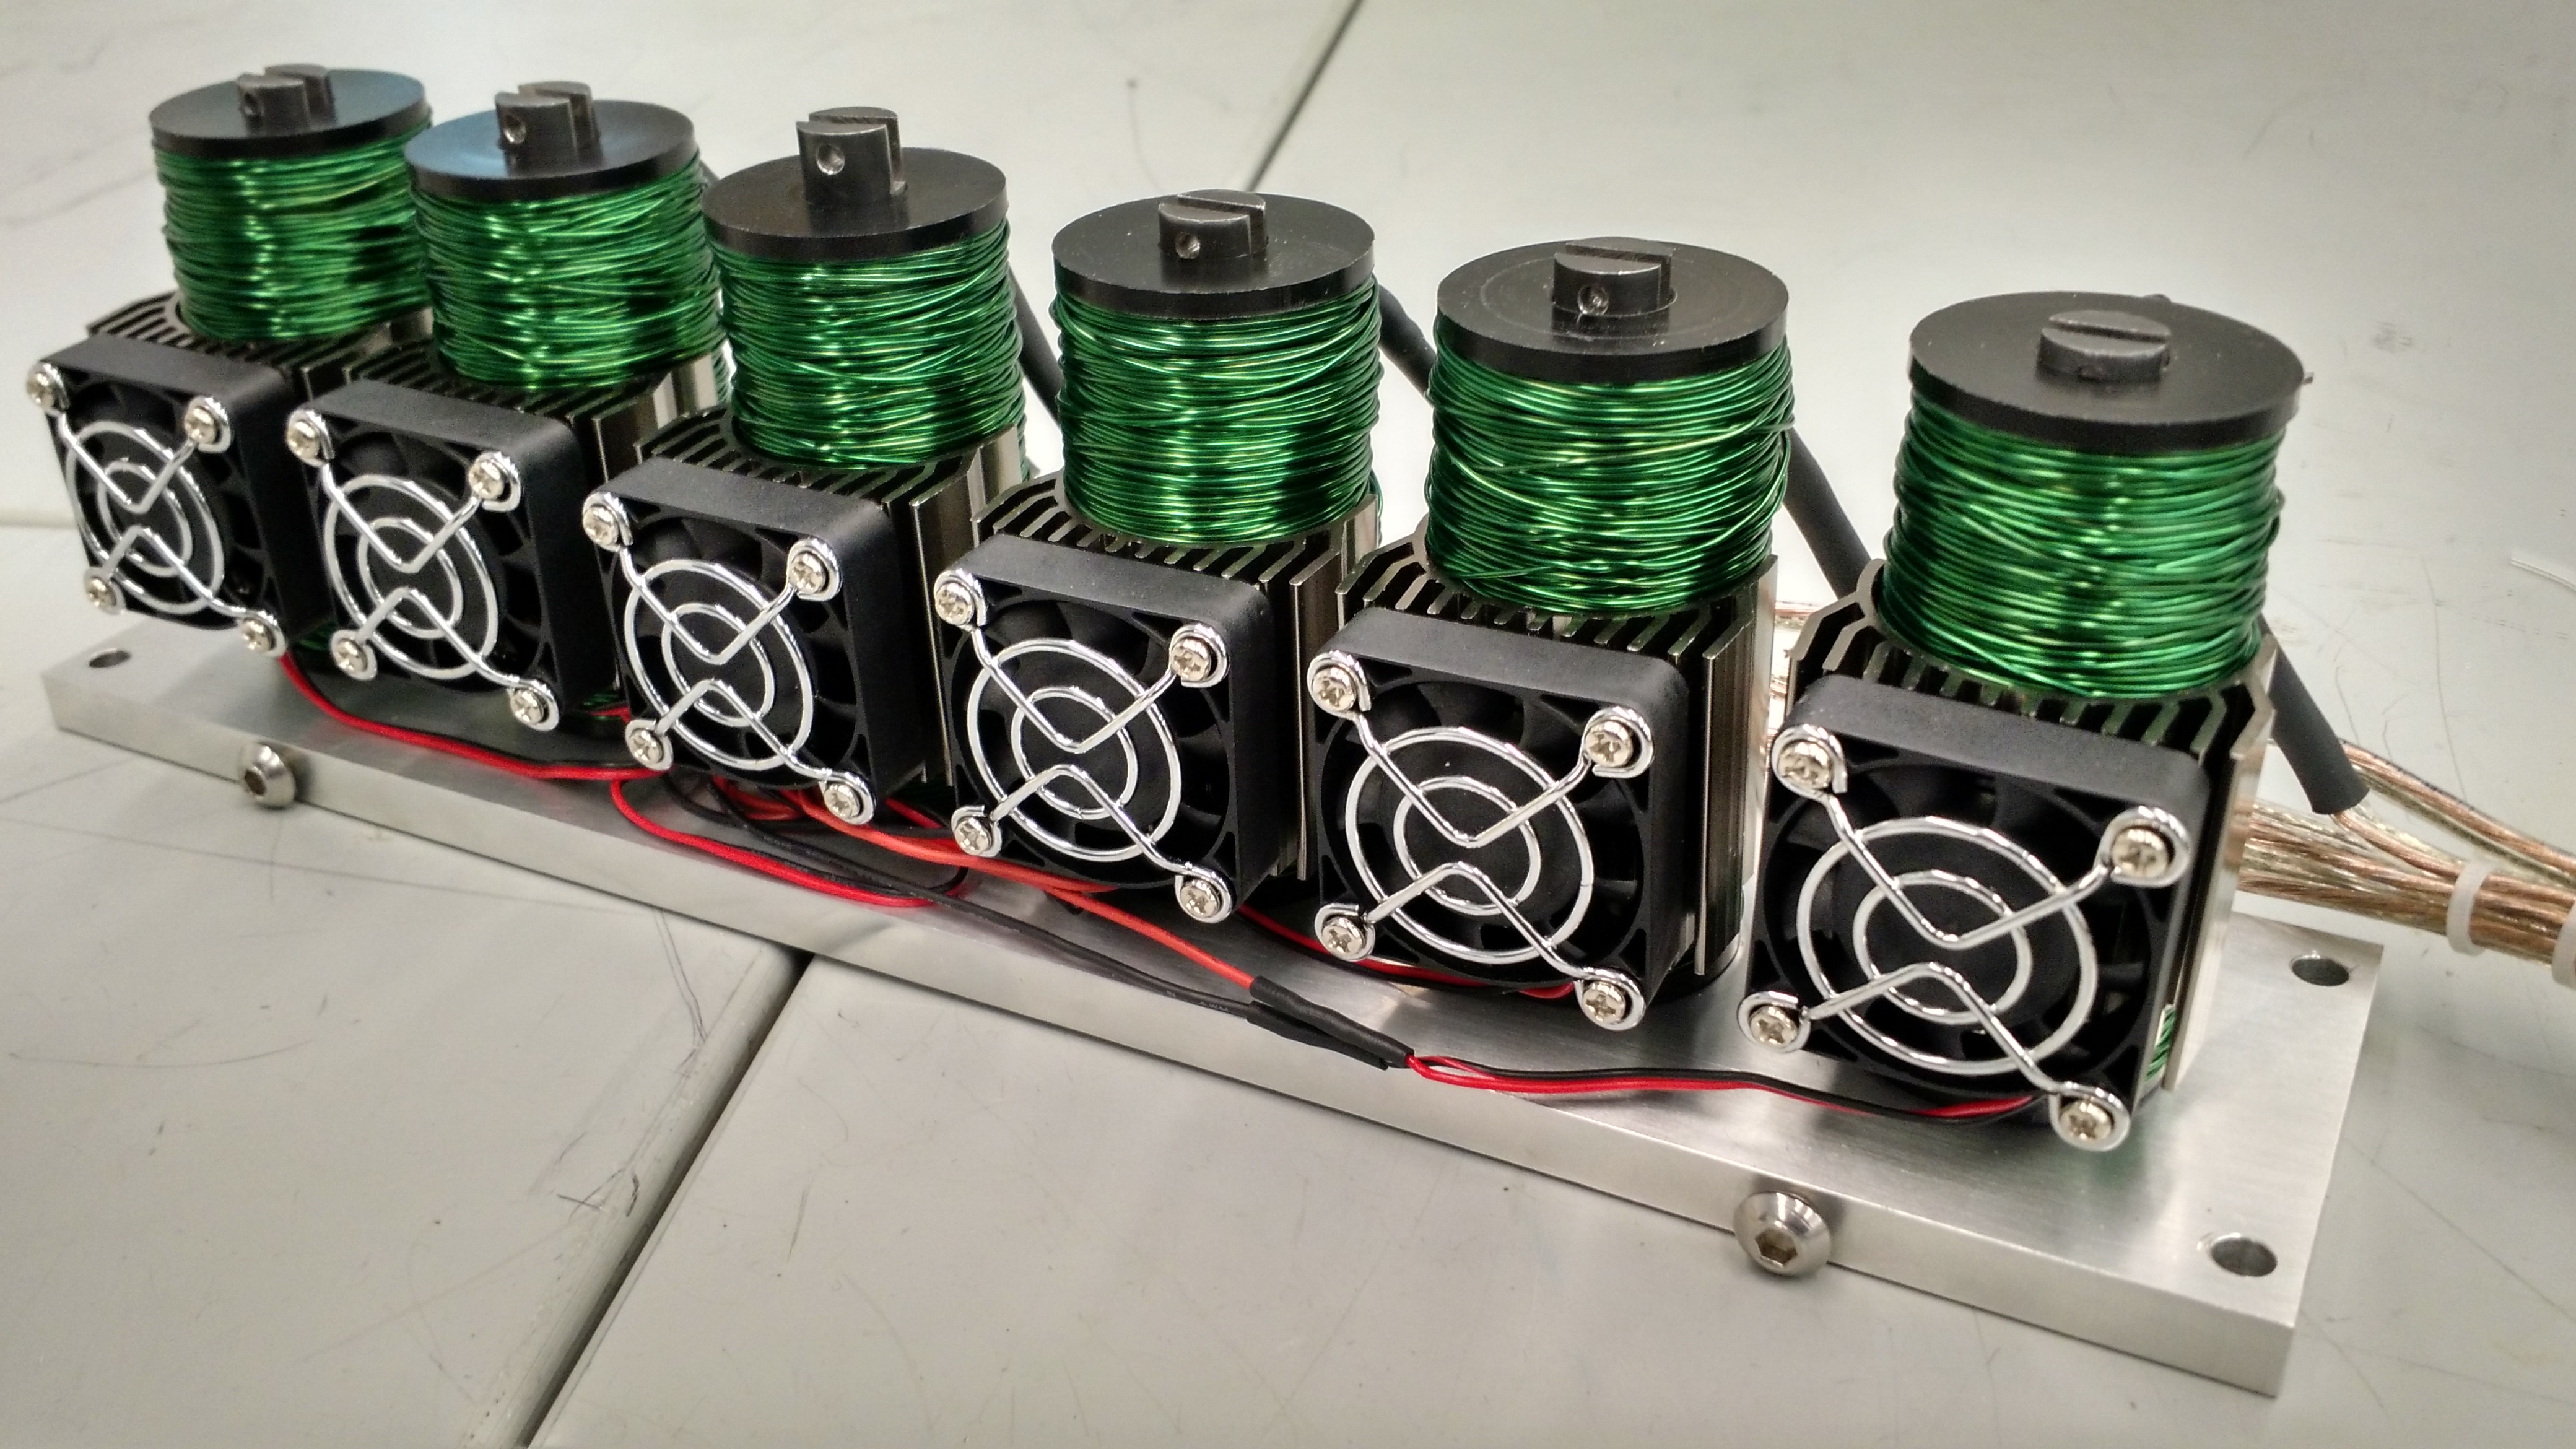 After assembly, the engine looks like this.
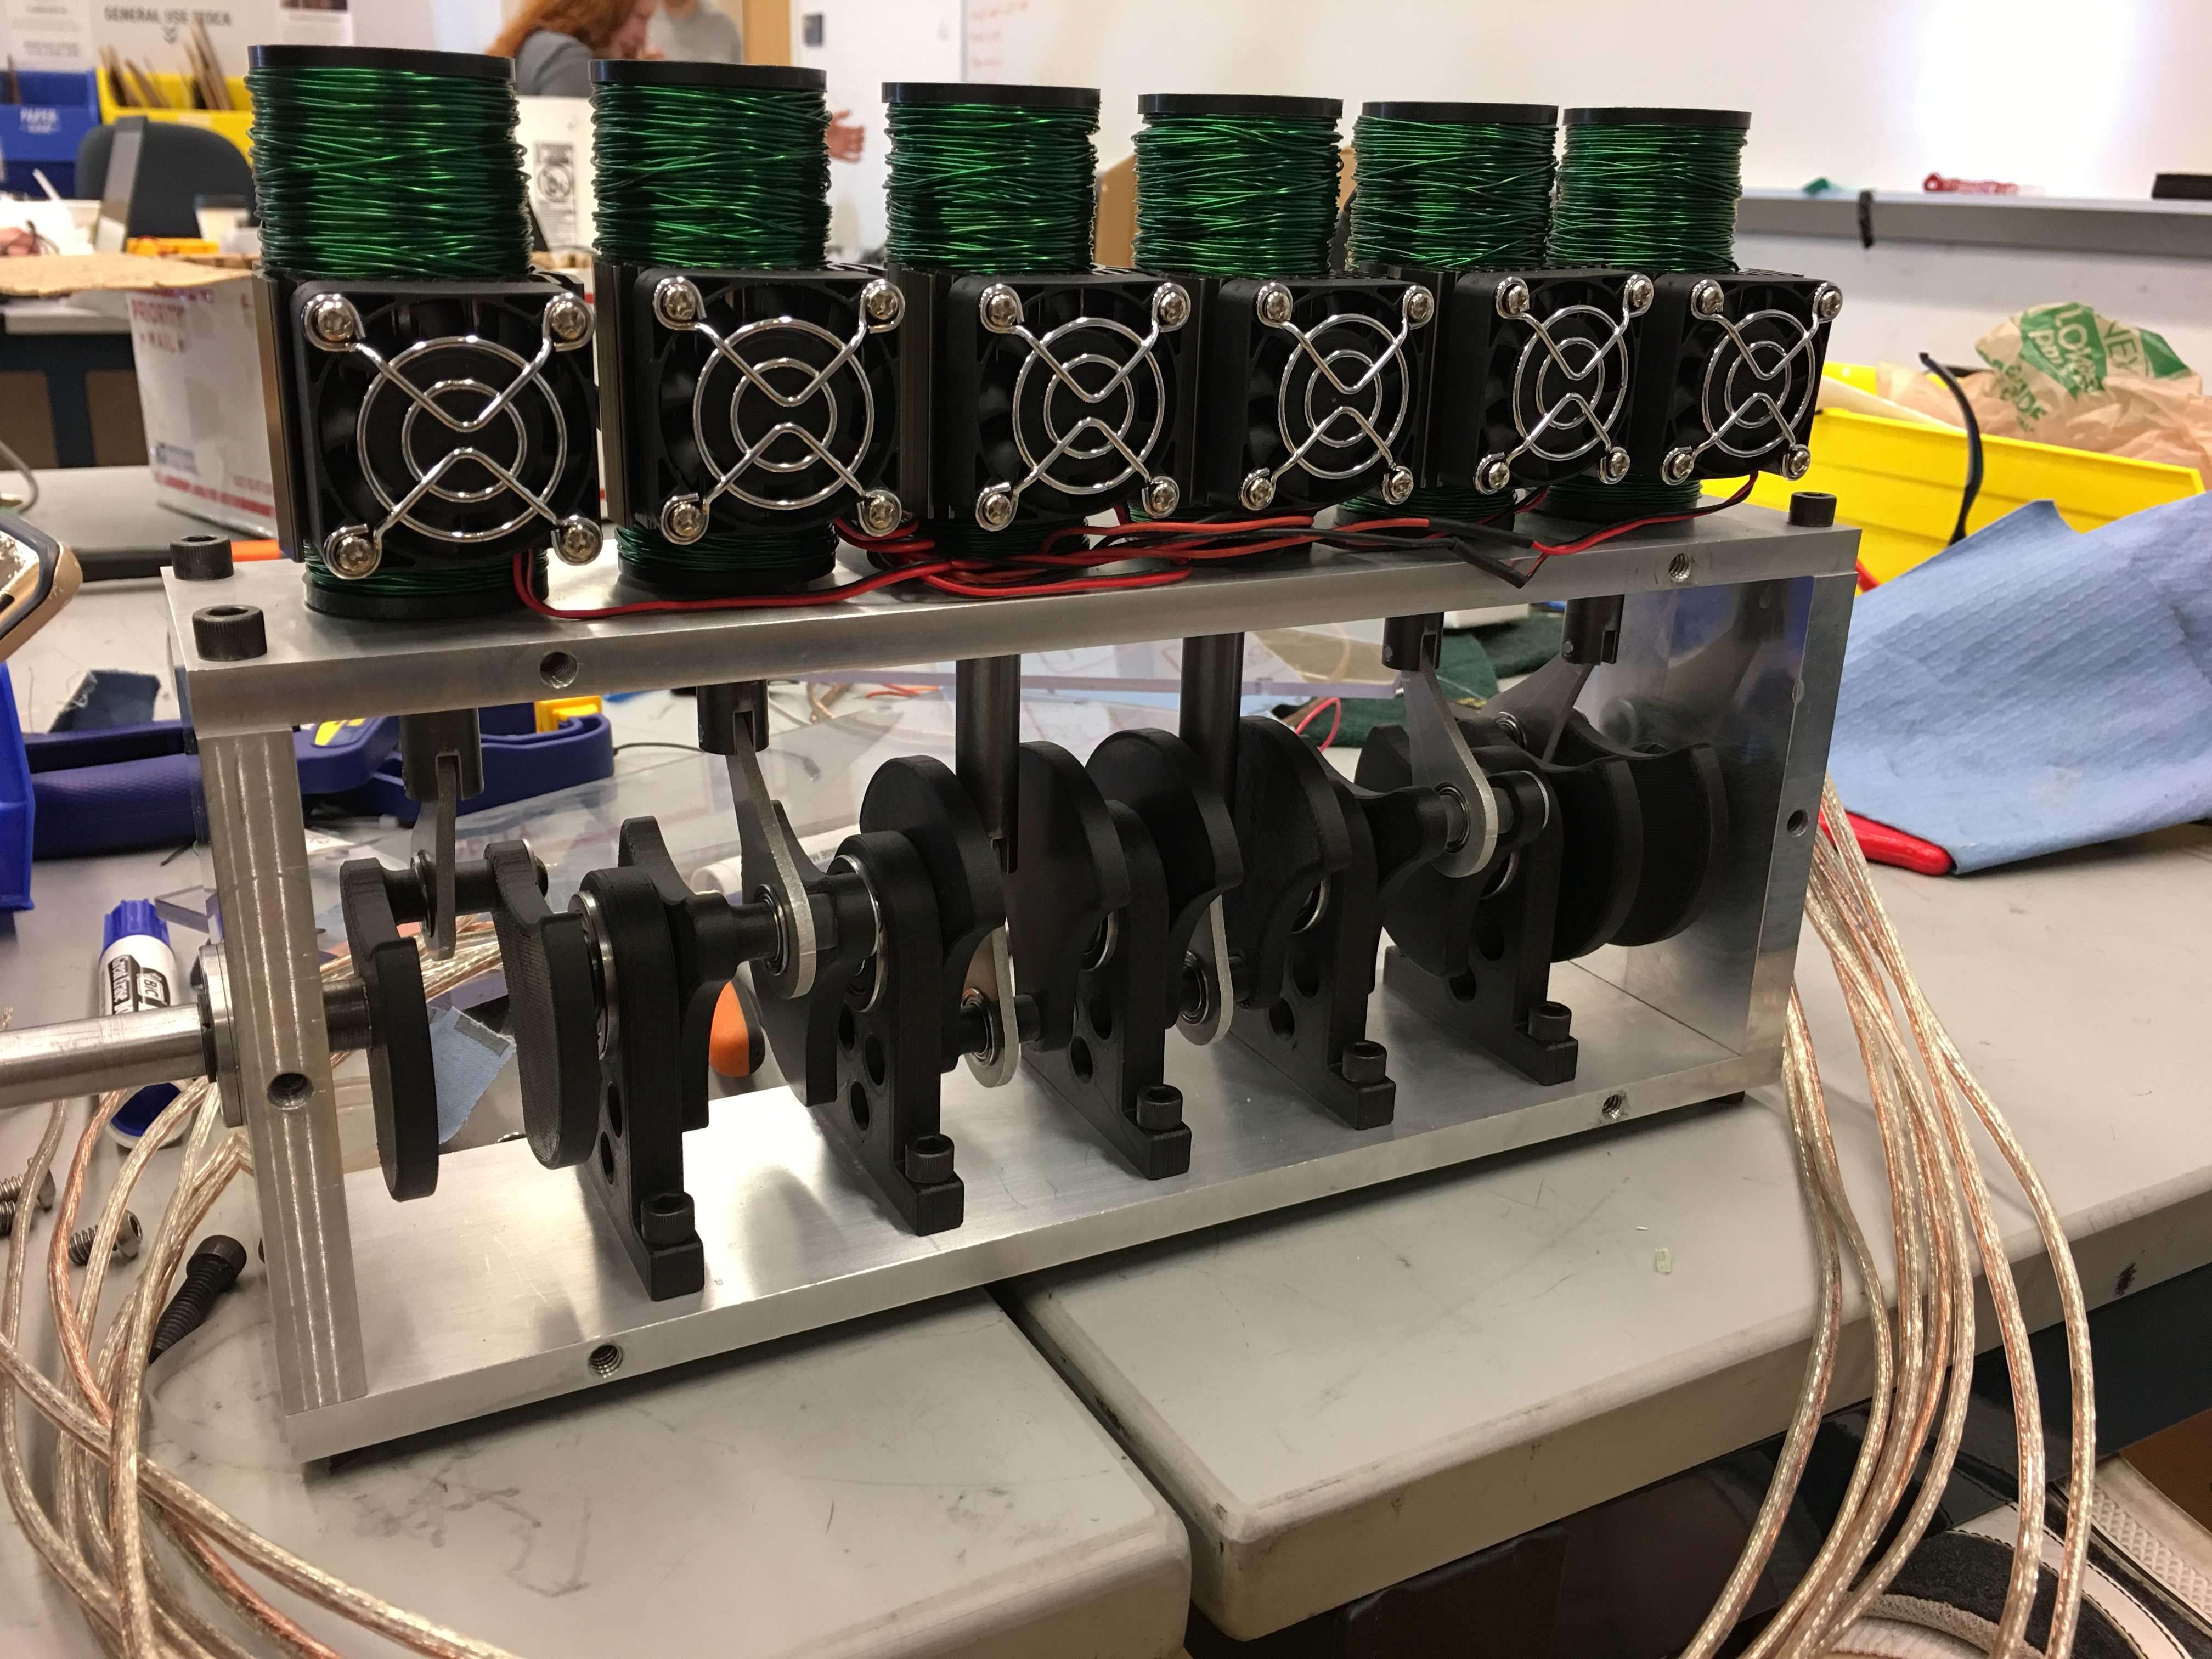 Post assembly, we detected too much friction and interaction between our pistons and the solenoid jugs, so we further reamed them out to ensure proper operation. The rest of sprint 4 was dedicated to troubleshooting and fine tuning.
Final Product
A system diagram describing the interconnectivity of our electrical, control, and physical system.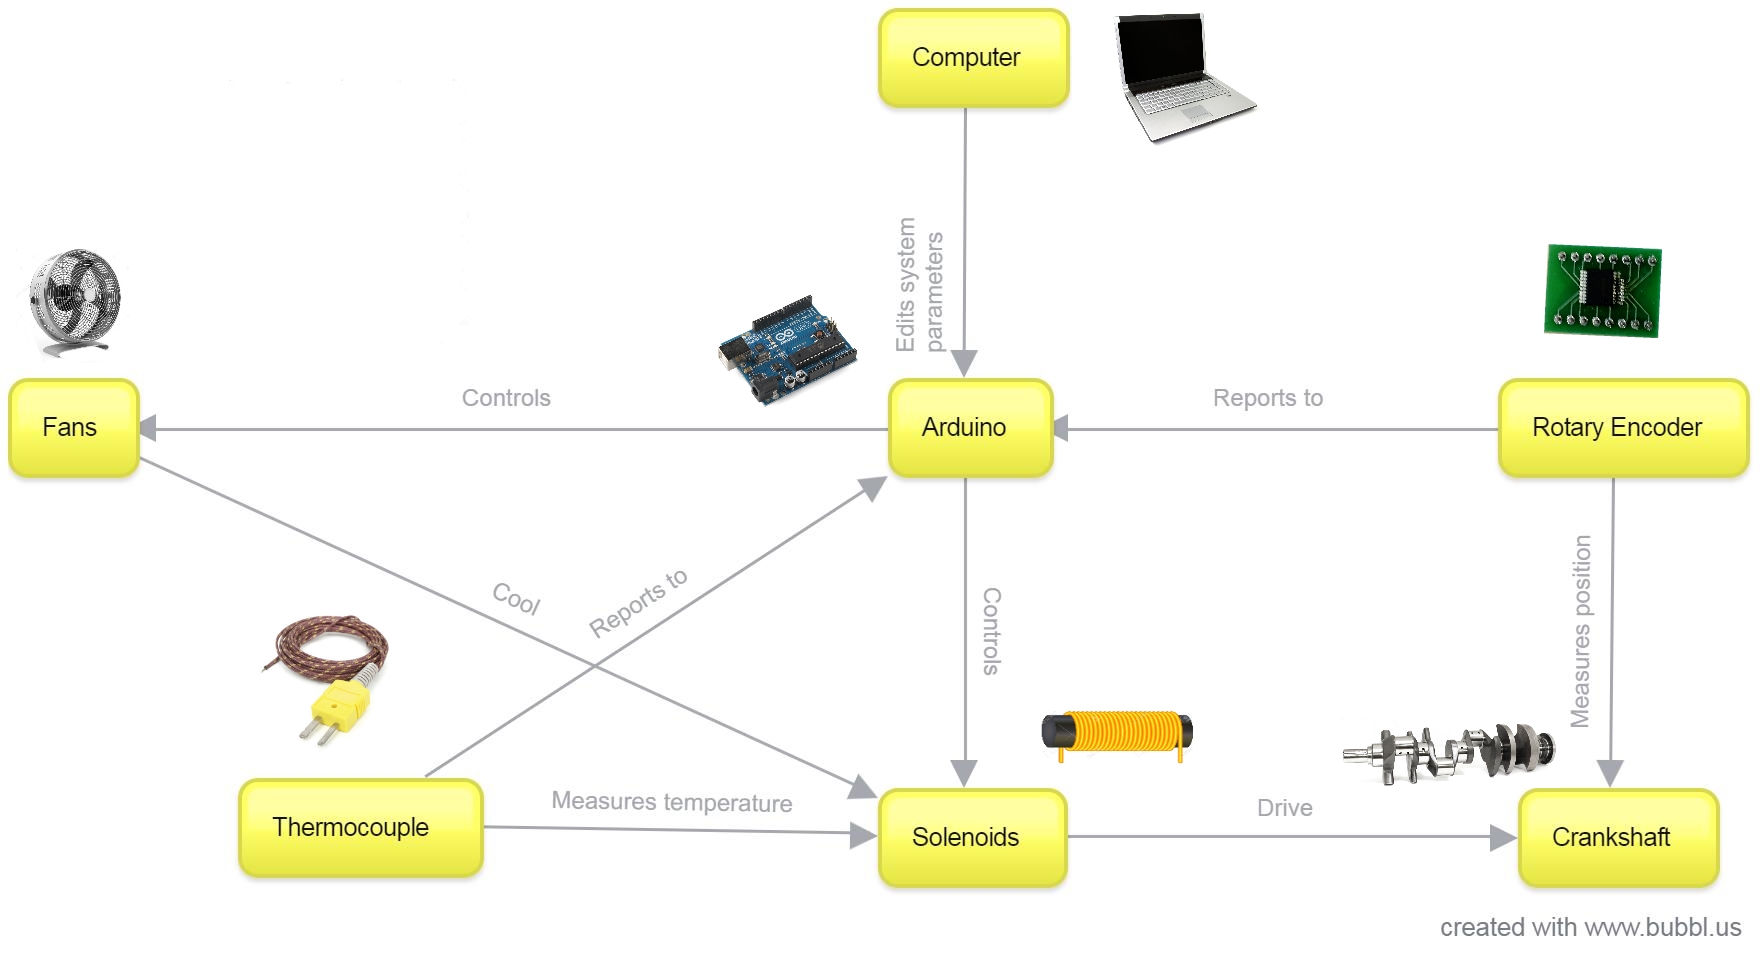
Blood, sweat, and tears. But she runs.