Description
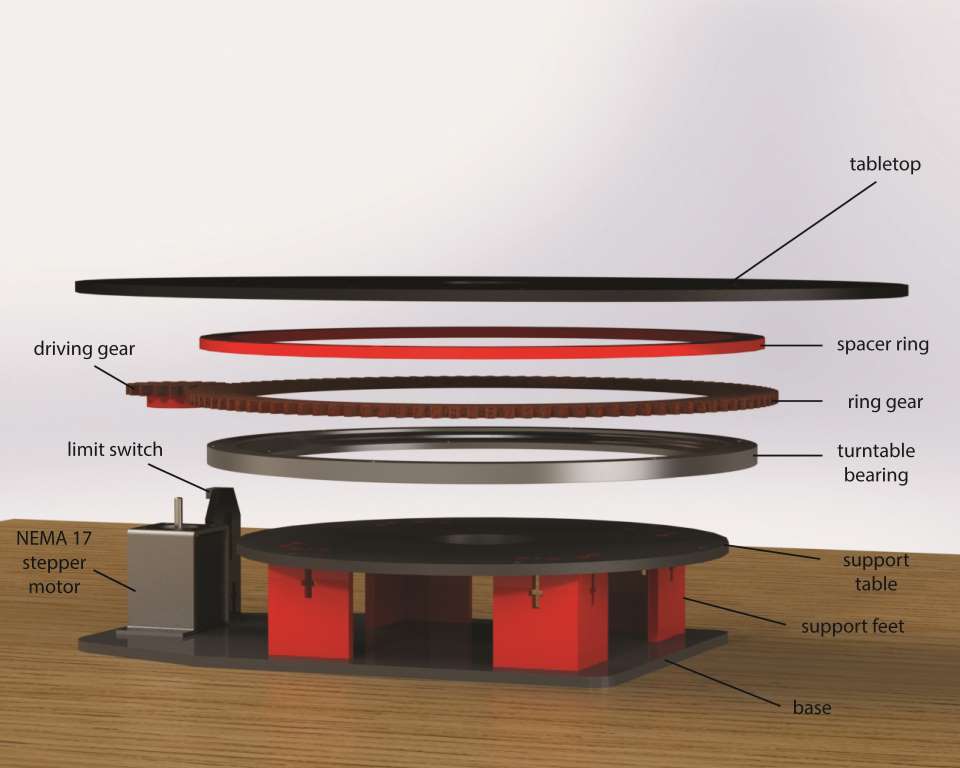
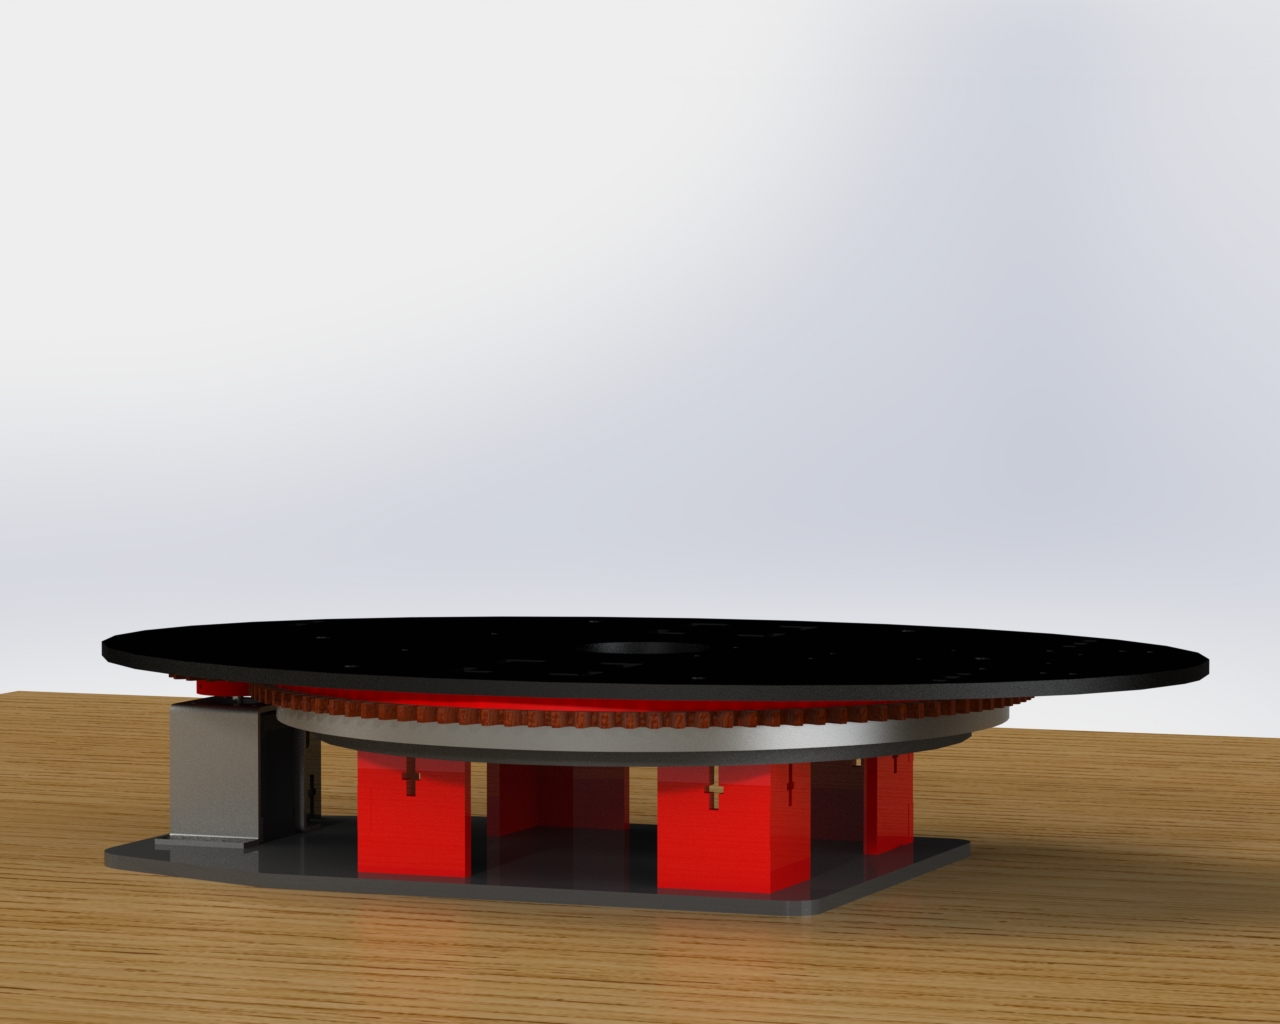
The card dealer can give each player around a table by rotating on a turntable base. The exploded view shows the different parts (without fasteners) that we used in order to achieve smooth rotation. Throughout this project we focused on creating designs for ease of assembly and fabrication. All of the fabrication for the turtable was 1/4" MDF that was lasercut in Olin's machine shop (with the exception of the sheet metal bracket that was sheared and bent) and a turntable bearing from McMaster. The overall design of the turntable portion of the card dealer hasn't changed much since the second iteration, which made it easy to transition into subsequent iterations because we would just swap out new structures on the tabletop. In the latest iteration the lasercut parts were spray painted red and black to round off our project with a polished product.
Starting from the bottom we have a base where the sheet metal bracket for the NEMA 17 motor (85 oz in and 0.64A) is mounted on. The support feet and the holder for the limit switch fit on with mortise and tenon joints. The feet were intentionally designed to allow for a large space underneath the turntable because we originally intended to house all of the electrical components in that cavity. However, we realized that the ribbon wire for the raspberry pi camera was too short and that the wires were twisting on each other (which could've also been resolved with a slip ring). So we moved them all up to the tabletop and to the middle of the mountain structure (not pictured here).
On the next layer we have the support table that is secured onto the feet with screw-reinforced mortise and tenon joints (which we talk about more on the Mountain Structure page). Both the support table and the tabletop have a large hole in the middle to allow for wires to pass through. The bottom of the turntable bearing is fastened to the support table with 8-32 screws (our standardized screw size).
Moving up some more we have the turntable bearing, the ring gear, spacer ring, and the table top. These are all fastened together by 1/4-20 screws going into threaded holes in the turntable bearing. It was important to get the alignment of the holes for the 1/4-20s rather precise otherwise the ring gear and the driving gear would grind. In retrospect it would've been helpful to have slots in the base where the motor bracket was mounted to fine-tune the position of the gears. The driving gear is attached to the stepper motor with a 3D printed hub and a set screw. Both the ring gear and the driving gear were lasercut 1/4" MDF like most of the structure, but they were not painted to avoid another reason for grinding. The spacer ring was made in the latest iteration to avoid having to countersink screw holes on the bottom of the tabletop to prevent interference of the screw heads on the driving gear.
Things to keep in mind
- Make slots in parts where motors would be mounted to fine-tune its position
- Be mindful of interfering components especially screws because they're easy to forget
- Make sure that the MDF you are lasercutting is flat to avoid warped pieces
- When designing, keep in mind that the wires can't magically pass through your material unless you put holes in them
- Avoid painting faces of parts that would be moving against another (i.e. gears)