
Description
The card advancer is the backbone of our card dealer and its job is to precisely push one card out at a time. Throughout this project we focused on creating designs for ease of assembly and fabrication. The card advancer was made from 1/4" MDF that was lasercut in Olin's machine shop, off-the-shelf items from McMaster, and fastened all together with 8-32 screws and square nuts. The overall design of the card advancer has been through many modifications through four iterations. In our final iteration the lasercut parts were spray painted red and black for a slicker aesthetic.
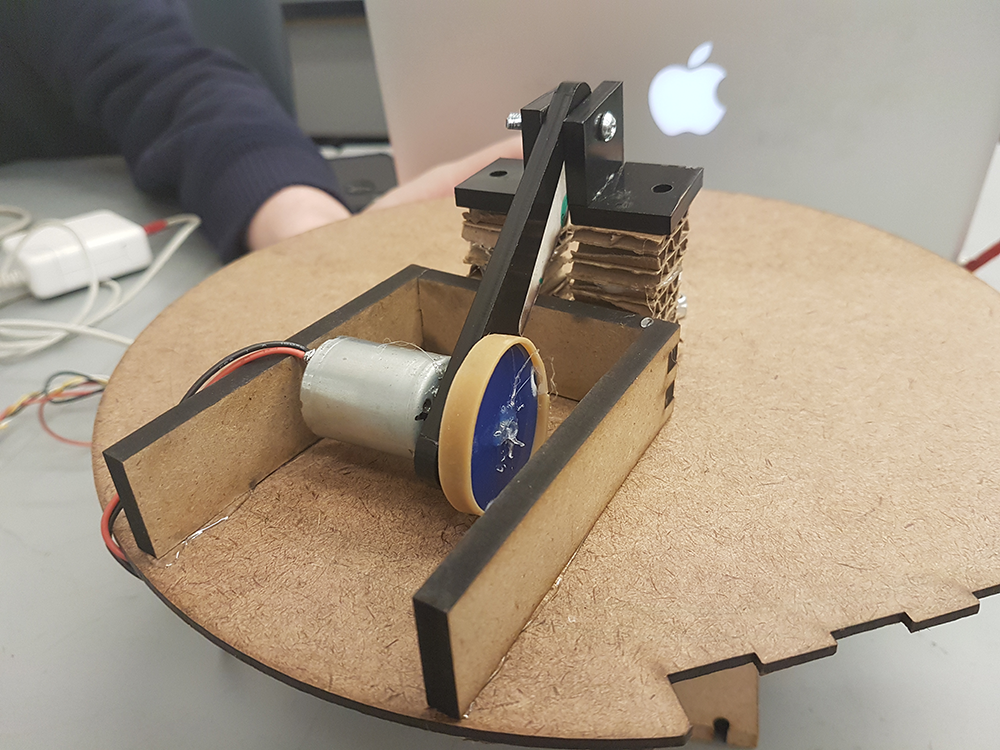
To be frank, in the first iteration most of it was hot glued together as you can probably tell from the picture above. But the purpose of the first iteration was to try out some ideas and see which ones might stick. Our first idea was to use a DC motor to shoot the cards out with the help of a rubberband on a wheel. The DC motor would move down with gravity as the deck of cards got smaller. However, this configuration wouldn't scale well if we wanted to increase to 4-6 decks of cards and the cards were flipping over.
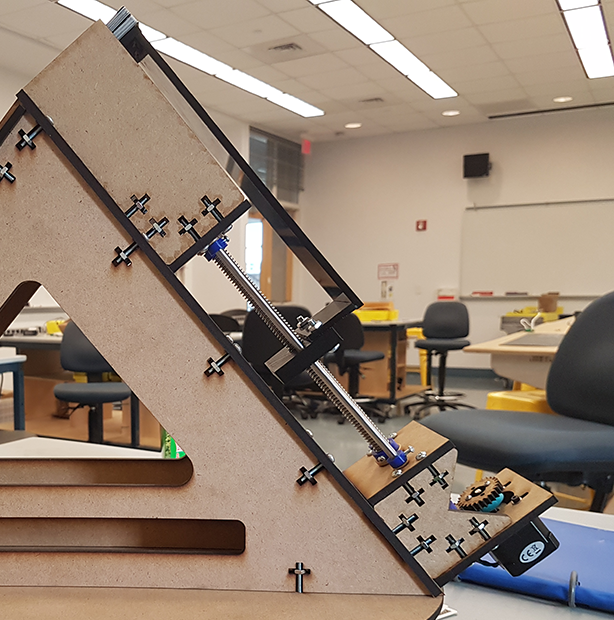
In the second iteration we tried to be more specific in defining what we wanted to design. Our goals were that the mechanism had to separate and deal individual cards from the deck, not flip the cards over, and had to hold as many as 6 decks of cards at a time, a pile known as a “shoe” which is something that you would find in a casino. This lead to the decision to use gravity to index cards from the shoe, which is how we came up with the 'mountain' structure and you can find more about that on the Mountain Structure page. The gussets and shaft support plates were lasercut out of 1/4" MDF and wiring pathways were added for the motor. In the picture above there is a NEMA 17 stepper motor located on the bottom right. It drives a 1/2-10 lead screw that is held stationary along axis of slope with shaft collars. On the lead screw is a 3D printed holder for a lead nut guided by two linear shafts. The holder is connected to a pusher that advances the shoe over the ledge of the ramp. As cards are pushed over, they fall down the ramp and get dealt out to the player. For us the slide was the perfect solution to prevent the cards from flipping over. There was some alignment issues with the lead screw system because all of the gussets and support pieces were surface mounts and the MDF was slightly warped when it was lasercut. We also realized that the structure was very tall and that the length of the side of the card advancer could be shorter and still accomodate 6 decks of cards. Another observation was that the bottom of the cards were experiencing friction with the MDF base plate because when we reversed the card advancer, the tops of the cards would move back but the bottoms stayed in the same position. The type of cards and the condition they were in also played a large role. So warped cards had a tendency to get pushed out inconsistently and dirty cards would stick and two cards would get dealt.
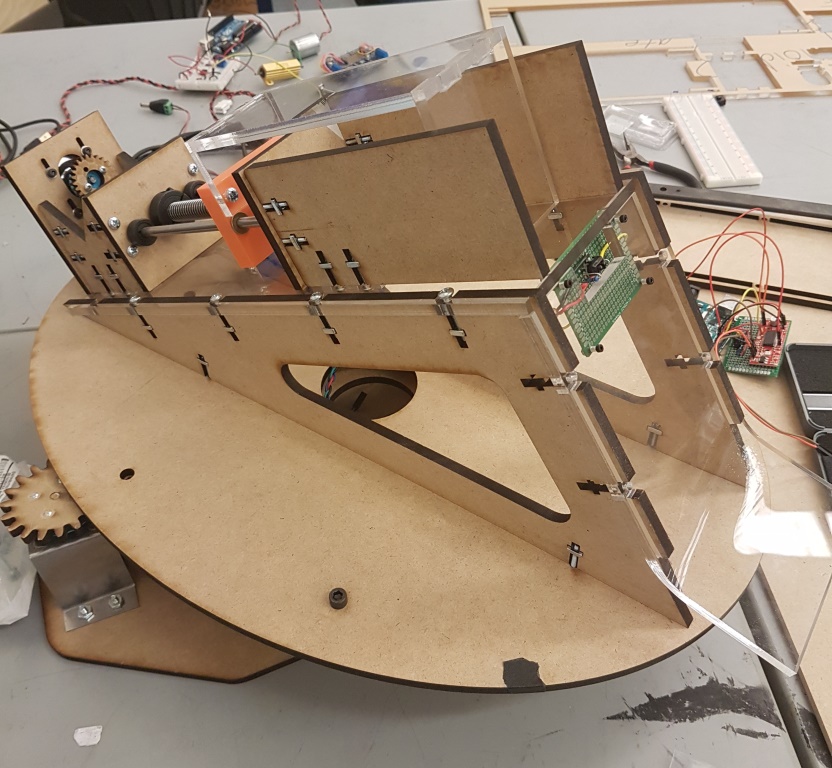
In the third iteration we focused on shortening the length of the card advancer while still allowing for 6 decks of cards to be stored. In the picture above you can see that the height of the structure was also reduced and you can find more about that on the Mountain Structure page. This time the base plate was cut out of acrylic to reduce the friction with the bottom of the cards and it worked pretty well. To address the issue of reliably dealing one card at a time, an IR reflectance sensor was embedded in the ramp to allow the robot to recognize when a card has been dealt (you can find more about that on the IR Reflectance Sensors page). The gussets holding the support plates for the lead screw and linear shafts were made with tenon joints this time to fit into the base plate for better stability. However, the support plates are still surface mounts so that we could adjust them to fine-tune the alignment of the lead screw and linear shafts. The friction was greatly reduced, but there would still be an occassional 'bump' of friction that you could feel for every turn of the lead screw. However, we made the assumption that our stepper motor could overcome this friction because it's holding torque was 63 oz-in, which we thought was sufficient. Unfortunately, it did occasionally stall because we were taking such small steps (about 4 steps per attempt to advance a card). On top of that we forgot to check the current rating on that stepper motor, which was 2A, and check it with our Adafruit Arduino Motorshield v2, which could only handle 1.2A, for compatibility. So both our stepper motor and our motorshield failed and needed to be replaced.
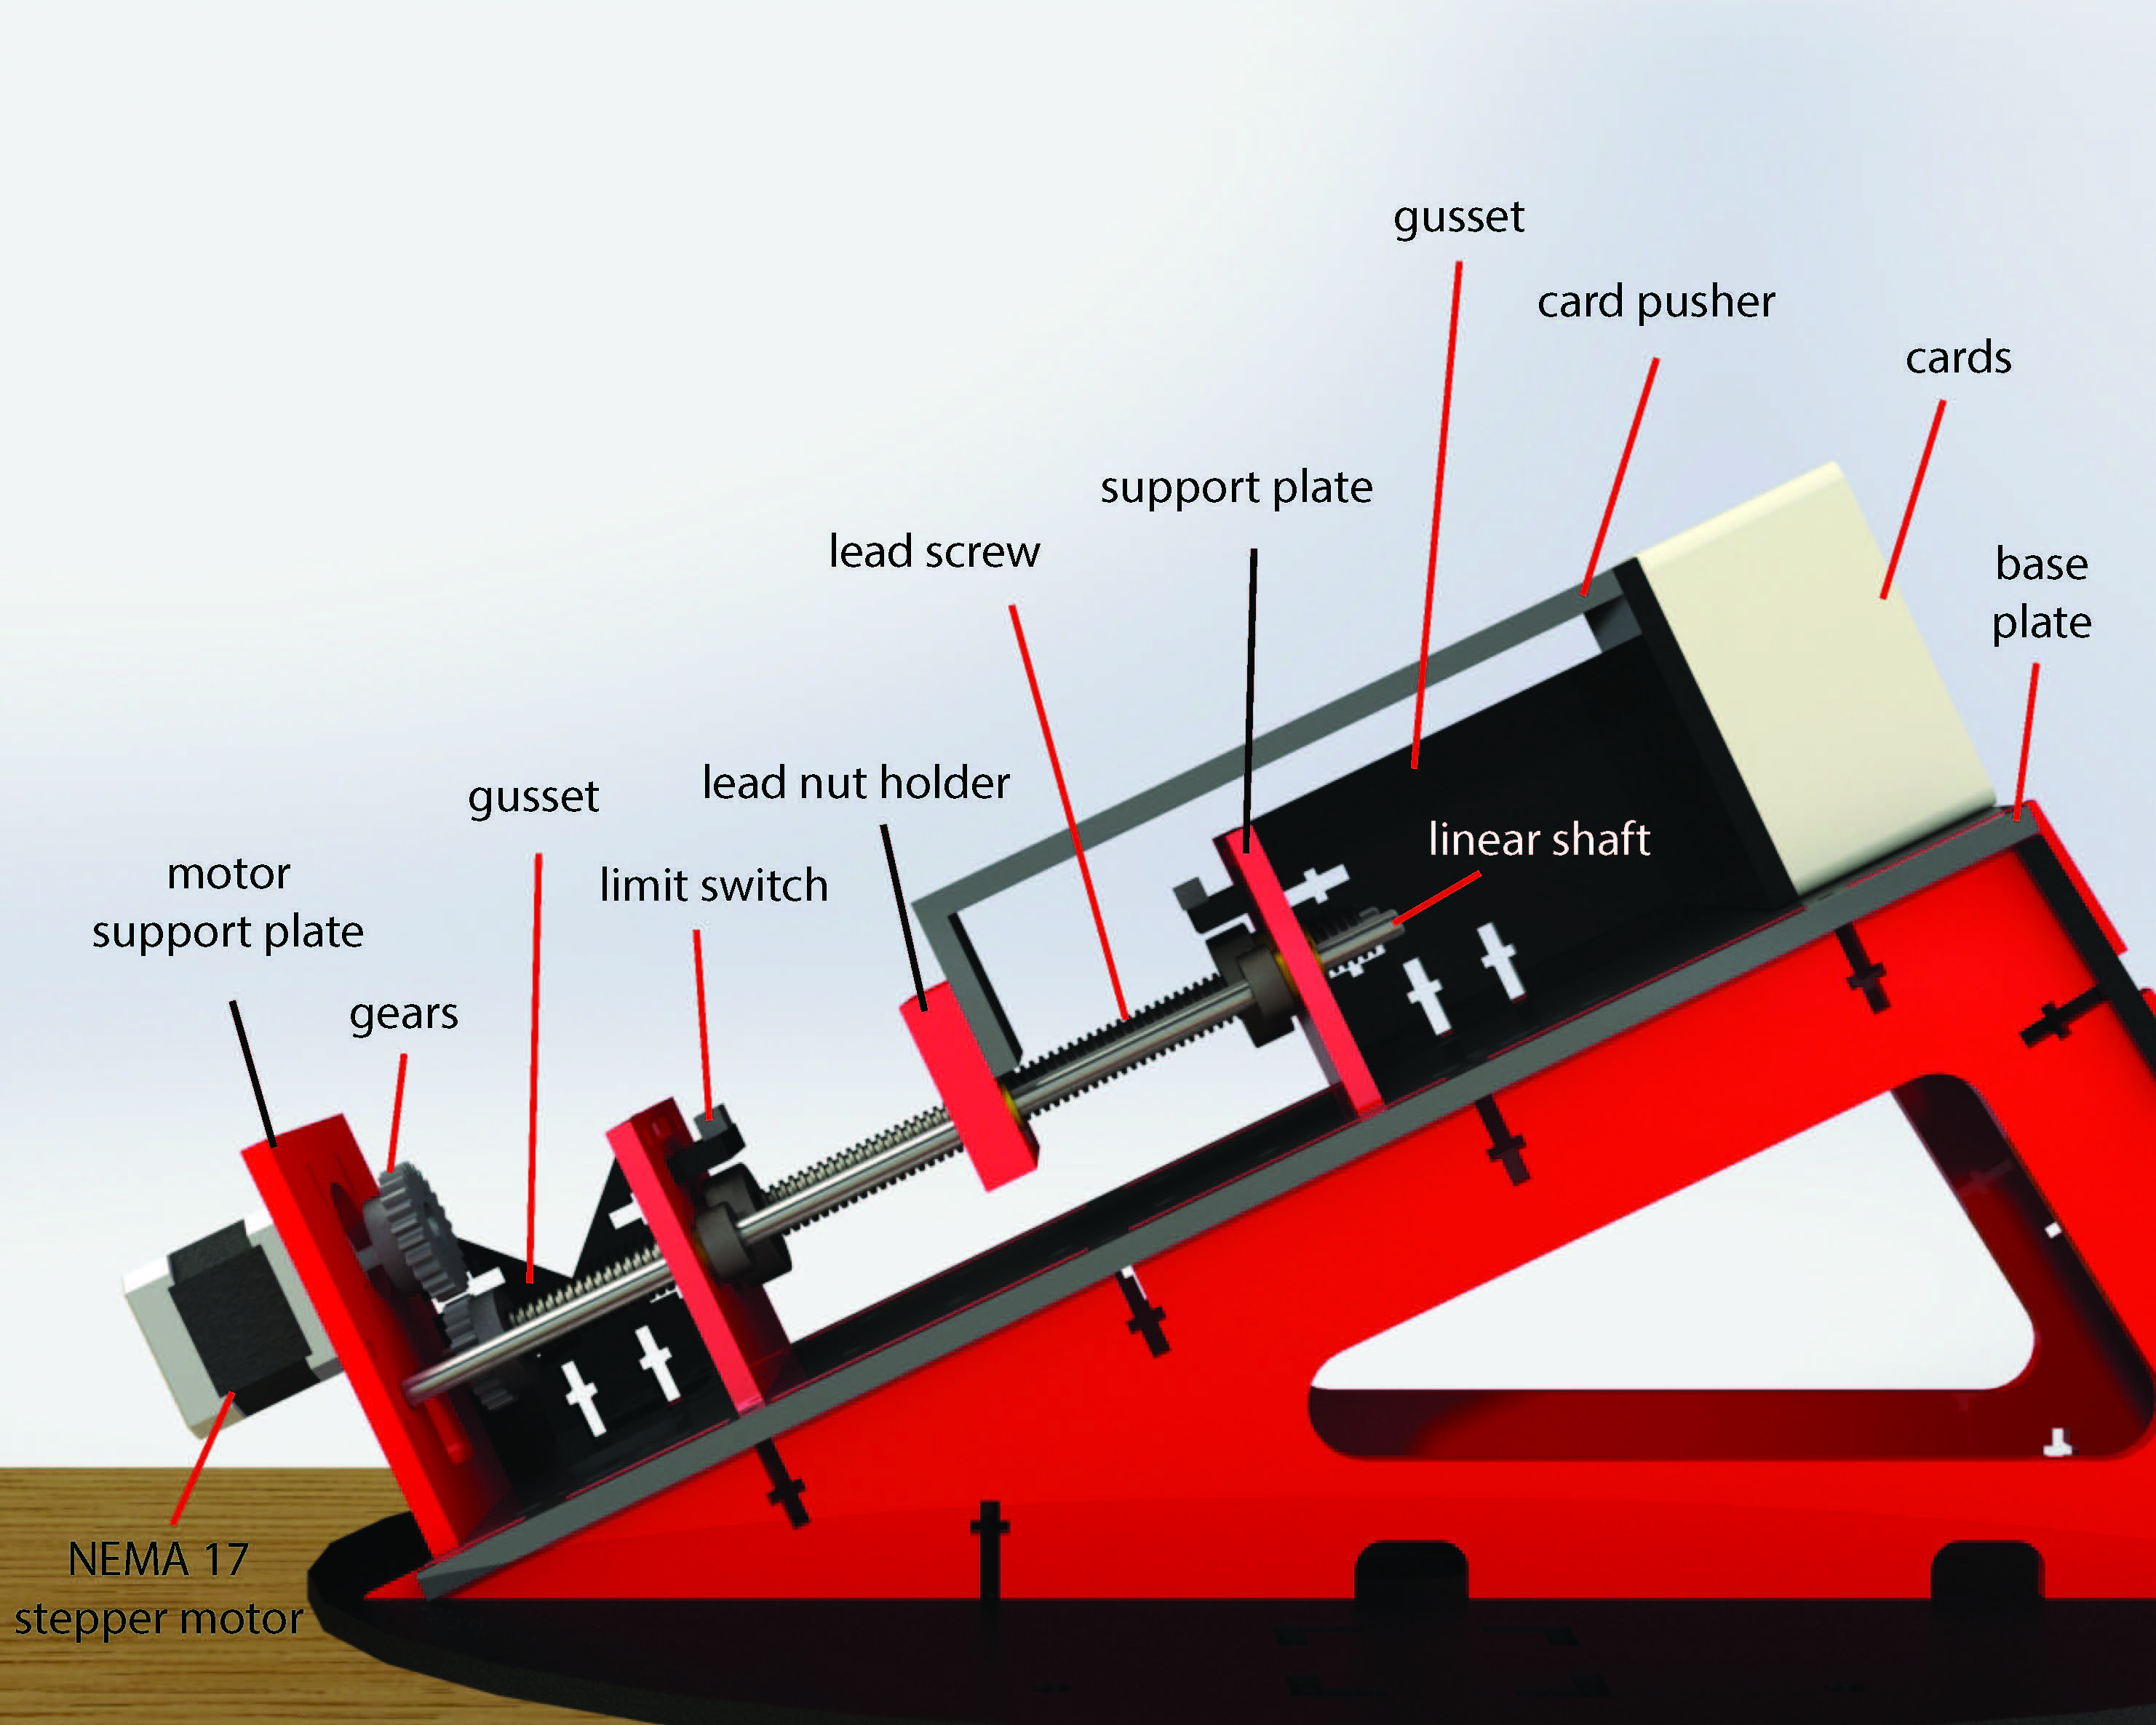
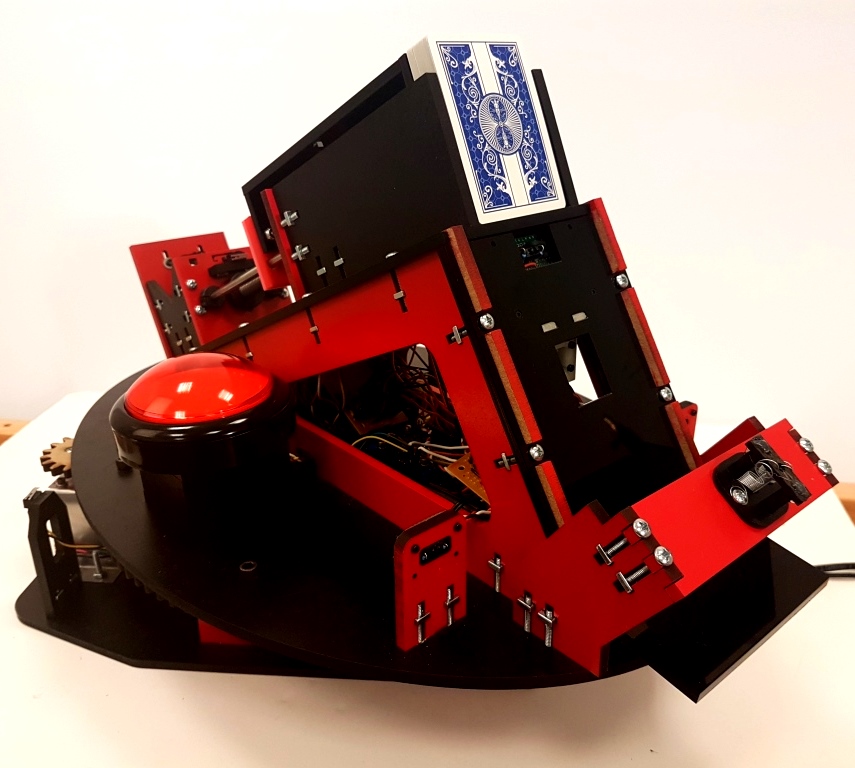
For the latest iteration the general structure of the card advancer didn't change much. We added limit switches to the extremes that the lead nut holder could travel so that we could reset it's position at the end of a game and prevent it from driving into the support plates. We bought a new NEMA 17 stepper motor with a current rating of 1.2A and a holding torque of 44 oz-in. We also introduced some compliance into the lead screw system so that there was little to no friction. We could have been bending the linear shafts in the previous iterations so we removed the bushings for the linear shafts in the lead nut holder. We also didn't fasten on the card pusher too tightly because now the lead nut holder can rock side to side a little without the bushings. So if the card pusher was screwed on tightly, the bottom of it would want to bite into the base plate. It worked out quite beautifully because the bottom of the card pusher rests on the base plate and there is no side loading so it still remains square. Combined with the IR reflectance sensor on the slide, we were able to deal one card at a time with ~95% consistency. As we were running our card dealer we also realized that the gears lasercut out of MDF were very loud (it was probably loude before but we were most likely distracted by the fact that it was working) so we considered plastic options. The gears weren't grinding, but rather rattling and it resonanted through the structure. So we lasercut some acrylic gears and it seems a bit better, but in the future we would want to try nylon gears. We wanted to get really nice cards for our last iteration because as we have learned in previous ones, the cards matter. So we each personally bought a deck of Black Ghost Second Edition cards to use in our demo.
Things to keep in mind
- check the current rating on your motors to ensure that it's compatible with your motor controller
- Design for modularity so that subsystems can be taken off and tested individually without interfering other components.
- Make slots in parts where motors would be mounted to fine-tune its position
- When designing, keep in mind that the wires can't magically pass through your material unless you put holes in them
- Make sure that the MDF you are lasercutting is flat to avoid warped pieces
- Be mindful of shaft alignments, either be very precise or introduce some compliance
- Avoid painting faces of parts that would be moving against another (i.e. gears)
- The cards matter so at least use new decks