Kinnect
  • Home
  • About
  • Mechanical
  • Software
  • Electrical
  • The Process
  • THE TEAM

The Process

Final Sprint: The Finish in Sight

12/14/2015

0 Comments

 
Goals and Focuses
  • Finalize installment location
  • Finish attachment structures
  • Add more complexity to the system
  • Create polished gears, pulleys, and backboards
  • Integration of all mechanical and electrical components
  • Solve internet connection issue 
  • Add a Twitter API for more variety
Achievements and Processes
Picture
We met with facilities to finalize our installation location.
        Our final meeting with facilities gave us the exact location where we would install Kinnect, which is in the hallway next to the mailing room. The location has a lot of daily traffic and thus provides enough attention to Kinnect. On the other hand, since our installation would be hanging on the wall, we would not obstruct the traffic. However, because there is no ethernet connection within reachable distance, we decided to use a WiFi shield for our Raspberry Pi.

​We made a French cleat mounting system to secure the sculpture onto the wall.
        We decided to use a French cleat mounting system, because it is minimally intrusive and also easily and quickly attachable and removable.

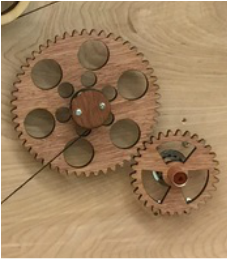
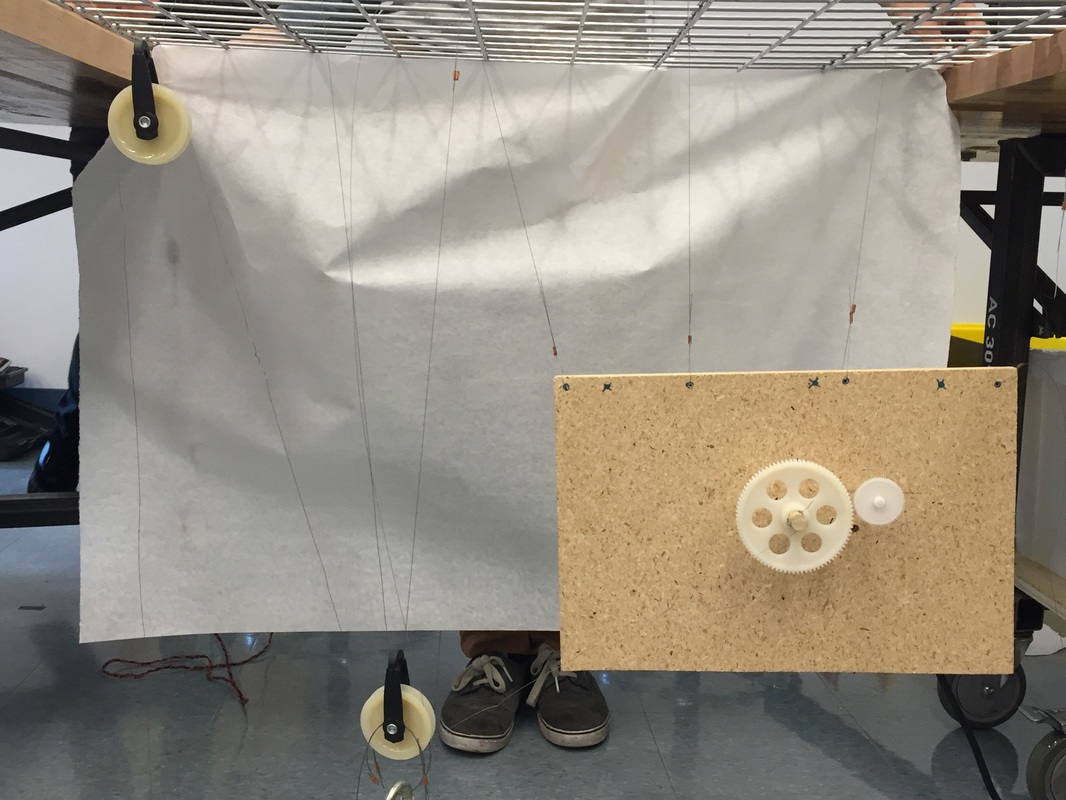
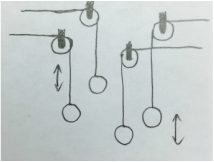
​Added extra movement to the system for aesthetics

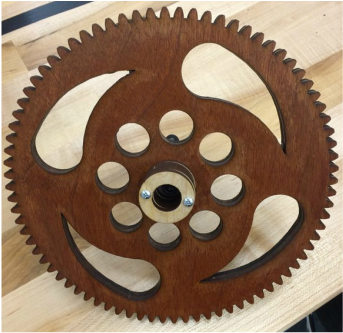
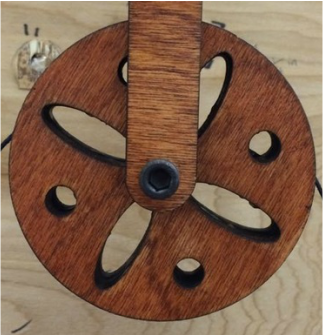
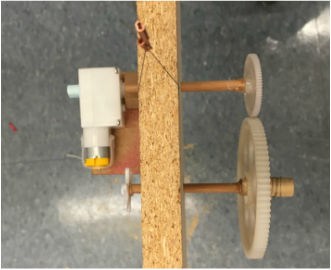
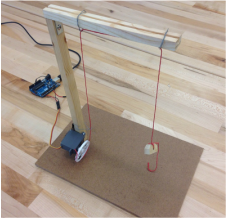
        We added another gear as shown below to give the sculpture a more complete look. We also increased the size of the gears and pulleys to occupate the board better.
Picture
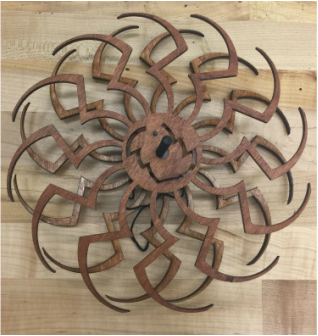
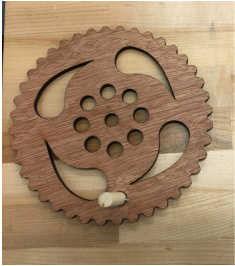
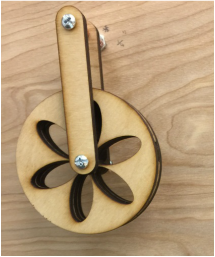
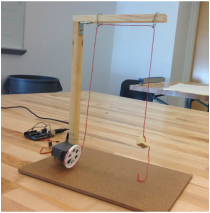
​We made new, polished, and sturdier gears, pulleys, and back board.
        To achieve a more sophisticated look for Kinnect, we decided to use wood stain, gloss, and paint to give our sculpture a new look. We also laser cut new gears and pulleys with thicker woods for a sturdy look and durability. The backboard was painted white to match the wall for installation. All components are assembled with the new and more polished materials.
Picture
Picture
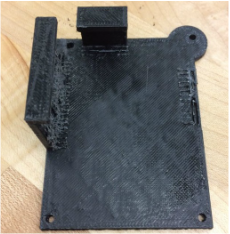
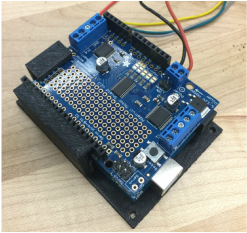
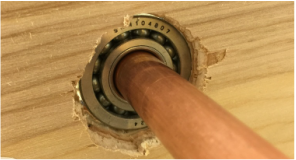
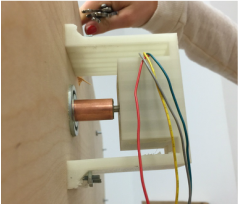
We integrated the electrical components with the back board.
        To achieve so, we became friends with the 3-D printers! With some adjustment to the printed product, the harnesses fit like a glove. 👐
Picture
Picture

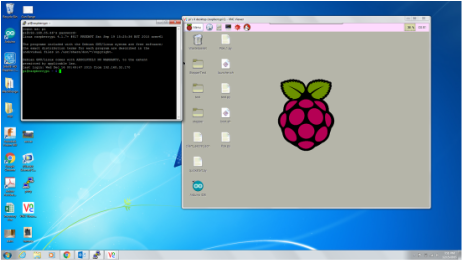
​WiFi connection for the Raspberry Pi...an early Christmas present

        Since there is no ethernet port near our installation site, we had to purchase a WiFi dongle for our Raspberry Pi. It magically arrived on time, just like an early Christmas present. And, pleasantly, it worked quickly.
Future Risks

​        In general, we are very proud of our project. 👪
        However, this is not to say that our project will function in eternity like we would love to see (but can we live that long to see eternity?) If we had more time, we would try to make the system fully independent and automatic. We realized that if the power source of the system is cut off, we would have to use VNC to restart the system in Raspberry Pi. This is not ideal because we would have to constantly check the sculpture for its functionality, 
especially because it is at a location of high traffic, and people may trip over the wire.
0 Comments

Sprint 3: MVP

11/20/2015

0 Comments

 
Goals and Focuses
  • Implement Raspberry Pi
  • Finish the coding component
  • Finish the mechanical structure
  • Integrate the mechanical and electrical components
  • Finish our MVP

Achievements and Processes

We moved onto Raspberry Pi controlled by VNC.
        Setting up the Raspberry Pi went smoothly but we ran into problems transferring the code to the Raspberry Pi.  This was due to the fact that the Raspberry Pi by default does not have all the same packages as the Ubuntu operating system where the code was originally written. This problem was easily resolved by updating all these packages on the Raspberry Pi. We created a connection to the Raspberry Pi using an SSH shell that allows us to use the command line on the Raspberry Pi. Additionally, we added a VNC viewer that allows us to see the Raspberry Pi desktop from any computer instead of connecting it to a separate monitor.
Picture
 We finished the Python Arduino interaction
        This proved to be more difficult than we anticipated. We used pyserial which communicates between Python and Arduino with strings of data. However, to control our stepper motors, we would need the data to be in the form of two integers. We solved this issue by transferring the two integers to strings, separated by a comma, in python. In Arduino, we then read this String and transferred it back to two integers which we could use as input for the stepper motors.
We changed the material from plastic to wood.
       As we have mentioned multiple times, one of our biggest focuses is high level of finish. Since we will be installing our project on campus, we must make sure that our final product looks polished. As a result, we decided to laser cut and assemble our own gears and pulleys from wood. The wood looks much better than plastic and allows us to make various designs on our gears for improved aesthetics. See below for some examples of our new gears and pulleys.
Picture
Picture
Picture
We improved our attachment mechanism.
        Initially, we wanted to use only tubes and screws for attachment. It turned out to have a lot of friction. Eventually, we decided to use bearings to reduce the friction, since we have limited torque with our motor and we would like the movement in our sculpture to be relatively accurate.
Picture
We started the integration of mechanical and electrical components.
        To make sure the stepper motor has enough support to steadily drive the gear, we 3D-printed two boxes for our stepper motors. They are secured to the back of our board by screws.
Picture
We finished the installment of our Minimum Viable Product.
       Beautiful.

Risks, Challenges, and Future Goals


        We were extremely pleased that our MVP worked in our live demo in class. However, our MVP is by no means as polished as we would like for a final installation. The interaction between gears are not extremely precise, causing extra friction and noise, affecting the precision of our sculpture. The stepper motors also heat up very quickly to a high temperature. 
        In general, we would like a much more polished model with more complex gear and pulley mechanisms. We are going to remake all of our gears and pulleys with much better material, and install them on a new board. We are going to integrate all electrical components including fixing the Arduino and Raspberry Pi to the backboard.
0 Comments

Sprint 2: The Blueprint

11/6/2015

0 Comments

 
Goals and Focuses
  • Create a prototype with gears and pulleys
  • Decide on the dataset
  • Discuss about possible locations for installation
  • Finish a working code that controls motors in proportion to available data

Achievements and Processes

We decided on the final mechanism of the sculpture.
       We wanted to balance between the visual excitement created by complexity and the high level of finish achieved by simplicity. Eventually, we decided on a system involving sophisticated gears and pulleys to accomplish an interesting yet polished system.
We created a simple prototype with gears and pulleys.
        In our last sprint, we created a basic hanging system with a hacked servo. In this sprint, we managed to build a prototype with plastic gears and pulleys. It's still rudimentary but it resembles what we wanted to achieve as a final product. We were also able to test different gear-pulley arrangements and look for potential risks in our mechanism.
Picture
Picture
We decided on the data set to use.
        We wanted a data set that is, first of all, dynamic enough so that our sculpture would not remain stationary, and we also want to make sure that it is relevant to the campus. Since, based on our survey, people were interested in the amount of all campus emails they receive, we thought it would be interesting to track the two most widely used mailing lists, helpme and carpe. However, it's important to note that we still have the idea of versatility in the back of our mind. We can track different key words and/or mailing lists by creating different Gmail filters. We would also like to explore other kinds of data set if we have more time in the future.

We met with facilities to talk about the installation.
          We learned about the limitations of the possible locations for installation and other fire hazard regulations we had to follow, but the consensus of the meeting was an on campus installation is absolutely possible. At the end of the meeting, we had three possible locations that were all viable and  interesting. We could install either near the wooden waterfall, in the mailing room, or in the staircase next to the mailing room to the dining hall.

We worked on a rudimentary version of the mail tracking code.
         We were able to track emails in Python and control the motor with Arduino. However, we encountered troubles communicating between the two programs. We used DC motors first which proved to be not accurate enough and more complicated to control. We decided to use a stepper motor which provided us with much more control.
        On a side note, we also finished a code that tracked tweets from twitter but we soon found out that there is a limit to the amount of tweets you can track and this limit is not very high. We decided to leave that be for the moment and finish it when we had more time.


Risks, Challenges, and Future Goals

        Our biggest challenge at the moment is that we are still not close to finishing our MVP. We were caught up with deciding what sort of mechanisms we wanted to focus on. The decision on data set and location was also holding us back. For our next sprint, our priority is to have a working model (our MVP), which means that we would compromise the level of finish and complexity if necessary. We are also hoping to continue our conversation with facilities to know more about possible installation locations, since that would affect our structure.
​
0 Comments

Sprint 1: Ideation and Basic Model

10/23/2015

0 Comments

 
Goals and Focuses
  • Decide on a project
  • Build a basic model

Achievements and Processes


We decided to build a kinetic sculpture that visualizes data pertinent to the Olin campus.
        The group had various interests including sustainability, medicine, etc. However, we all agreed that we would like to make a project that is long lasting and relevant to the Olin campus. Eventually, we decided to build a kinetic sculpture that visualizes data so that the project can cater to different interests based on the data set we use.
We decided to prioritize longevity and high level of finish as opposed to the complexity.
        Since we expect our project to have a long lasting presence on the Olin campus, we must make sure that our structure is long lasting and well polished. As a result, we would spend more time on perfecting the structure as opposed to building up the complexity (which may result in a higher chance of malfunctioning in the long run).
We decided on a hanging structure which would be powered by a servo.
          
After some brainstorming, we were debating between two structures to present the data. 
          The first is the hanging balls. We would use motors and pulleys to move hanging weights up and down. The position of the weights would represent the data. This sort of representation is intuitive and can have a simplistic and clean finish.
​         The second idea is the dropping balls. We would have a center tank that stores all the balls. These balls will be dropped into a different container through a spiral tube. This sort of representation is more visually interesting, incorporating non-linear motions.
Picture
Fig. 1 Hanging Weights
Picture
Fig. 2 Dropping Balls
          We eventually decided on the first type, because the second type is too complicated to implement. We may not be able to have a highly polished product finished .

We built a simple model based on our idea.
          We wanted to see the motion of the hanging system, as well as trying out different motors. We built a simple wood structure and secured a hacked servo to the wood structure. For time's sake, we shaped metal wires into hoops to secure a small wooden block as the weight.
Picture
Picture
We visited a few locations on campus for installation.
          It's essential to determine the location where we would install our sculpture since it determines the way we would hang our structure. We considered the space in front of the library, the stairwell of the academic building, as well as the space next to the waiting line of the dining hall. We considered the possibility of hanging our structure from the ceiling above (more stable), or supporting from the side with clamps (easier to remove and attach).
Risks, Challenges, and Future Goals

          Our biggest challenge so far is to narrow down our ideas. We decided to prioritize longevity, simplicity, and impact. As a result, we had to make decisions on locations, mechanisms, and other electrical components. We will be meeting with facility to find a viable and impactful location to install Kinnect. We will also start narrowing down ideas in our next group meeting as opposed to brainstorming more ideas.
0 Comments

    Kinnect

    Kinnect communicates data with intuition and aesthetics.

    Archives

    December 2015
    November 2015
    October 2015

    Categories

    All

    RSS Feed

Create a free web site with Weebly
  • Home
  • About
  • Mechanical
  • Software
  • Electrical
  • The Process
  • THE TEAM