The software and firmware bring together all the components of the jukebox - taking in user input, processing the notes of the song, controlling the timing of the notes, and actuating the mechanical components to actually play the notes.
View our code
You can find all of our code for this project here
Electronics System Diagram

Software Components
Software - Raspberry Pi
The Raspberry Pi primarily handles the higher-level programming tasks. The RasPi’s functionality is controlled by a C++ program that runs on startup. It uses a C++ MIDI processing library (midifile) to load MIDI files that are stored on the Pi and convert the notes of the MIDI file into a format that is readable by the Arduino. MIDI files are first loaded from the file, then converted into a list of commands (as that’s how MIDI files store song data). Then, the note-playing commands are extracted and turned into a list of notes, times, and durations. Then, this list is converted into a string of the form
0x1y1000x5y1500x6y1500x7y3000x2y
where ‘x’ and ‘y’ are used as delimiters for the time and pin number of the note, respectively - in this example, there will be notes played at times 0, 1, 1.5, 1.5, and 3 seconds, with pins 1, 5, 6, 7, and 2, respectively. Because each note is played as a single marble drop, we only use the time of each note and ignore the duration. Also, we must convert the note number into the pin number - the note 60 representes middle C, which is pin 2 in our jukebox, and each whole note (usually the next even integer) above that is one pin higher. We parse each note and convert it to the proper pin, ignoring any notes outside the range of our xylophone. After parsing the MIDI file, the RasPi opens a UART serial connection with the Arduino via USB (using a C++ serial library, libserial) then sends the entire song as a single string to the Arduino. We considered having the RasPi continuously send messages to the Arduino telling it when to turn on a certain pin, but we decided that doing so would require continuous handling of the serial buffer, and as such it would be simpler to simply send the entire song as one message at the beginning.
The other component handled by the RasPi is user input from buttons. The RasPi handles button functionality in order to reduce the number of ports used on the Arduino, and also to reduce the amount of serial commands needed, since the Arduino would have to tell the RasPi to process the MIDI files if the buttons were connected. Using WiringPi, the RasPi waits for button input from the GPIO pins before doing the MIDI processing.
Everything that runs on the RasPi is controlled from a single C++ program. We have it set up to run on the RasPi on startup, so that it is ready to start the jukebox as soon as it’s plugged in. However, we do have to include a wait period in the program for the Arduino to establish serial connection, as it usually takes a few seconds for the USB ports on the RasPi to turn on and give power to the Arduino.
Firmware - Arduino
The Arduino handles the functions that require precise timing - i.e., the actual playing of notes. First, it waits for input from the serial port (in practice, this is the first thing that happens anyway, since the Arduino is reset when the RasPi opens a serial connection), then parses the serial input string into the individual notes. We do have to do some pre-processing of the notes, since the number sent by the RasPi doesn’t map exactly to the pin on the Arduino - the RasPi sends numbers from 1 - 13, and the Arduino uses pins 2 - 12, A2, and A3. We do this for several reasons. Arduino’s default serial communication uses digital pins 0 and 1, and pin 13 is connected to an LED that turns on when the Arduino turns on, which causes a solenoid to accidentally trigger, so instead we use the analog pins as digital output pins, which solves our issue; however, we have to shift the pin values in the Arduino code to match the correct pin. Then, it uses the motor shield to turn on the conveyor belt motor, then loops through the list of notes and turns on the corresponding solenoid for a short period of time (~20 ms) for each note. At this point, it repeats the loop, and is ready to accept another song from the RasPi.
Control Loop
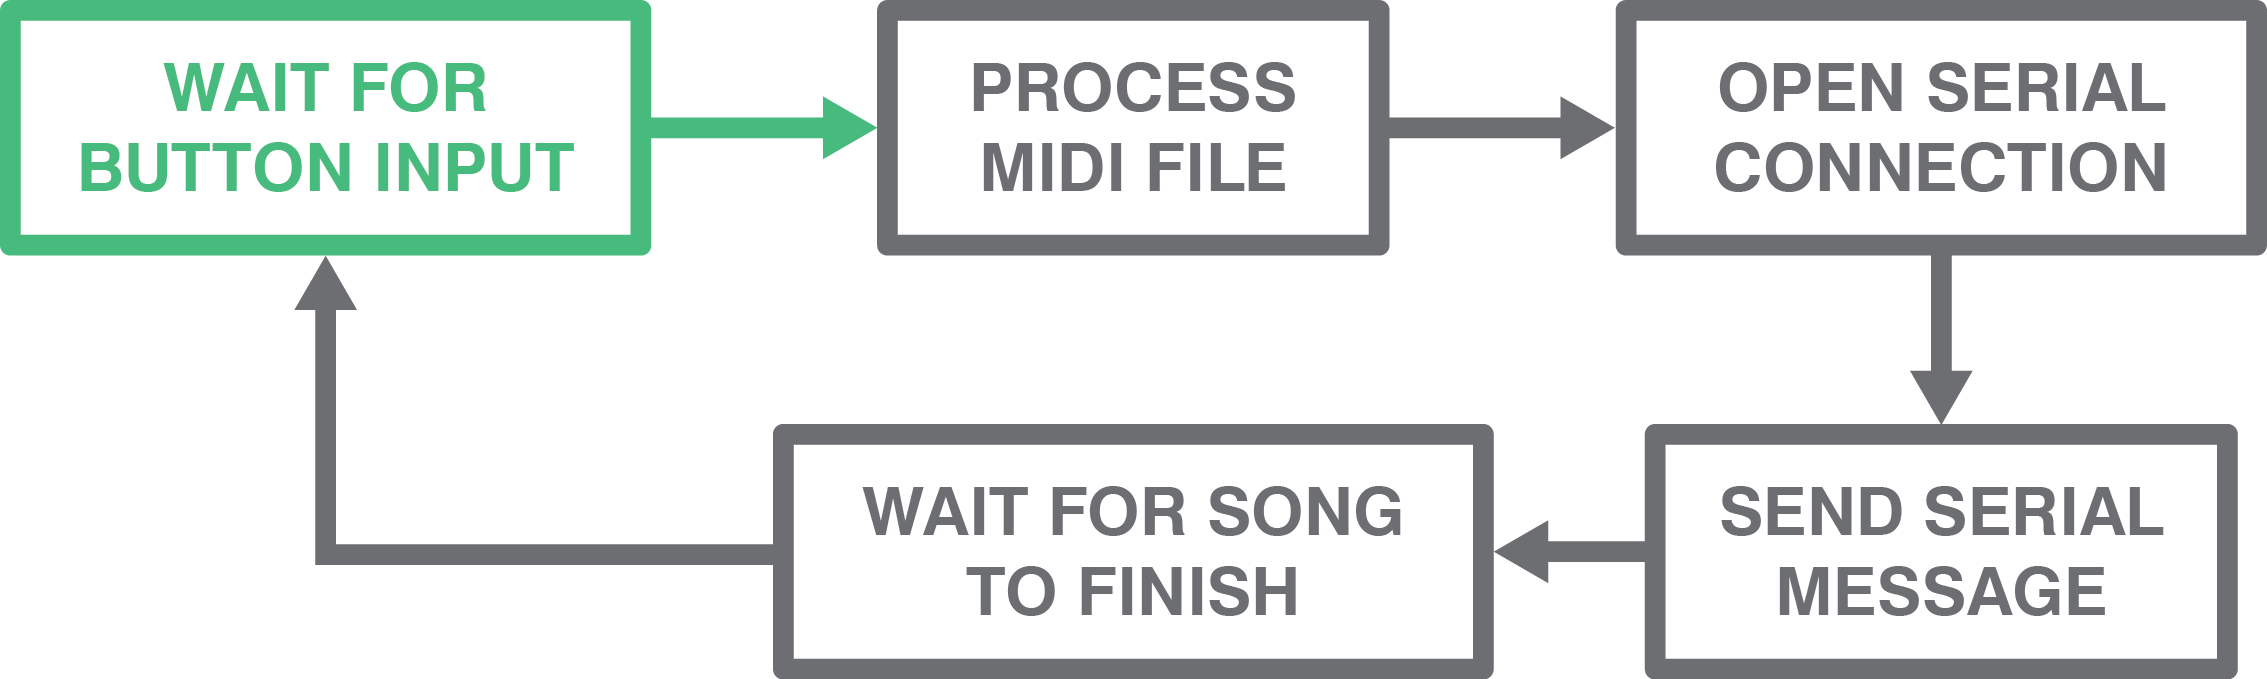
As shown in the above diagram, the control loop on the RasPi begins by waiting for button input, then processes and sends the notes to the Arduino, then waits for the duration of the song before restarting.