Convert Midi
We created a program in C++ that allowed us to take Midi files and convert them to 'drawn' notes that we could print out on a roll. If you wish to look at the code, feel free to check it out here.
We input a Midi file and copy it to a memory buffer that we can parse through and modify. We parse out information from the header chunk and track chunks to get information such as tempo, notes, and note timing.
From this we output to a text file. We use the box unicode charactor to represent notes. Each charactor represents a quarter note so we fill in as many spaces and box unicode charactors to make up each note and blank space. The image below shows what the text file looks like after the program takes a midi file, parses it, and prints the notes to a text file.
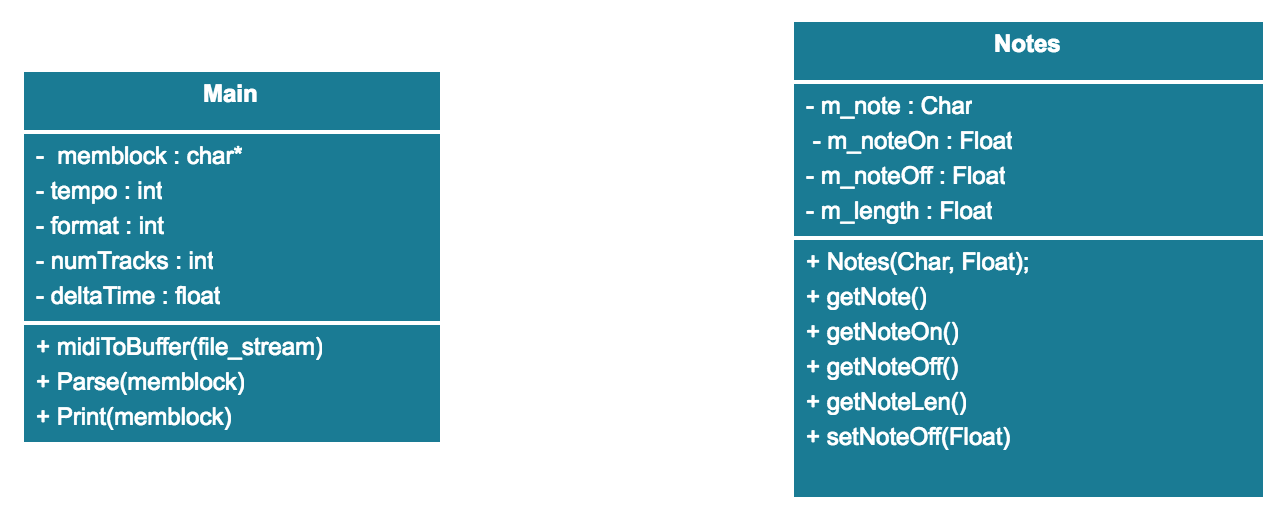
There are two main classes. The main class holds the functions that copy the midi file to a buffer (memory block), parse the buffer, and print the notes to a text file. The other class, Notes, holds information about each note such as its starting and ending time and the note it represents. The code could be split into better and more well-defined classes, but what we have now is functional. We are working to make the code cleaner. The summarized flow of the code is below.
Stepper Motor
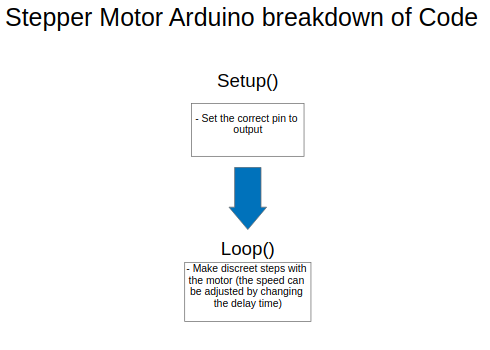 The stepper motor is simply controlled with a program that allows for constant stepping of the motor. Once turned on, the stepper motor will continue stepping indefinitely (we did not have time to work in an automatic stop). For this code, please view this Github file. Looking forward, we plan on creating a basic interface for your computer to aid in speed adjustment.
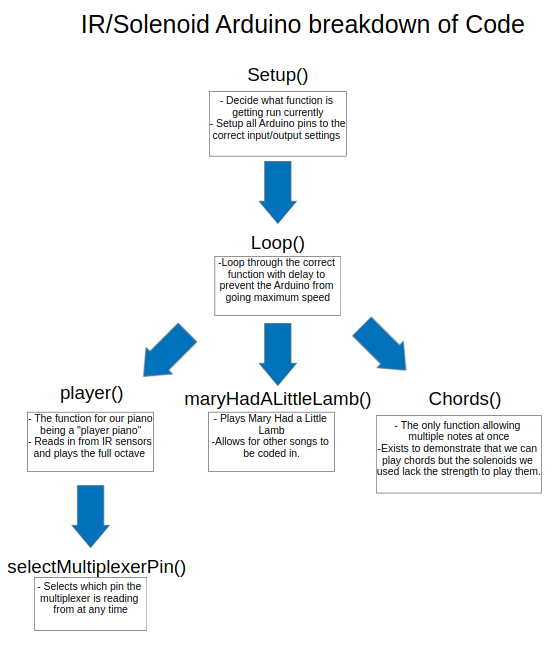 Both IR sensing and the solenoids were controlled through one Arduino, and through the code diagrammed above and found here. We were able to implement this through multiplexing, a process that allows for one Arduino pin to read/write to multiple (although not simultaneously). Without multiplexing, an Arduino Uno does not have enough Analog pins to run a full octave. It is also important to note that because we use pins 0/1, you will be unable to use Serial, because communication will be blocked from the Arduino to other devices.
The code itself is fairly simple, as we have a setup function that sets the Arduino up for running the program, then a main loop that runs a different function depending on what the user wants to and uploaded to the Arduino. The user defines this through changing the variable "program_to_run". Assuming that a user is reading from the scroller, the Arduino then proceeds to run the "player" function, which first reads in from all IR sensors and keeps track of where the highest value above the bounds of what constitutes a note is for readin values. It then loops through all solenoid outputs and outputs "LOW" to all except the solenoid whose position matches that of the highest value. It is possible that no sensor reads in higher than the bouds, at which point no note will be played. In this case, speed is determined by the stepper motor.
If a user decides to play one of the preprogrammed songs (currently Mary had a Little Lamb is the only supported song, however we will soon include other classics like Twinkle Twinkle Little Star and a one-octave Megalovania, courtesy of Jeremy Ryan).
For the full code, please check it out here. If you want to see the iterations leading up to this, you can go up a folder and view our prior sprints' code.
Both IR sensing and the solenoids were controlled through one Arduino, and through the code diagrammed above and found here. We were able to implement this through multiplexing, a process that allows for one Arduino pin to read/write to multiple (although not simultaneously). Without multiplexing, an Arduino Uno does not have enough Analog pins to run a full octave. It is also important to note that because we use pins 0/1, you will be unable to use Serial, because communication will be blocked from the Arduino to other devices.
The code itself is fairly simple, as we have a setup function that sets the Arduino up for running the program, then a main loop that runs a different function depending on what the user wants to and uploaded to the Arduino. The user defines this through changing the variable "program_to_run". Assuming that a user is reading from the scroller, the Arduino then proceeds to run the "player" function, which first reads in from all IR sensors and keeps track of where the highest value above the bounds of what constitutes a note is for readin values. It then loops through all solenoid outputs and outputs "LOW" to all except the solenoid whose position matches that of the highest value. It is possible that no sensor reads in higher than the bouds, at which point no note will be played. In this case, speed is determined by the stepper motor.
If a user decides to play one of the preprogrammed songs (currently Mary had a Little Lamb is the only supported song, however we will soon include other classics like Twinkle Twinkle Little Star and a one-octave Megalovania, courtesy of Jeremy Ryan).
For the full code, please check it out here. If you want to see the iterations leading up to this, you can go up a folder and view our prior sprints' code.