Subsystem Integration
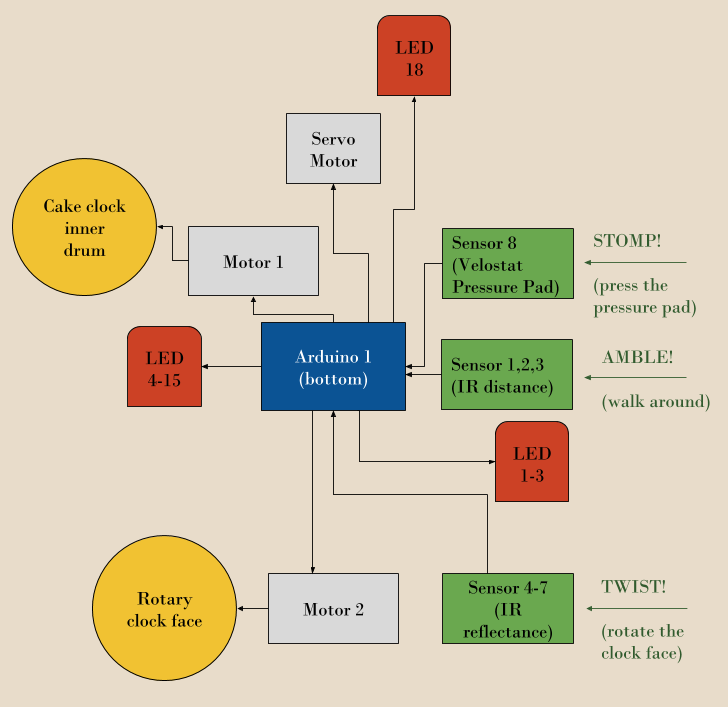
System block diagram showing how the components go together.
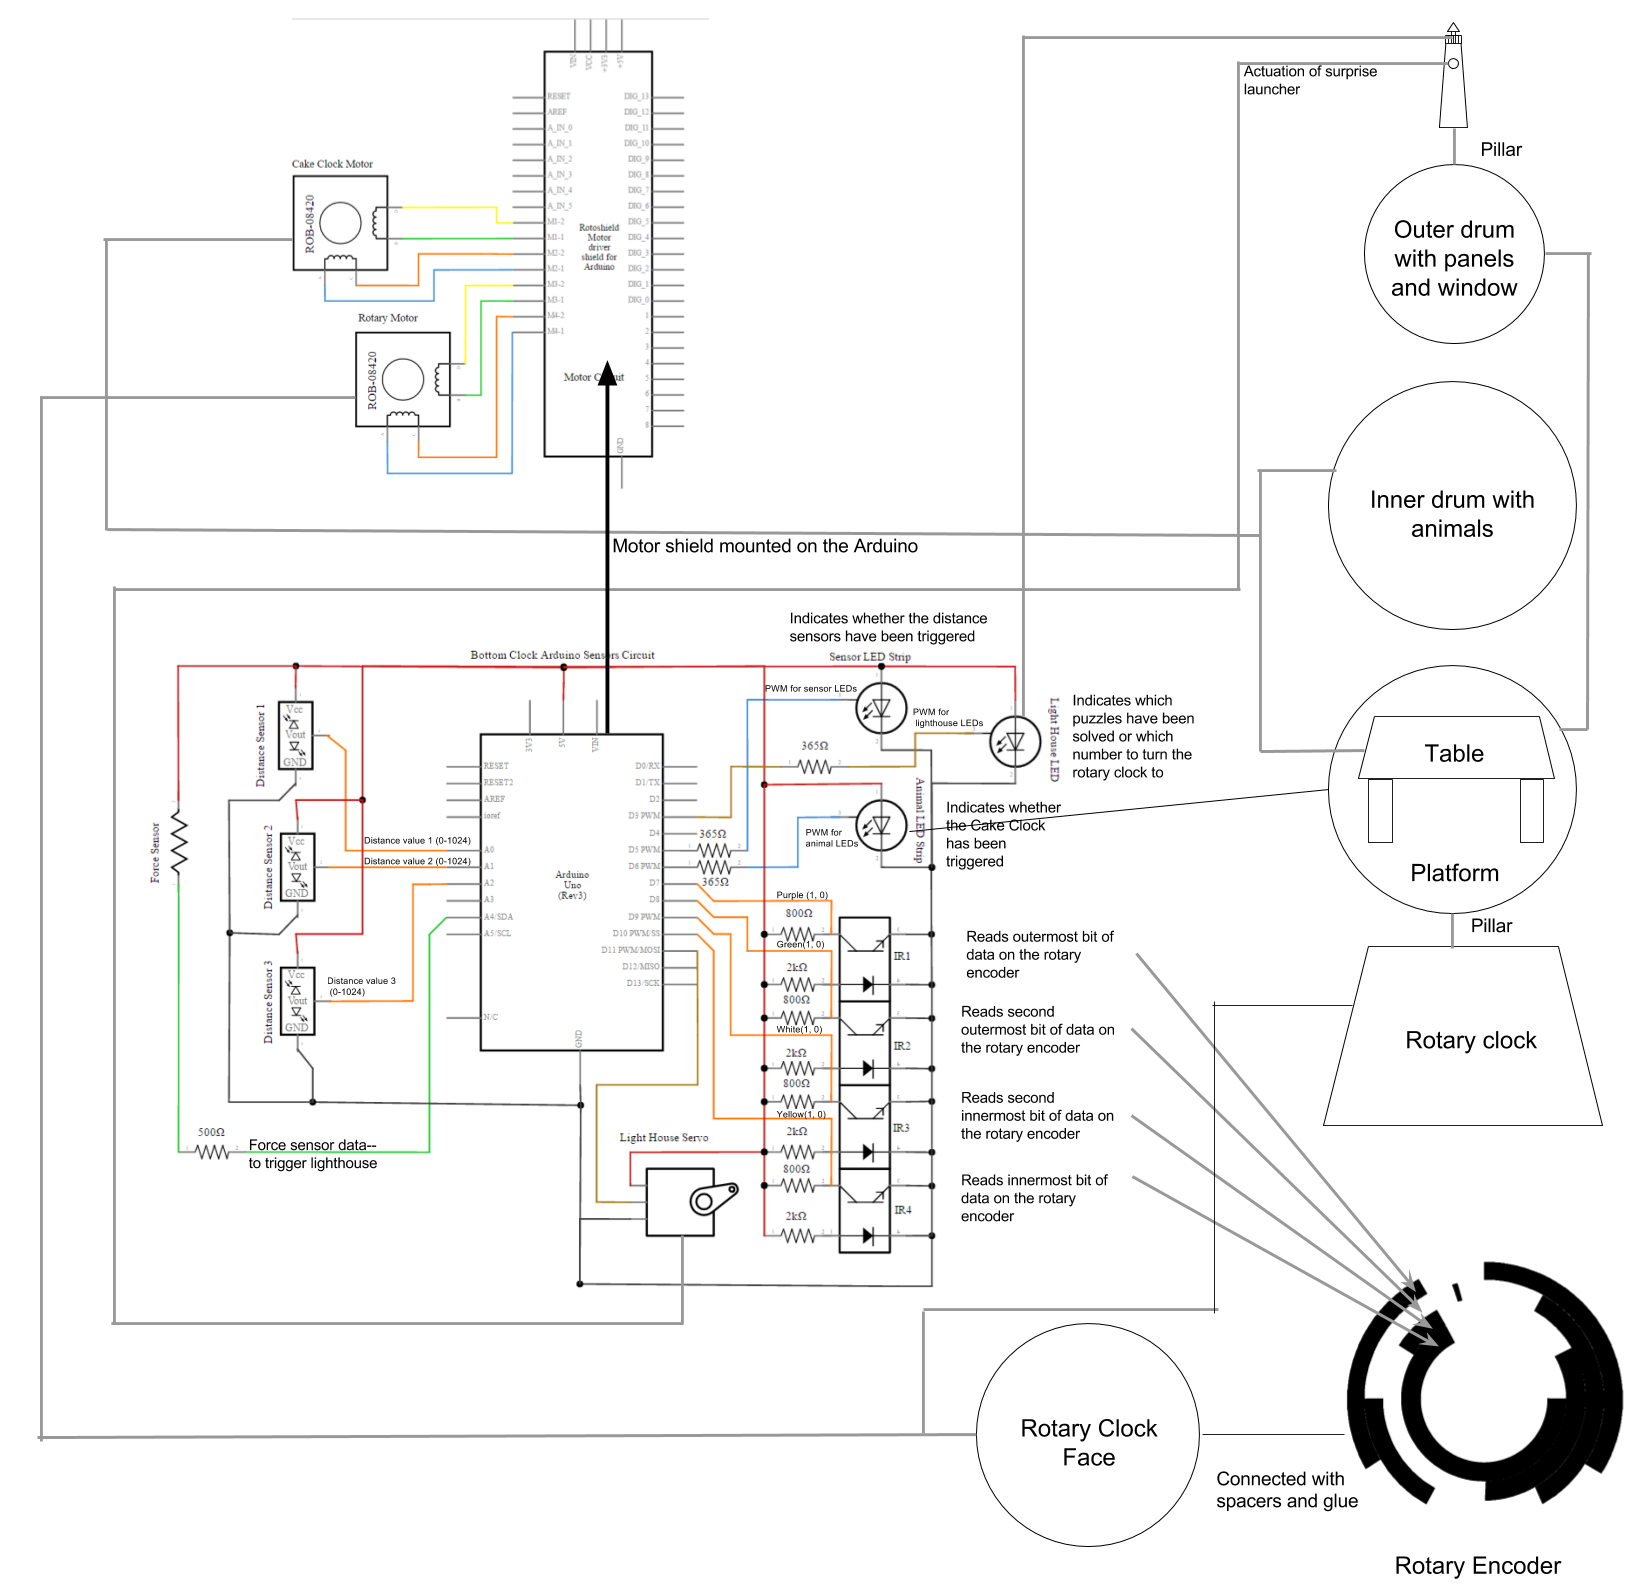
A more complete system diagram, showing information flows and physical relationships between components.
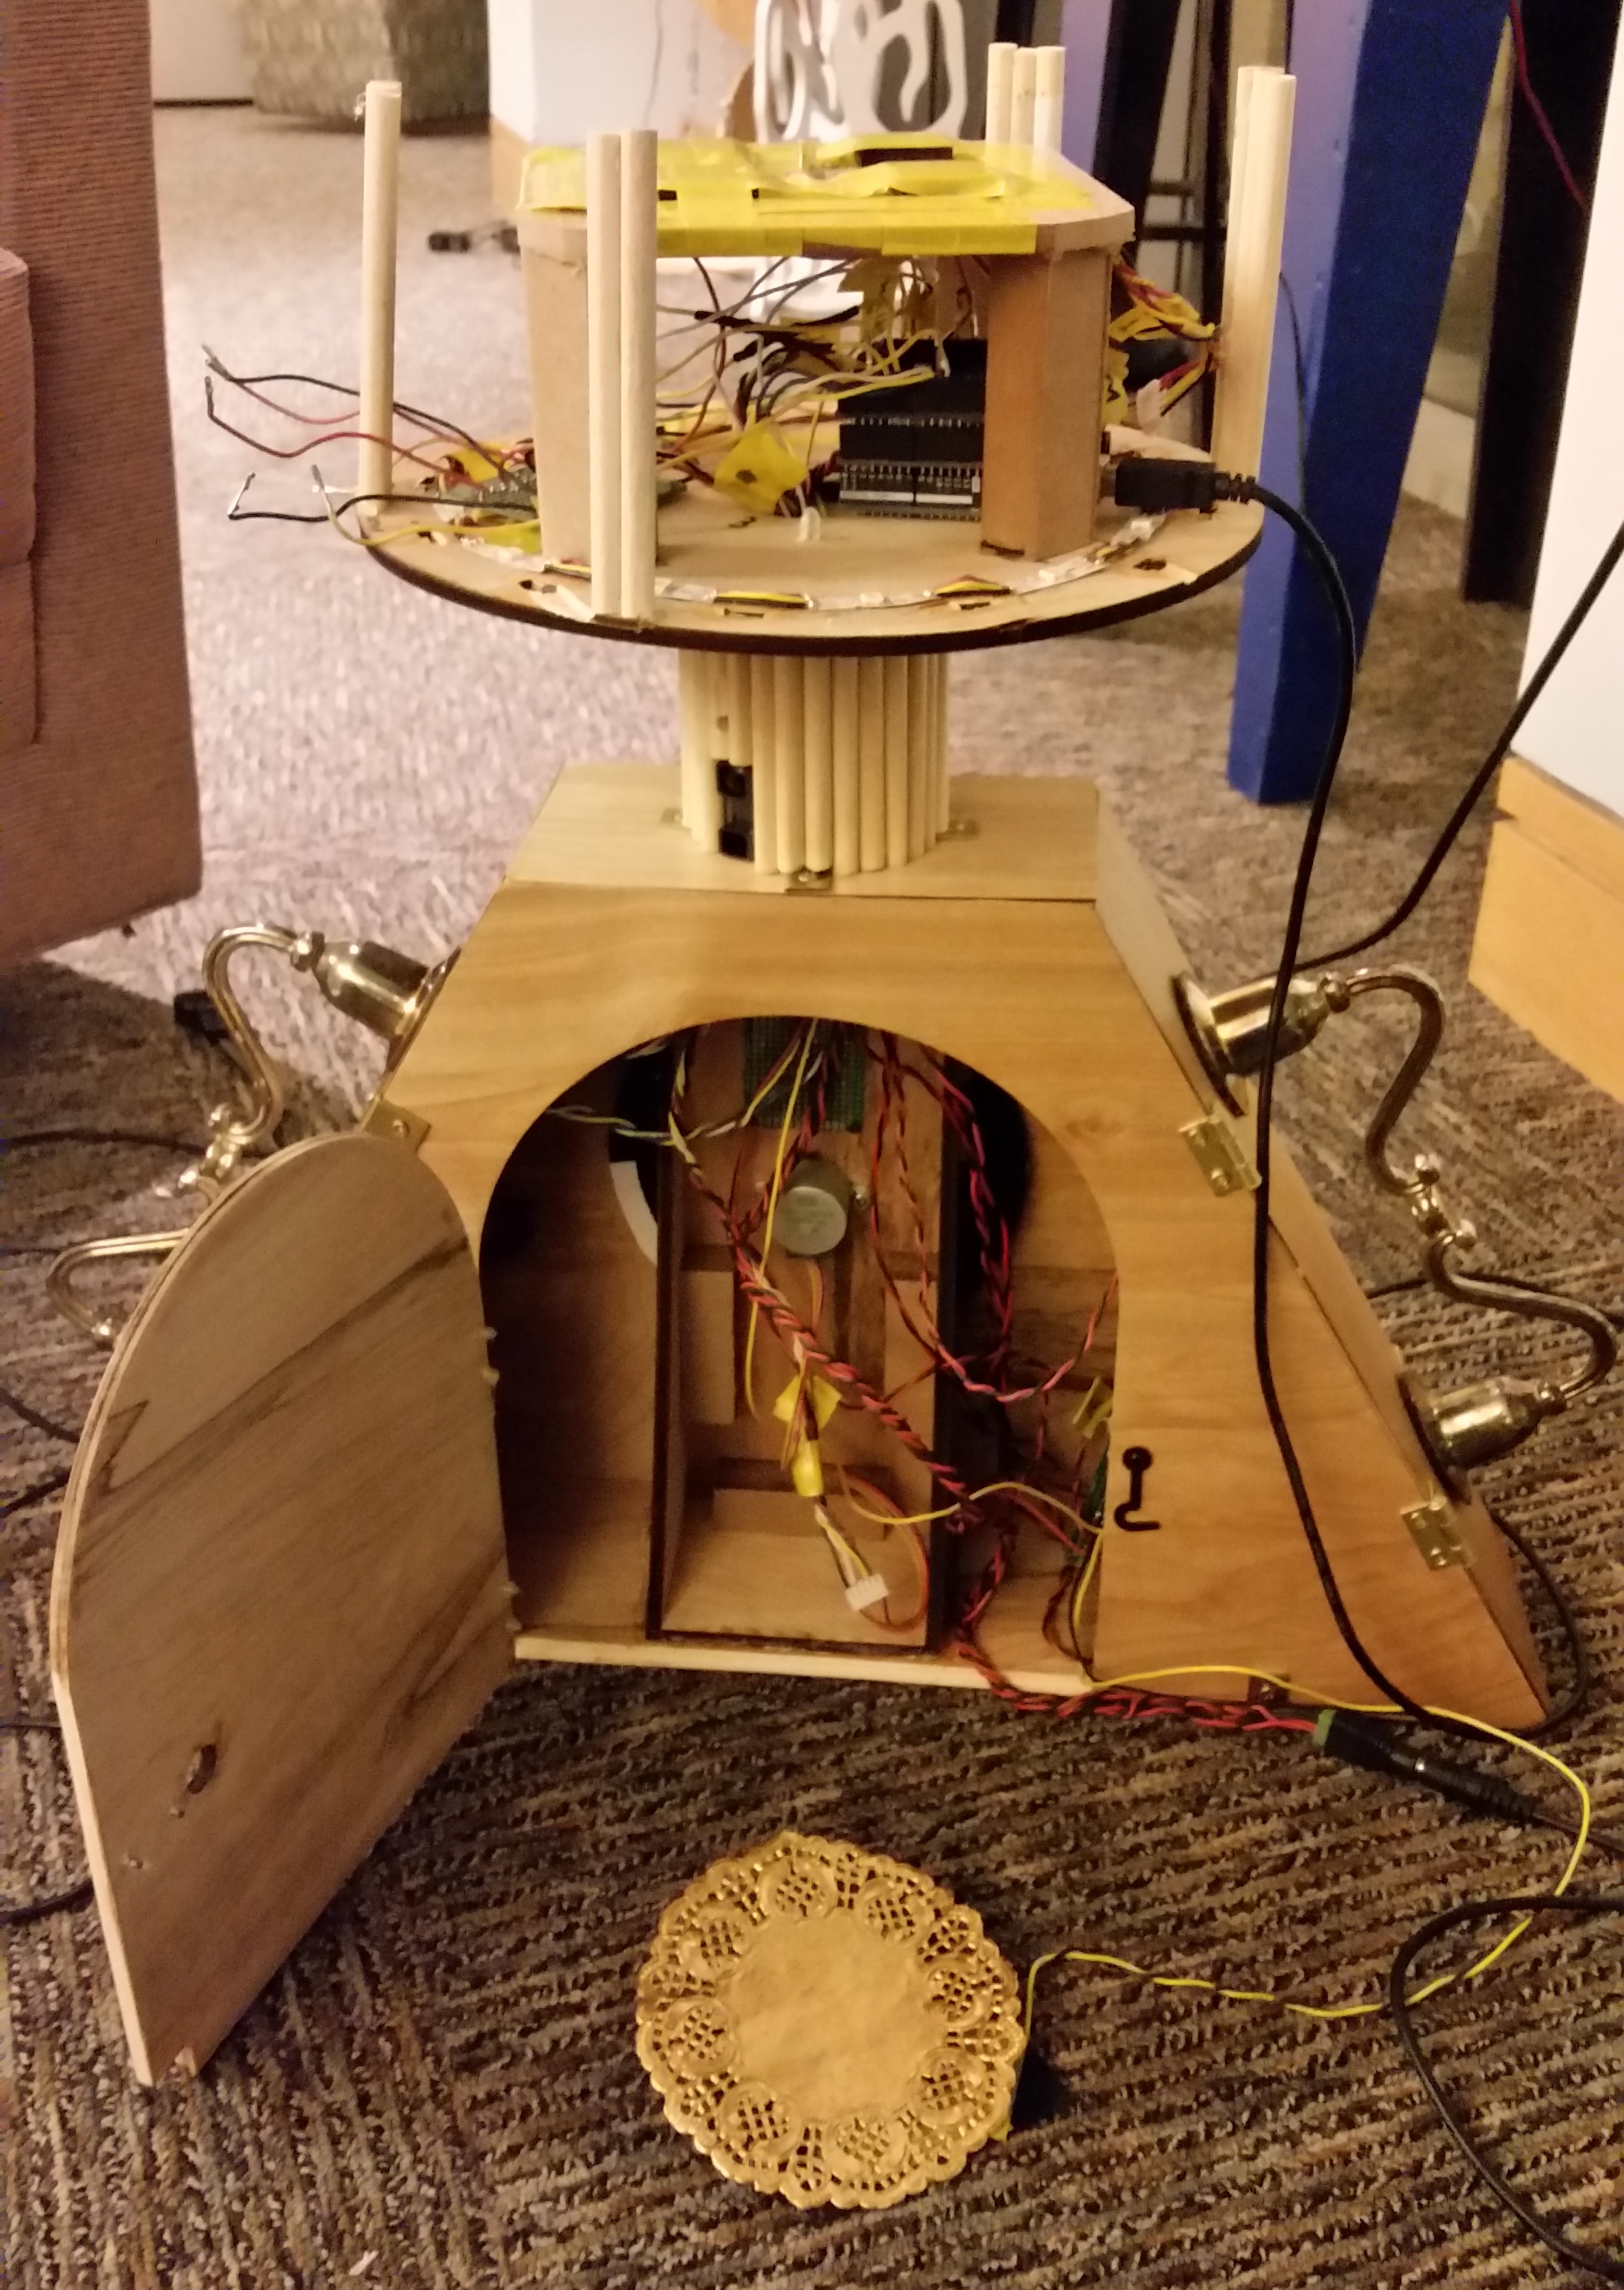
The clock's components, partially assembled. To put the lighthouse on, six wires need to be connected. Note the doily artfully concealing a pressure pad.
Challenges:
Integration was kind of challenging because the mechanical and fabrication team had to make physical systems that would allow the electrical system to connect the bottom two clocks; the electrical team didn't always know until too late how to design for wiring. However, through iteration we managed to come up with a physical base that was close to optimal!
We also had problems with the final assembly because we didn't test very much while we were assembling. We did enough unit testing, but often once we had assembled everything we found that it wasn't working for mysterious reasons! Usually the reasons were something like "a wire came undone" or "something is shorted but we don't know where."